INTERNET EXPRESS - SHIP LOGIC
USER MANUAL

Table of Contents

OPS DASHBOARD

Our Ops Dashboard is specifically designed for your day-to-day operations, summarised in one view per Branch, per Ops manager, and per Driver. The Ops Dashboard will give you and your operations managers the ability to monitor the drivers and intervene where needed, adding to the already streamlined user experience

With access to all drivers per branch and the shipments that are assigned to each of them, the ops managers can easily open any shipment directly from the Ops Dashboard and update any details to the shipments. All changes that are made on the Ops Dashboard are immediately updated on the driver’s side, allowing the driver to navigate and complete the shipment process from there on.

How to manage the Ops Dashboard

Open the Ops Dashboard and start by selecting the branch you wish to manage.

Ops managers are assigned to branches upon user creation and will see their assigned branch by default.

Set the rest of the filters by selecting them in the dropdown menus.

Select a driver form the list on the left-hand side of the dashboard or use the search bar to search for a specific driver in the list.

Click on the driver to view their shipments on the right.

How to access and manage individual shipments via the Ops Dashboard

Click on a shipment in the list to open and manage it via the Ops dashboard.  Once opened, the operations manager can update the status, change the drivers, update any address and/or contact details etc, without leaving the Ops dashboard page.

How to manage unassigned collection and deliveries

Shipments that have no driver assigned or have been rejected will be listed on the Ops Dashboard under unassigned or rejected  To manage these shipments, click on the unassigned tab in red to open the list on your right-hand side.

Click on a shipment to open and assign a driver. Once a new driver is assigned, click Save in the bottom right corner. 

The shipment will now be assigned and moved to the relevant driver’s collection and deliveries.

How to view a driver's performance

Select a driver from the panel on the left and click to view their relevant collections and deliveries.

Find the View driver performance button in the top right-hand corner and click to open. 

View a summary of the driver’s performance and filter between dates to view the driver’s historic trip sheet. 

Use the graph and get more info on the driver’s total stops for the day or scroll down and see that driver’s outstanding tripsheet.

SHIPMENTS

With shipments at the heart of any courier business, we’ve ensured that you have a hassle-free experience when using our software. Manage problematic shipments effortlessly by changing or updating addresses and contact details to minimise any failed collection and delivery attempts, saving your company valuable time and money.

The software allows you to capture and upload images related to a shipment to better manage credibility and improve follow-up and resolution times for any issues that might come your way. To make processes even more efficient, operations managers can create their own custom filter sets based on drivers, shipment statuses, and much more to streamline their future workflow.

How to navigate and filter the shipment page

Your shipment page provides you with all the info you’ll need regarding your shipments.

Navigate to this page by clicking on the Shipments tab in your left-hand menu

You’ll see that you can use this page to search for your waybills and to set some custom filters which you can save to use every day.

You can also simplify your daily check-ups by saving these custom filters for those shipments that are usually hard to find.

How to create and manage your own custom filter sets

Add custom filters to your shipment page and work with information that is only relevant to you. 

E.g. Use custom filters to:

  • Find and manage problematic shipments
  • View shipments for a specific set of drivers
  • Only view damaged shipments 
 

Set your desired filters on the main shipment page and save them to your custom filter set. (See below)

Go to Saved filters in the top right corner and select the dropdown. Then, click on Save current filters to save your new filter set.

To delete a custom filter, open your saved filters and click on the bin icon.

How to navigate and update a shipment

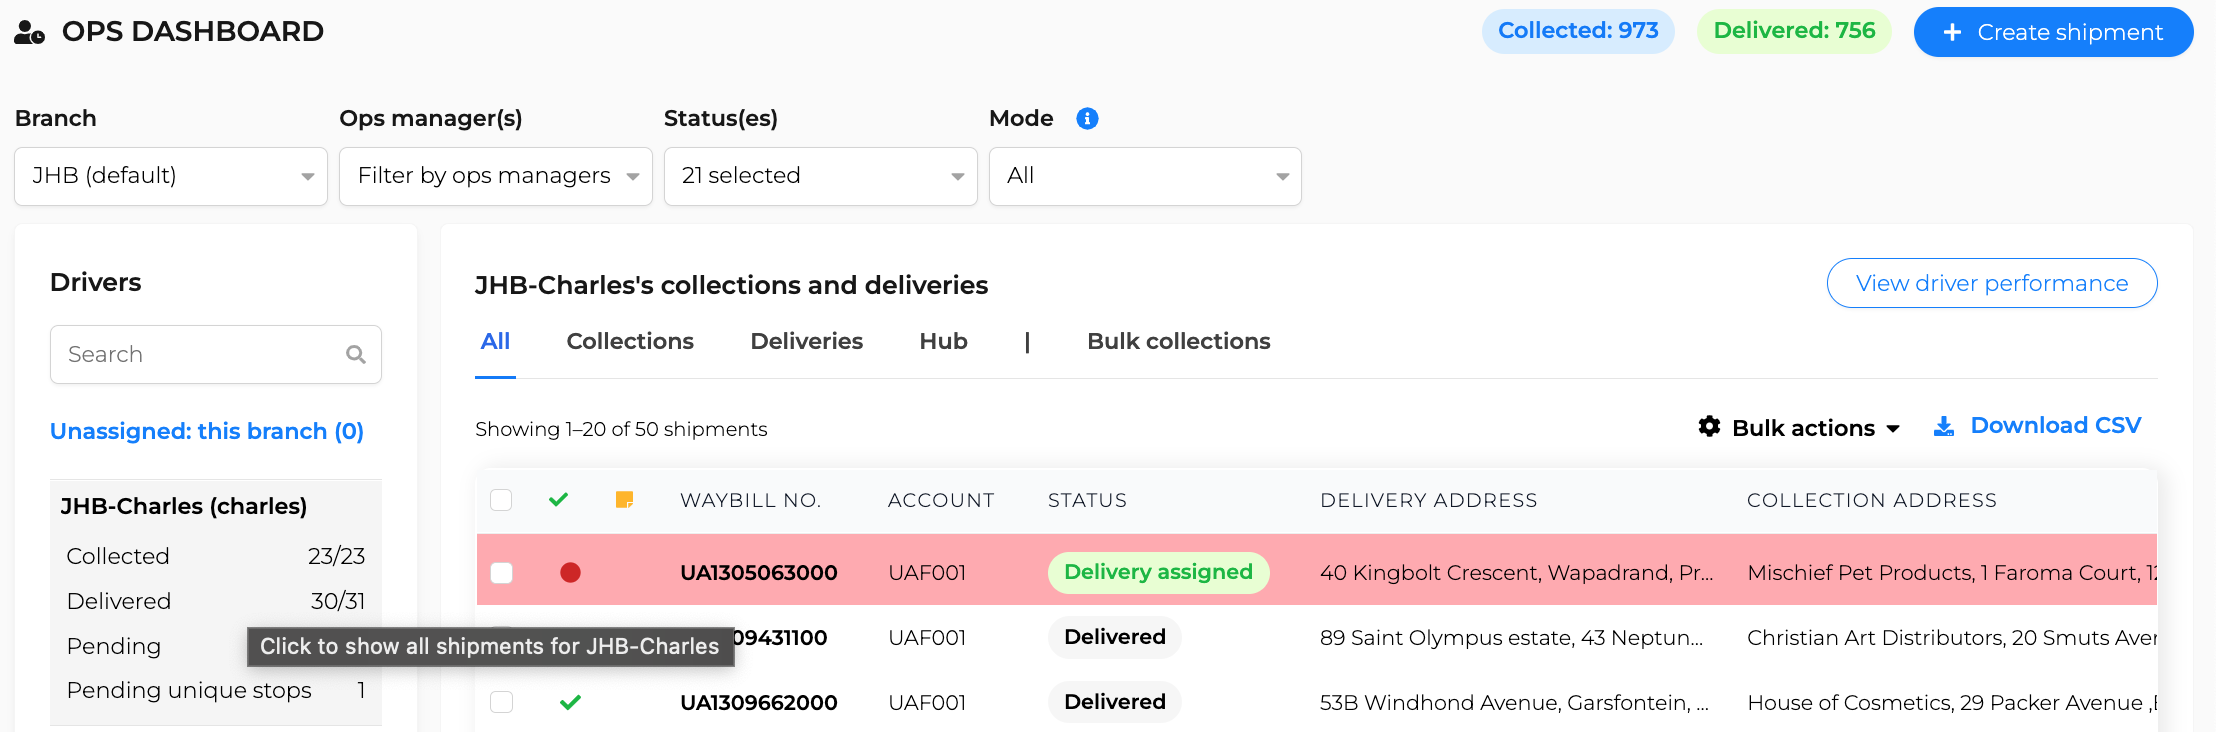
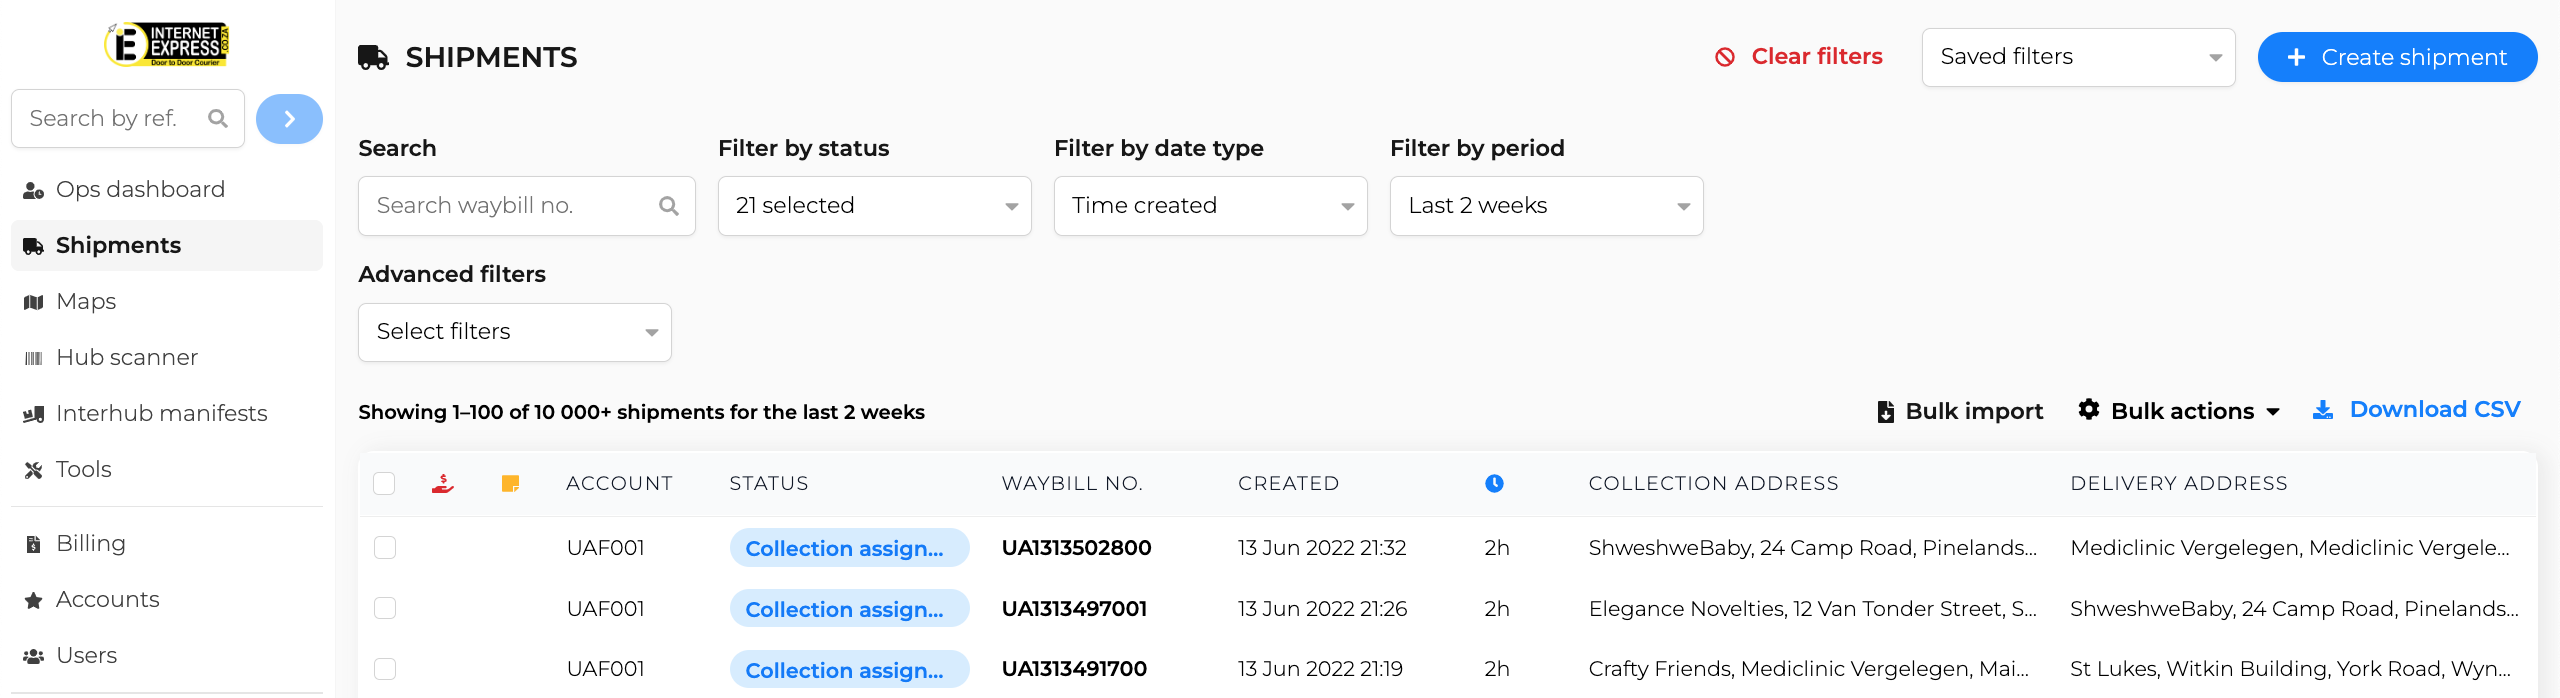
Select the relevant waybill from the shipment page and open it to view the shipment details within. 

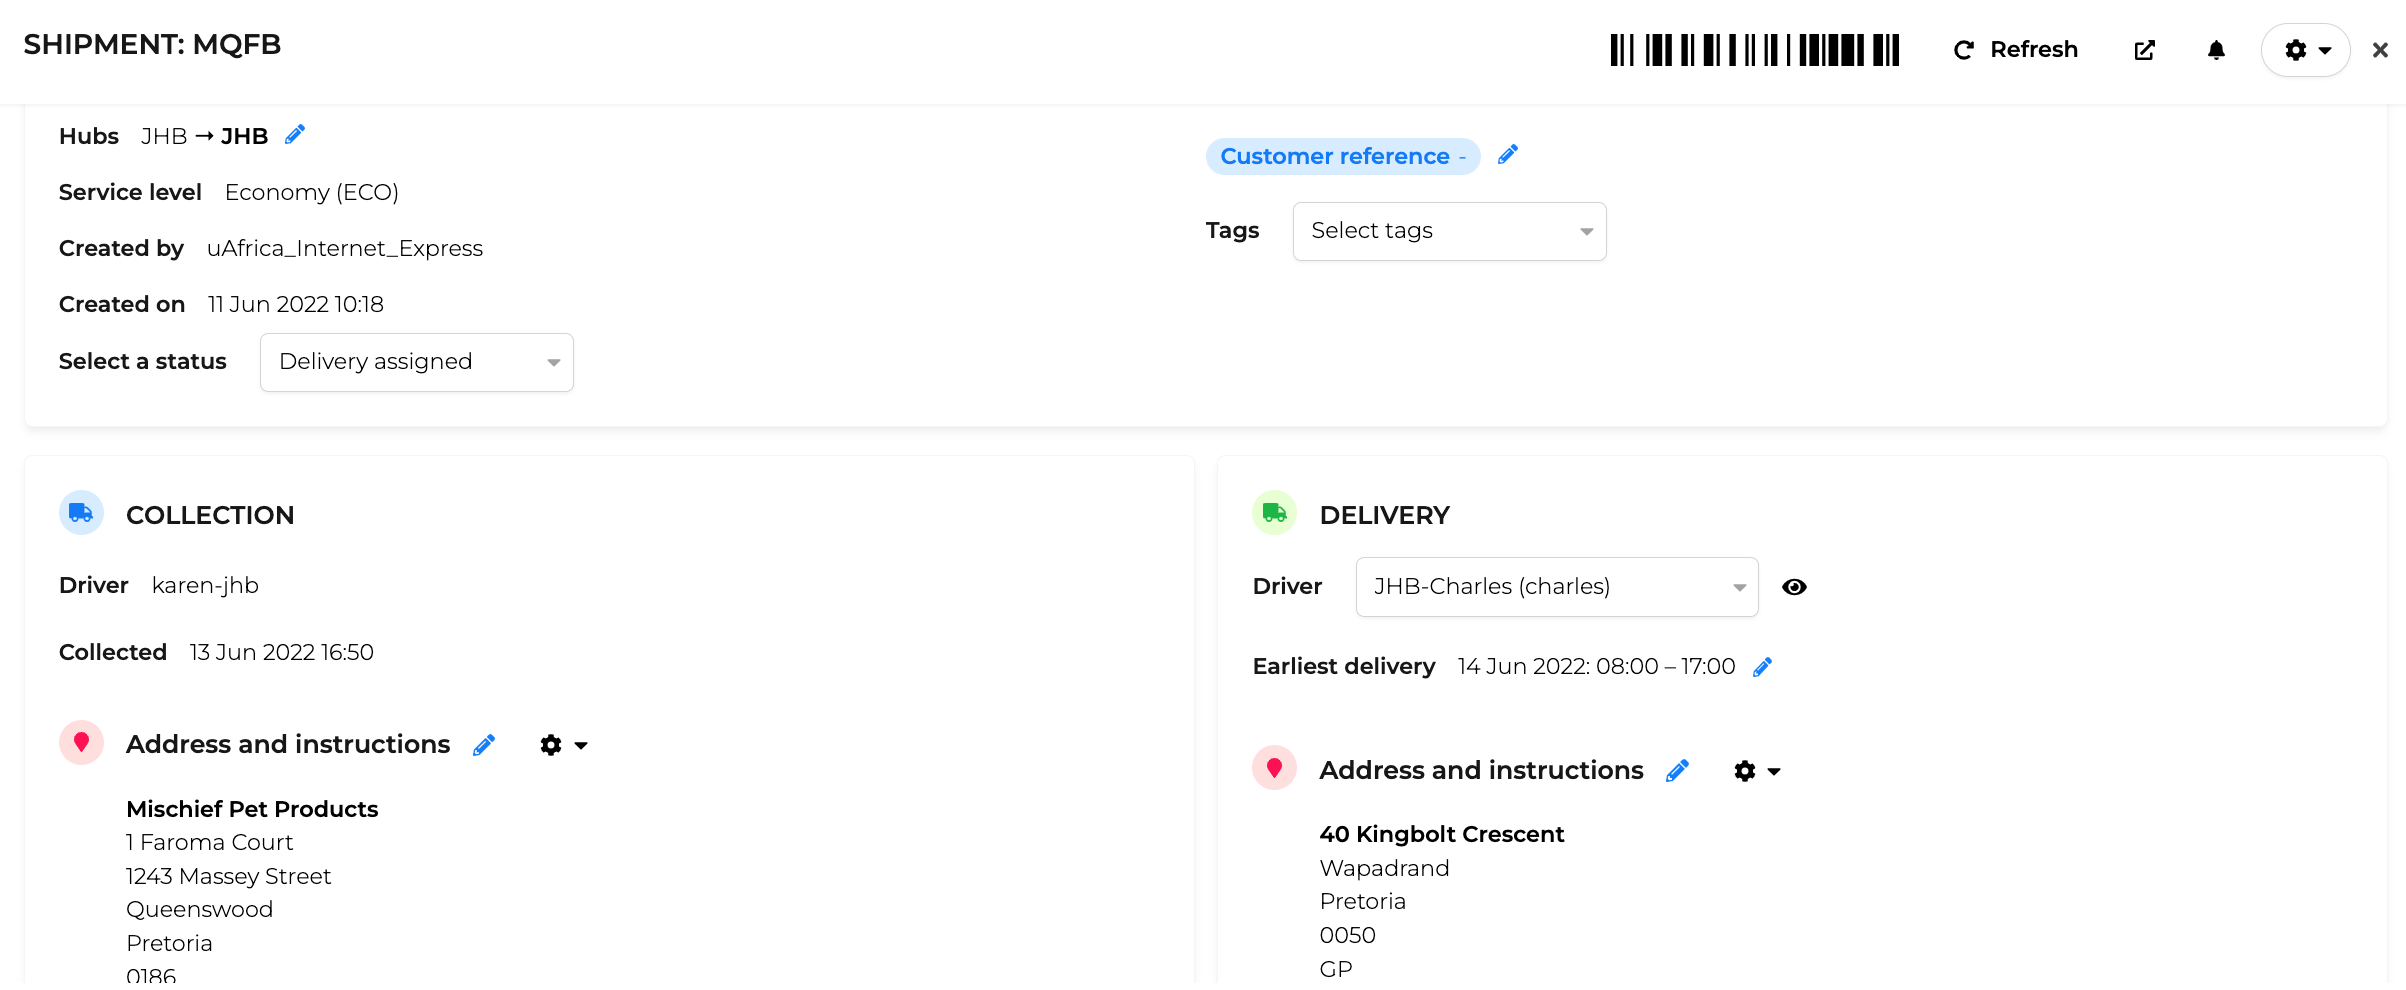
There are a few things you can do in this screen. Look for the icon throughout the shipment and click on it to open edit mode. Using this mode, you can make changes to the shipment in an instance. 

Don’t forget to Save your changes when done. All changes made will have immediate effects on the shipment.

How to update parcels on a shipment

HUB SCANNER

How to use the Hub scanner

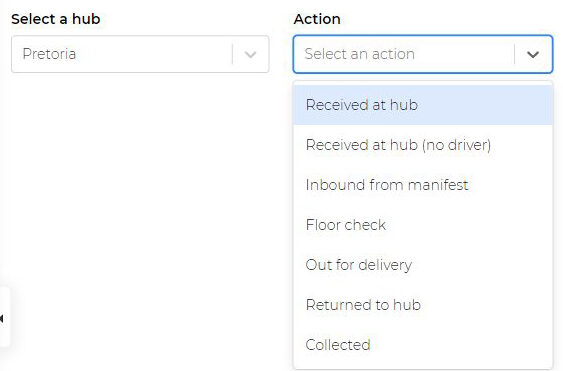
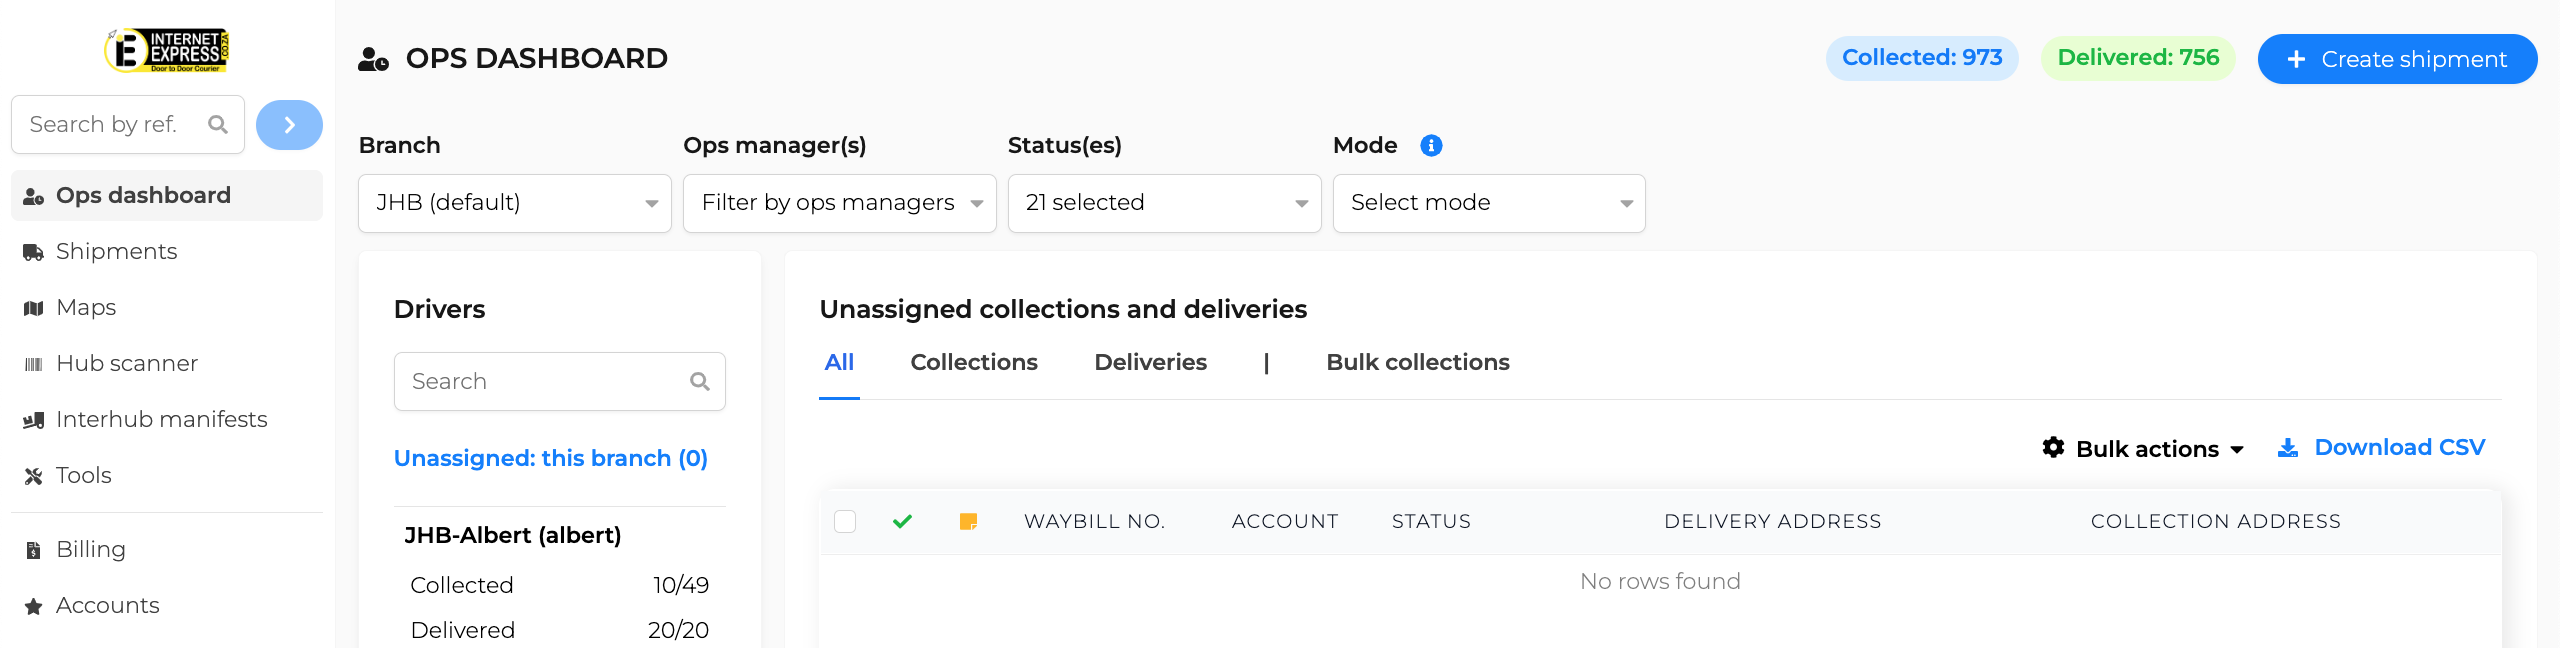
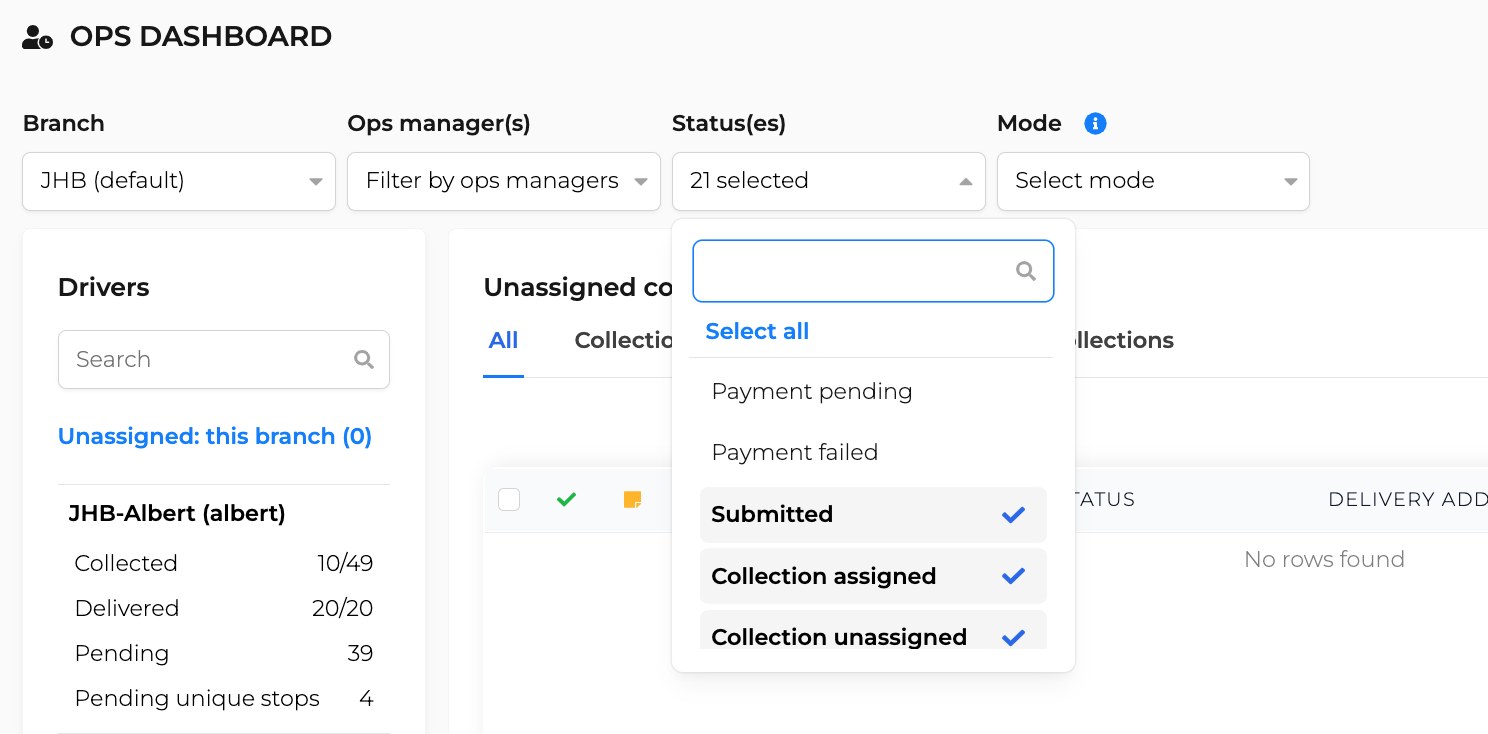
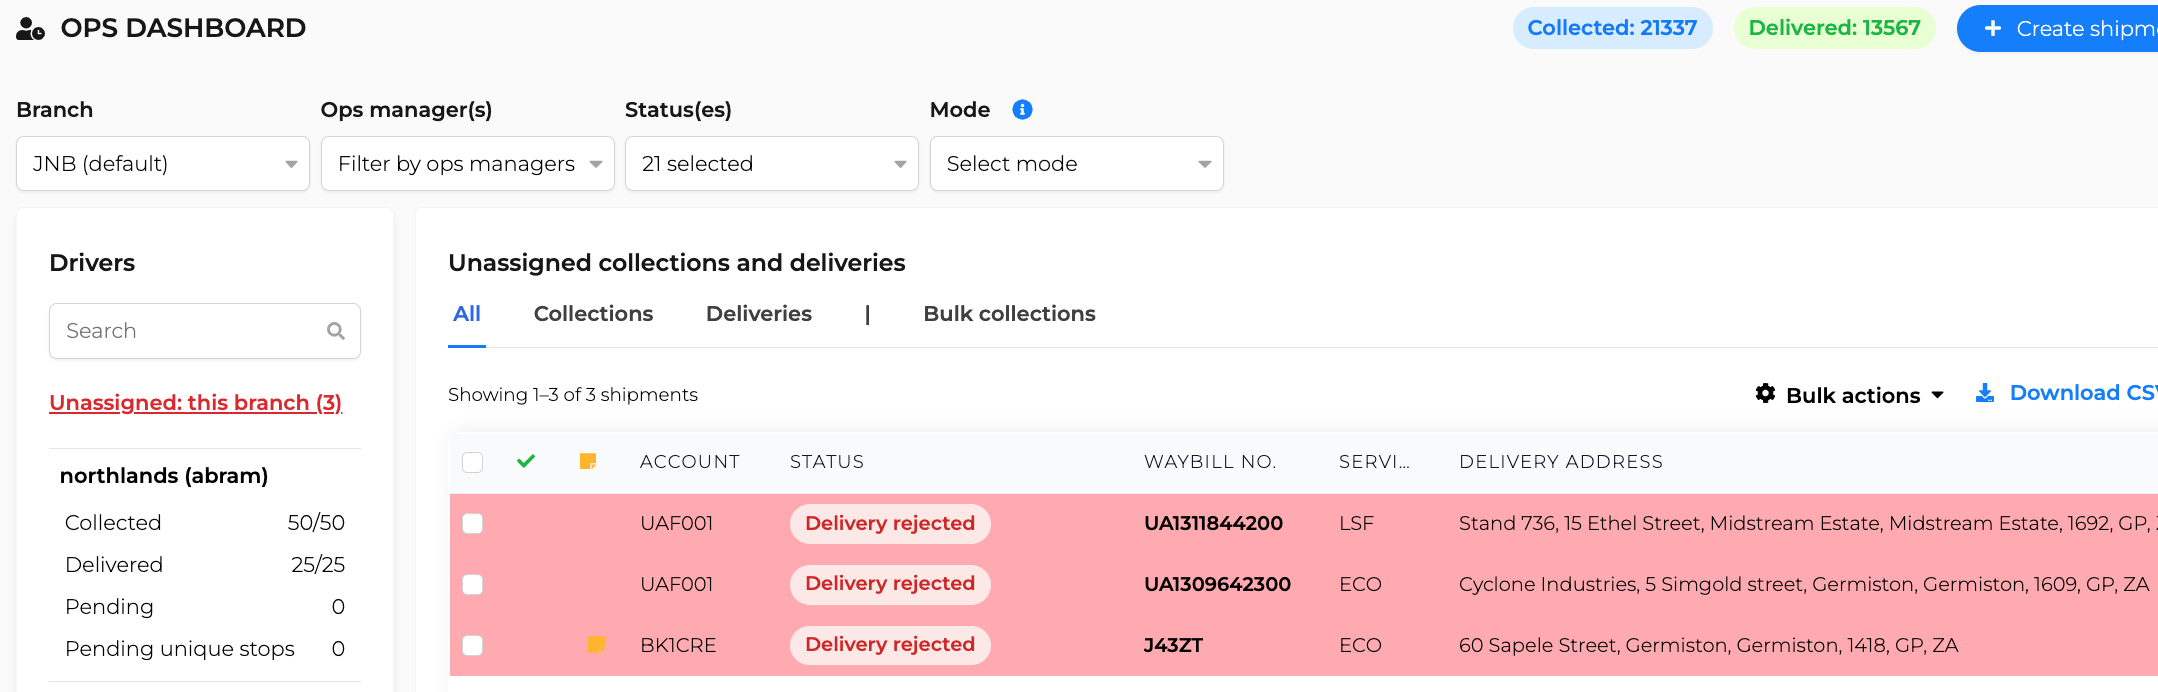
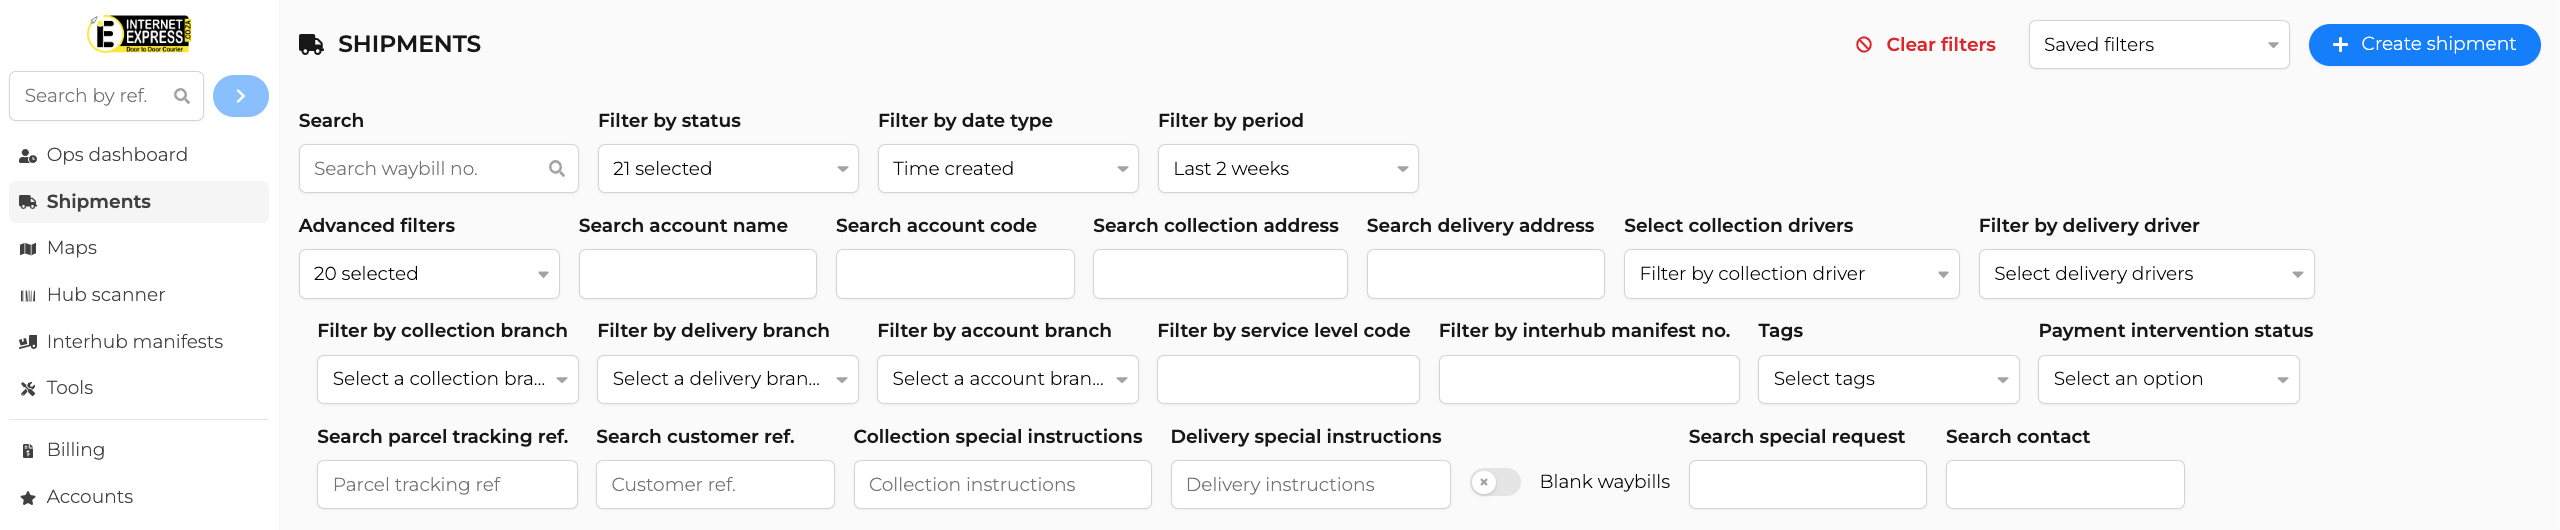
Go to Hub scanner in the left-hand navigation menu and select a hub from the drop-down. If the logged-in user is limited to the branch, then there will be no branch option as the hub scanner will automatically be linked to the chosen branch. 

More drop-down menus will appear as you complete the information.
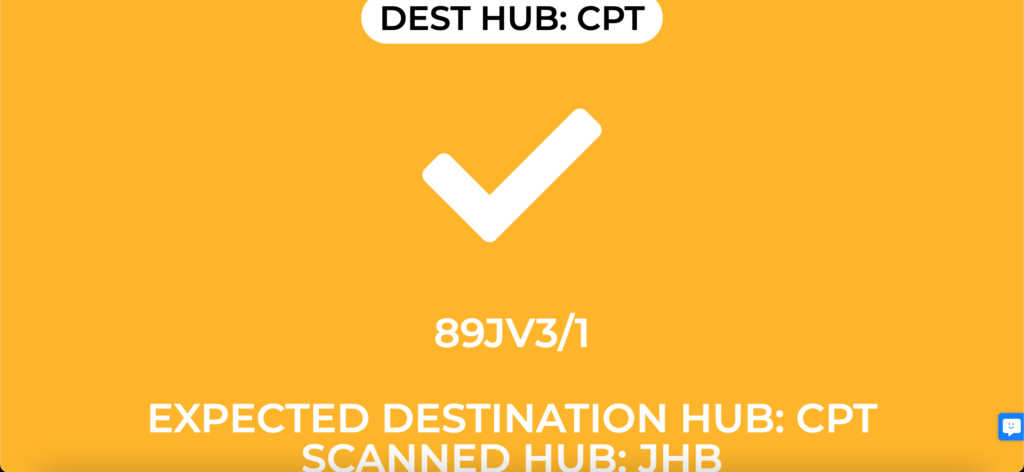
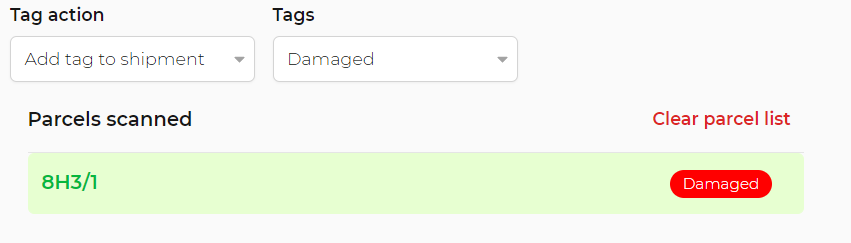
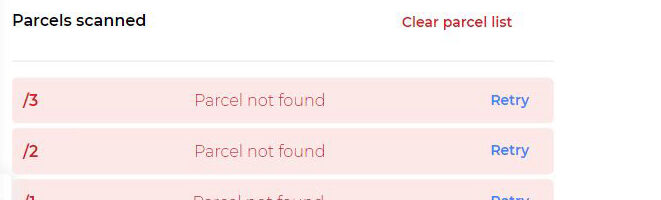
If plugged in, the scanner will become active and ready for use.

Scan the shipment and wait a split second for the GREEN, RED or YELLOW screen to appear to confirm if the scan had been successful.

The scanner is immediately ready to continue scanning after the first scan.

Each shipment is updated accordingly per scan and customers are notified where requested. 

How to add tags to shipments with the hub scanner

Tag shipments in bulk using the hub scanner.

Go to hub scanner and select the toggle to add the tag function to the current scan session. Choose an option from the tag action menu and then add some tags to complete the action.

What to do if the hand-held hub scanner doesn't work

If the hand-held scanner doesn’t work, you can manually enter the parcel reference into the provided space at the top of the page.

Press enter to submit the parcel reference.

What to do if a parcel is highlighted in red

Invalid parcels will appear in red. This means that the parcel is not created or not registered on the system.

You can Retry the scanner and if the parcel is still not found, you can ask an operations manager for assistance.