

![]() Note: The password requires 8 or more characters
Note: The password requires 8 or more characters


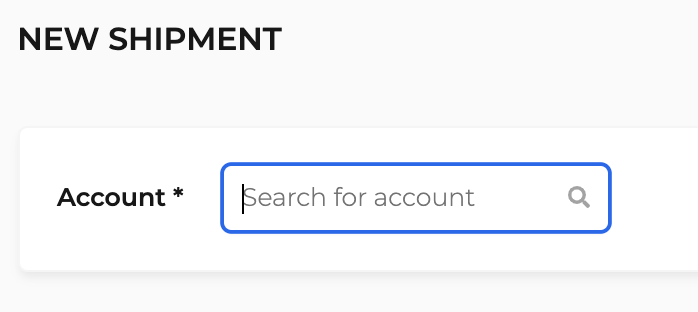
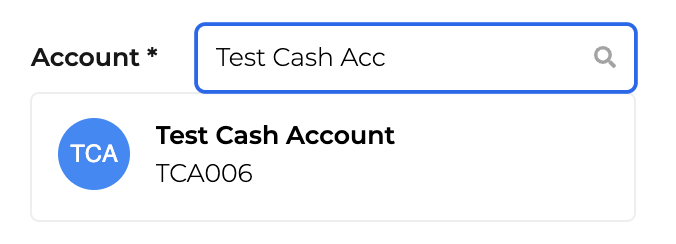
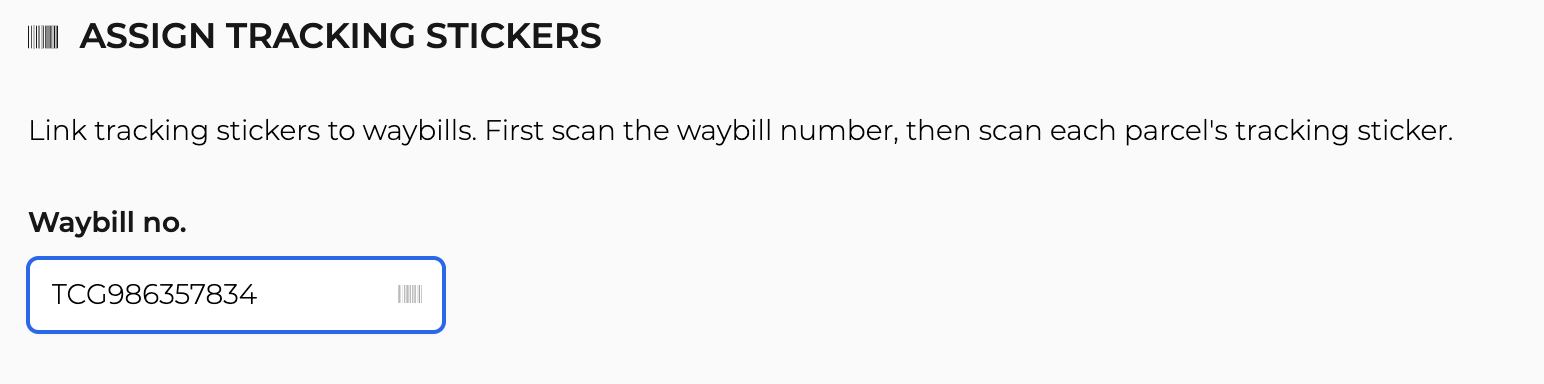
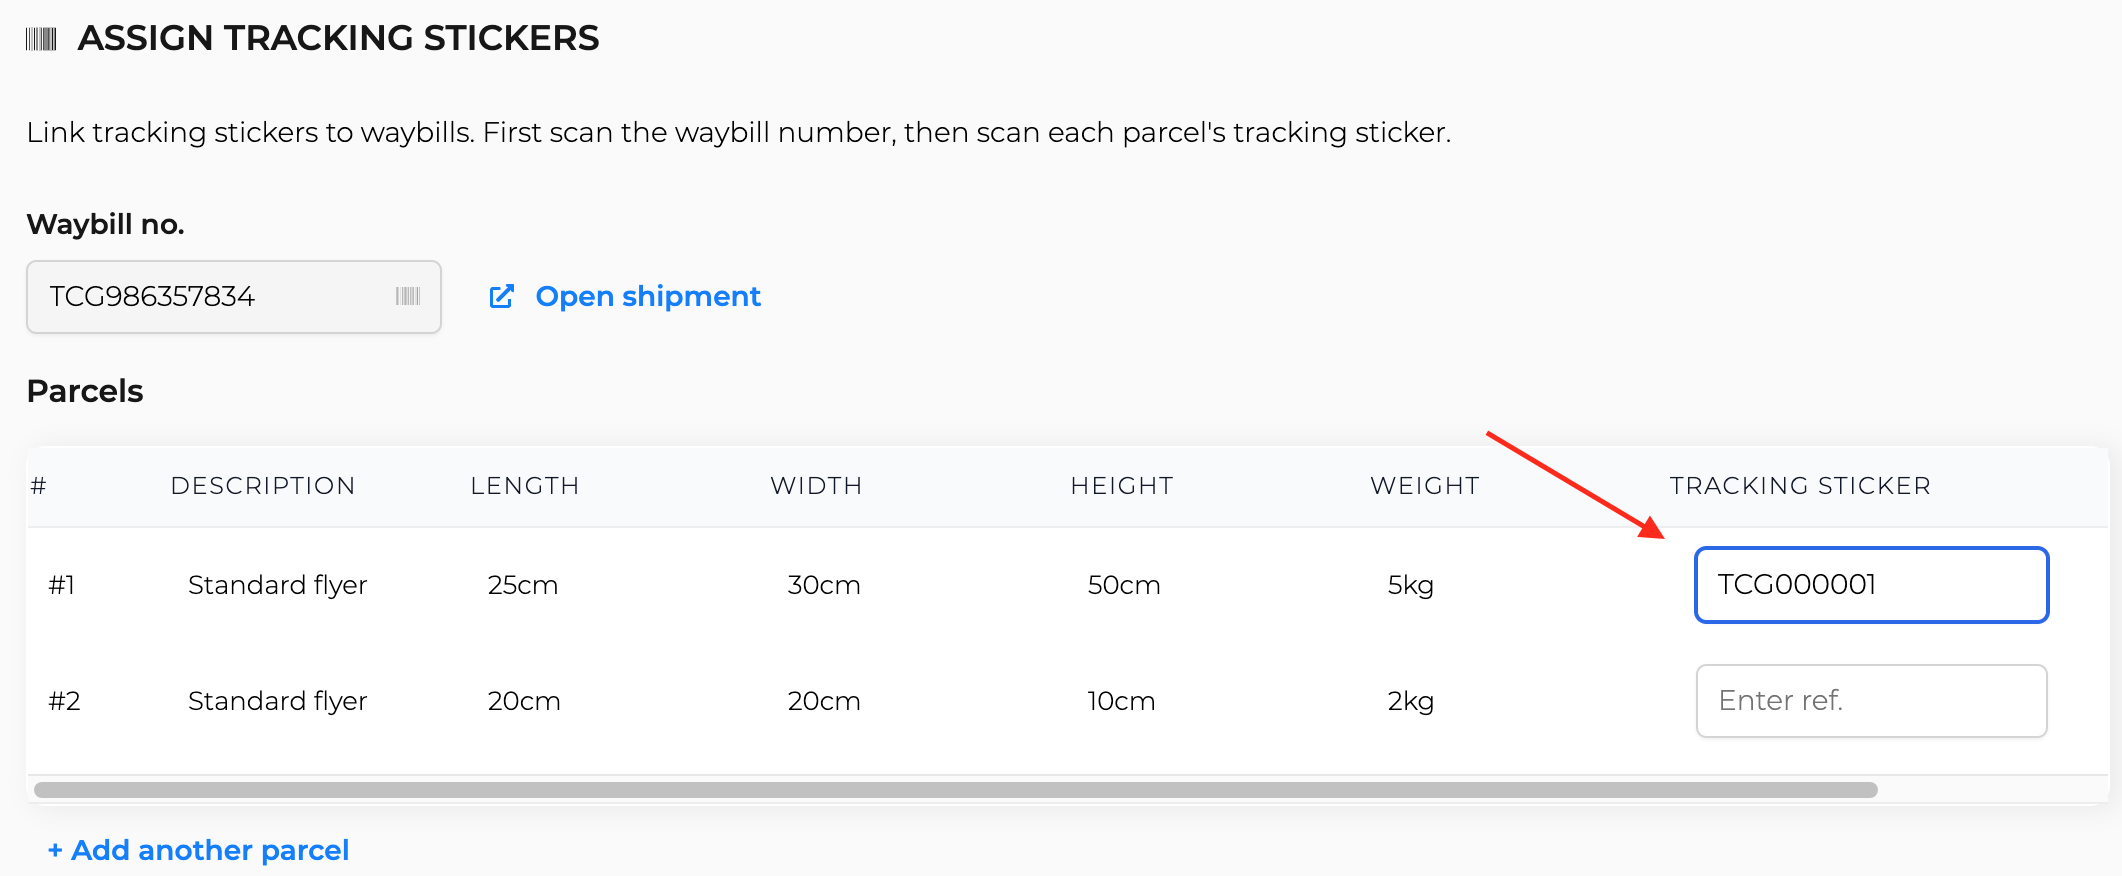
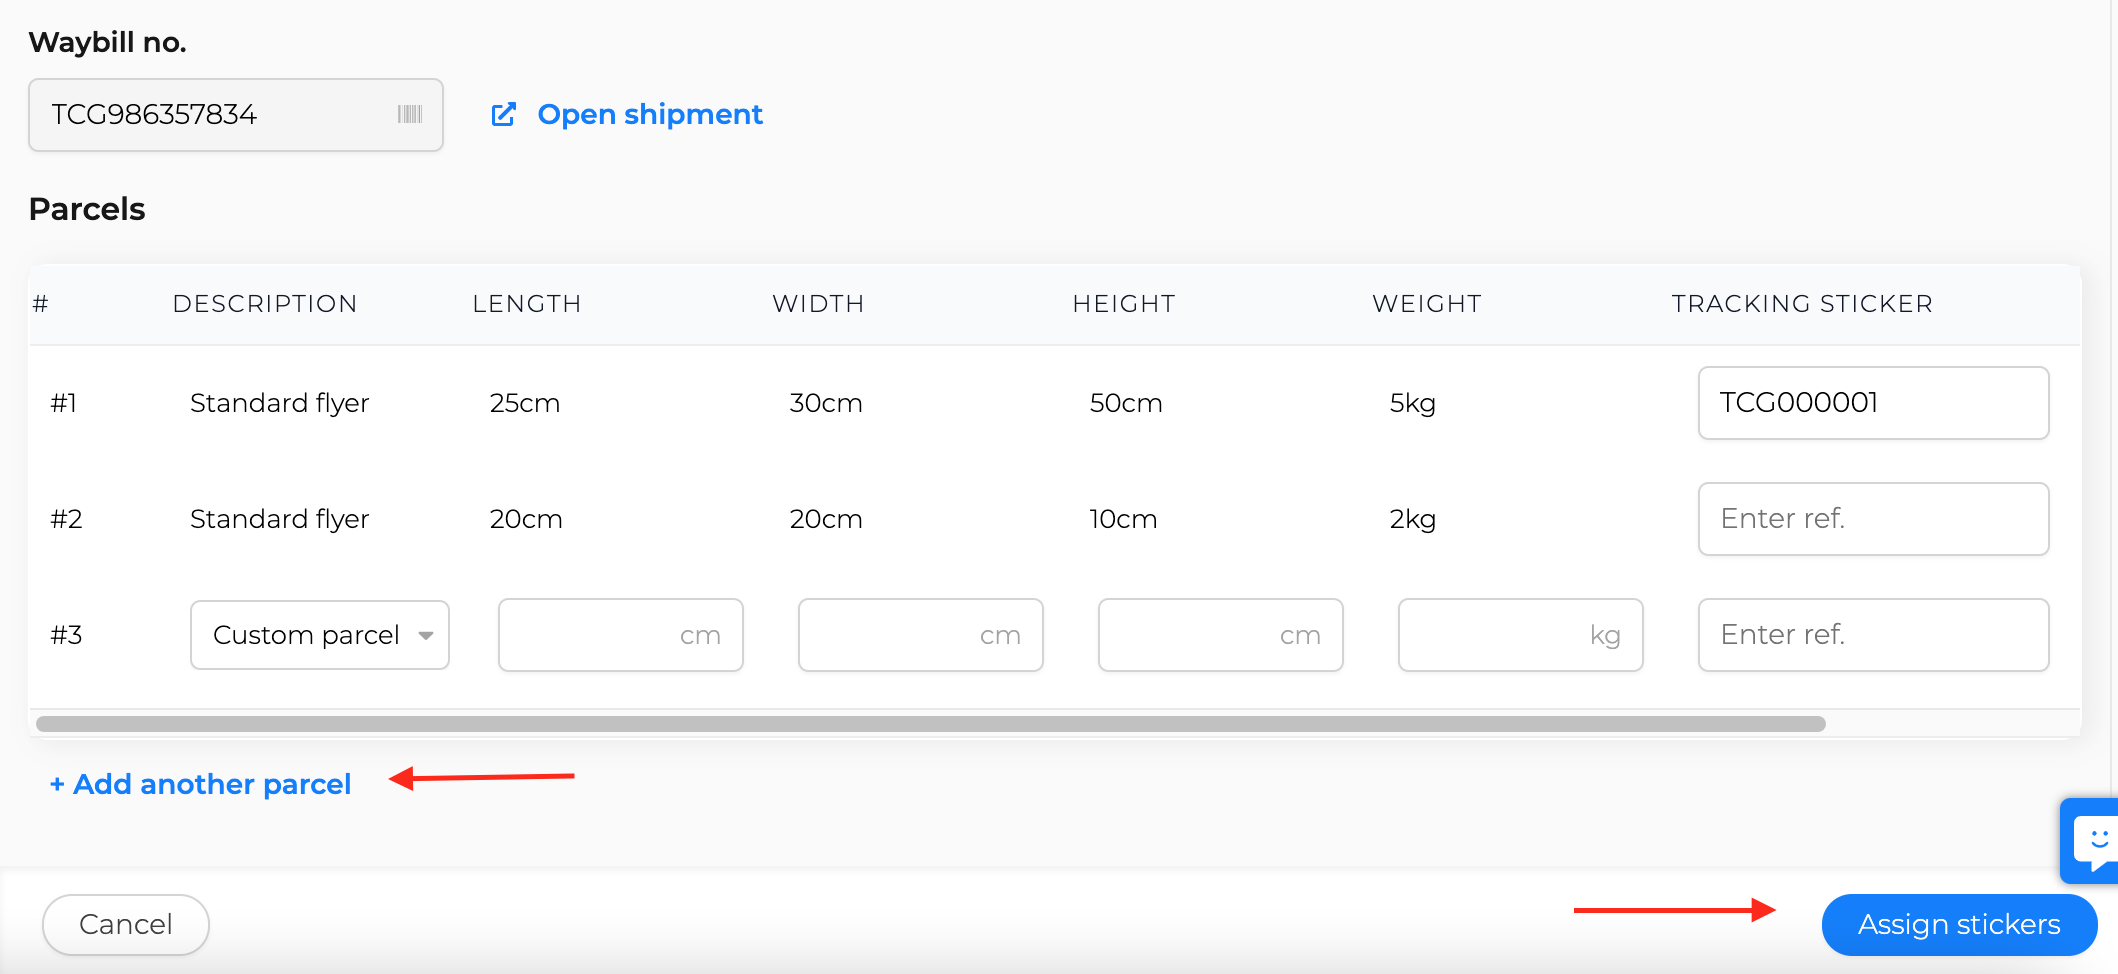
Start by selecting an account.
The operator can choose between the TCG Cash account OR the customer’s personal account, if they have one.
![]() Attention: Kiosk Bulk accounts will not be used anymore – Bulk rates are now shown as a service level.
Attention: Kiosk Bulk accounts will not be used anymore – Bulk rates are now shown as a service level.
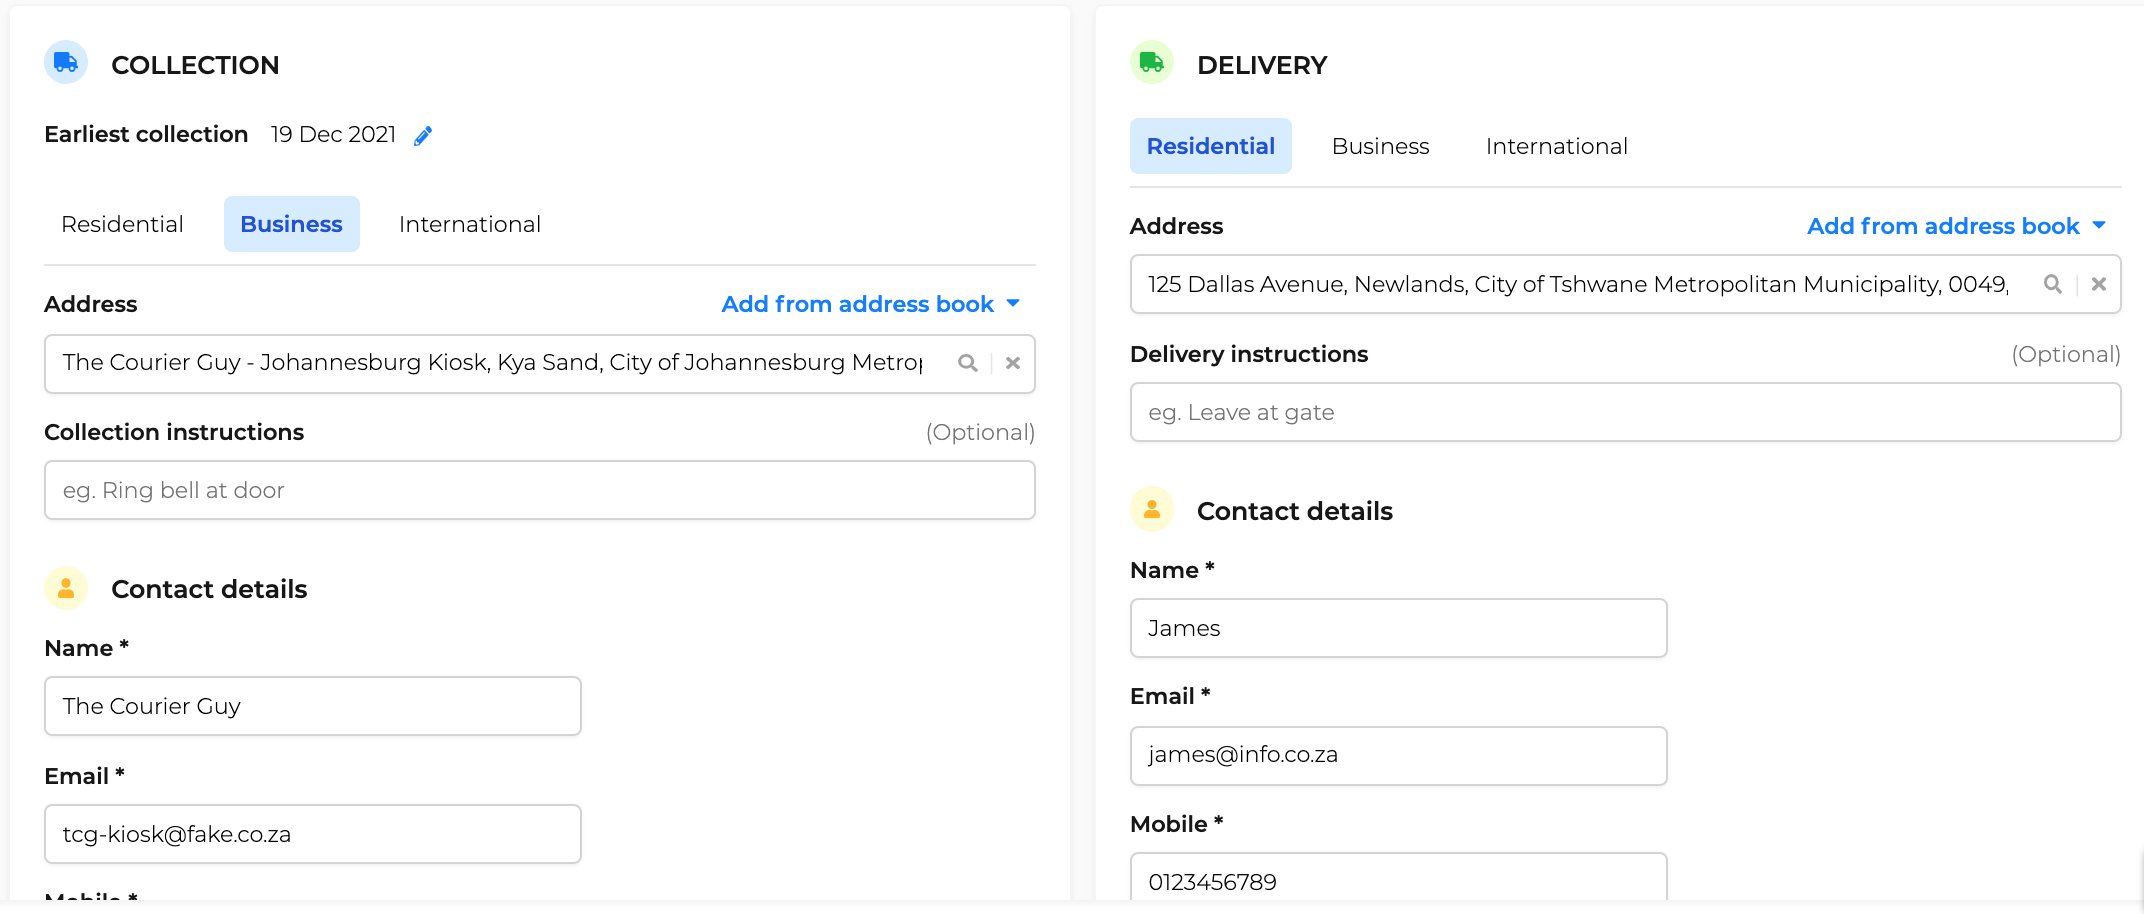
Choose the correct account and start filling in the shipment details as per the printed waybill.
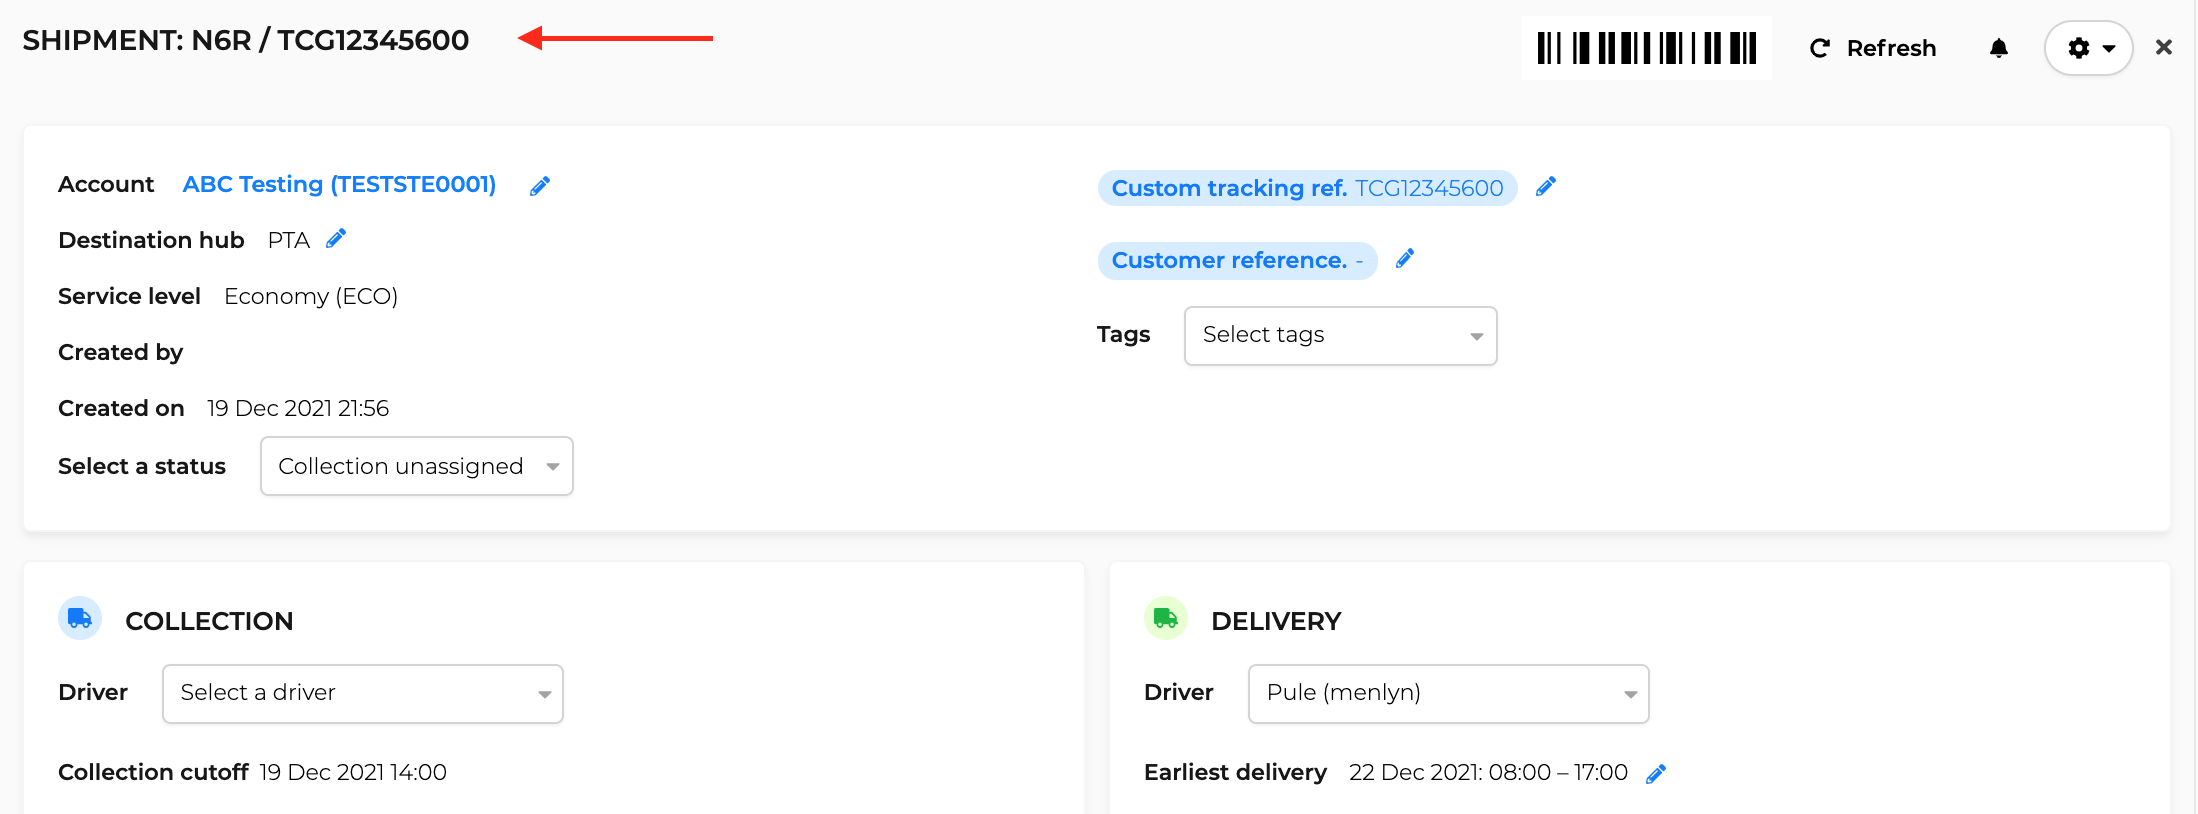
![]() Notice the Custom reference filled in from the TCG paper waybill.
Notice the Custom reference filled in from the TCG paper waybill.


Once the shipment has been created on Ship Logic, the Kiosk operator can click on the blue invoice number, found in the billing section of a shipment, to download and print the automatically generated Ship Logic invoice, if necessary.
![]() There is no need to print the Ship Logic generated waybill as the manual paper waybill is being used.
There is no need to print the Ship Logic generated waybill as the manual paper waybill is being used.


Shipments can also be created directly from the shipment page.
Click on Create shipment and start by choosing an account. Follow the same process as above and enter the shipment details and get rates.
![]() Please note: Shipments created directly will require the Kiosk operator to manually fill in the custom reference.
Please note: Shipments created directly will require the Kiosk operator to manually fill in the custom reference.


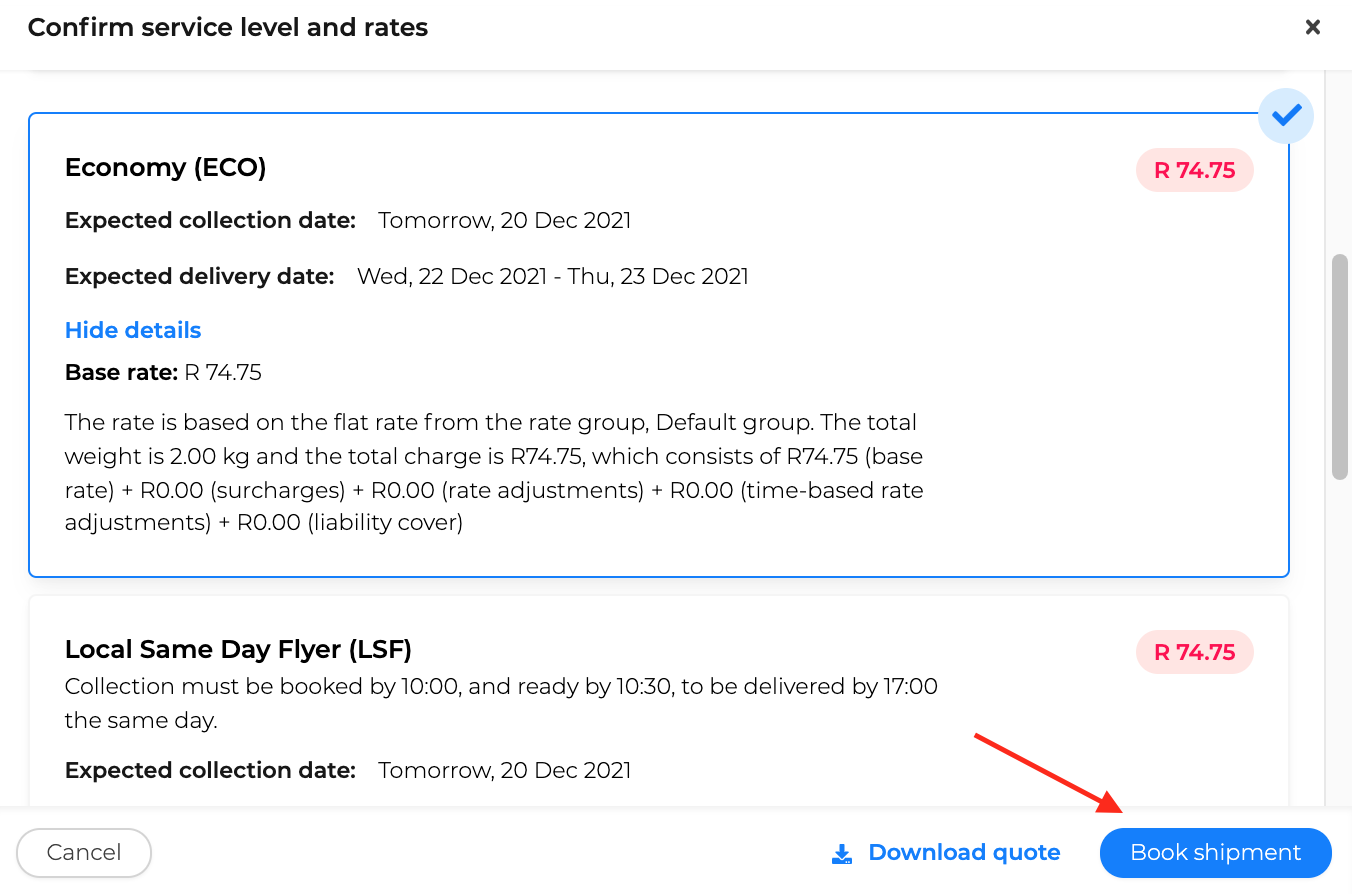
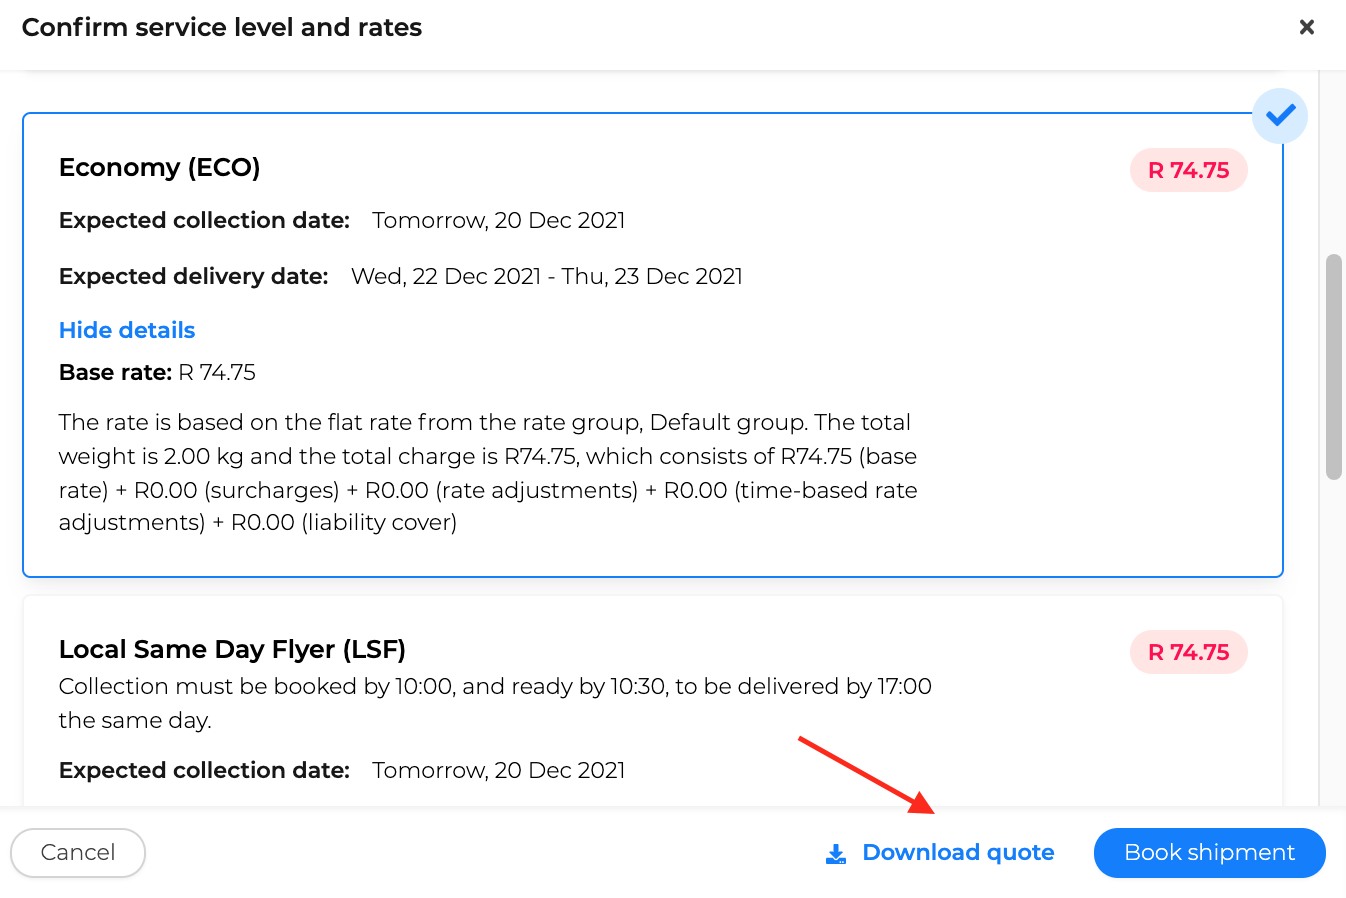
On the rates page, look for Download quote and then click on it to preview.
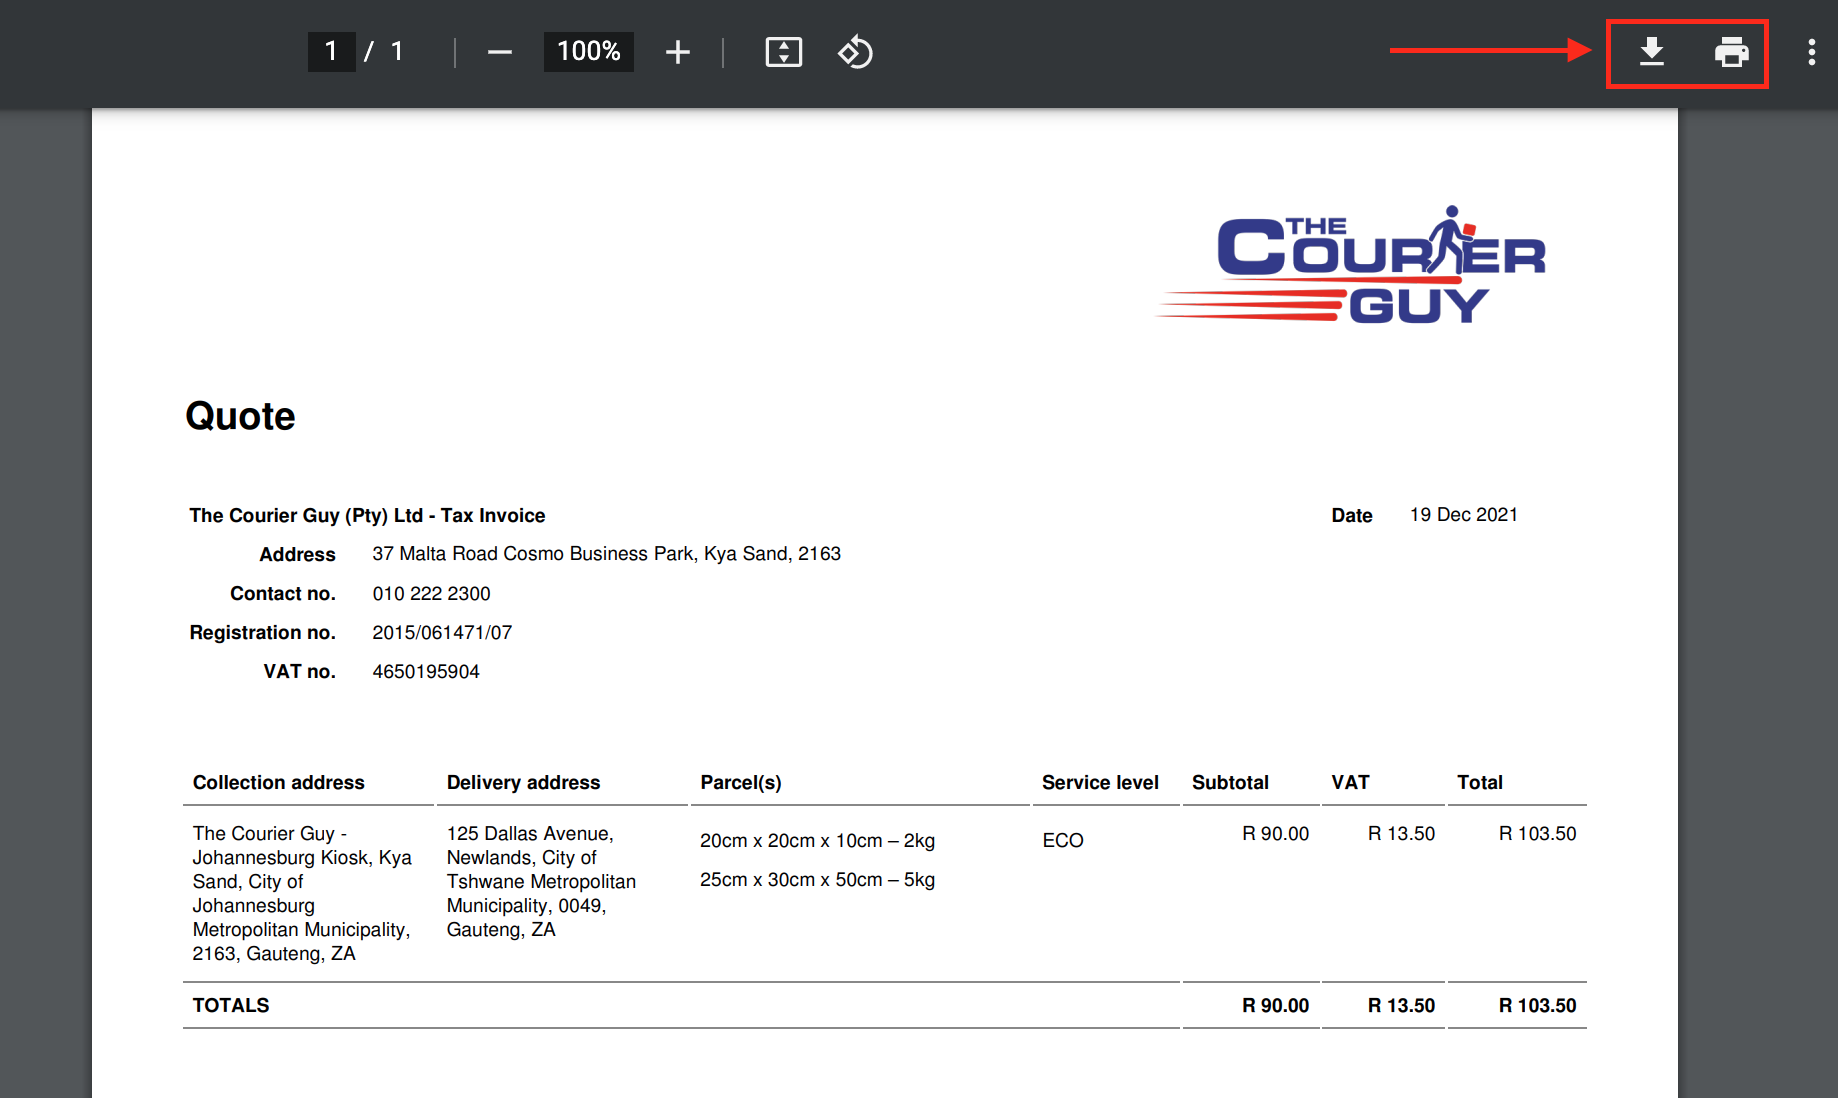
Download or Print directly from the preview page.
![]() Note: Please allow pop-ups on your browser to be able to view the quote page.
Note: Please allow pop-ups on your browser to be able to view the quote page.
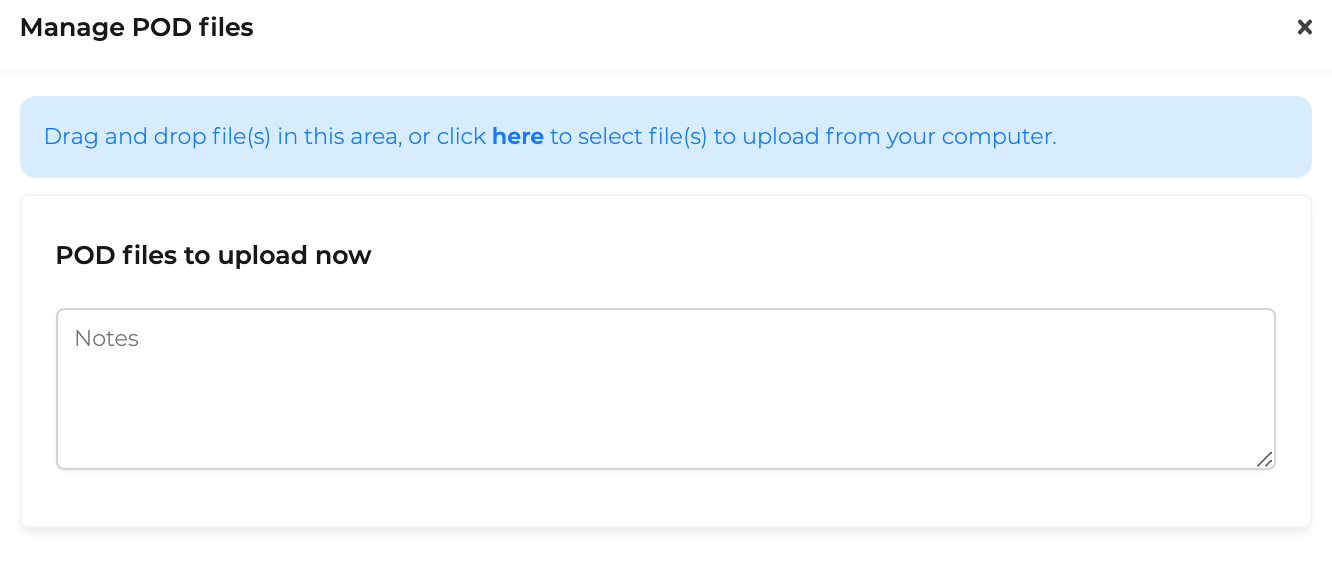
![]() Uploading a POD will automatically set the shipment status to delivered.
Uploading a POD will automatically set the shipment status to delivered.
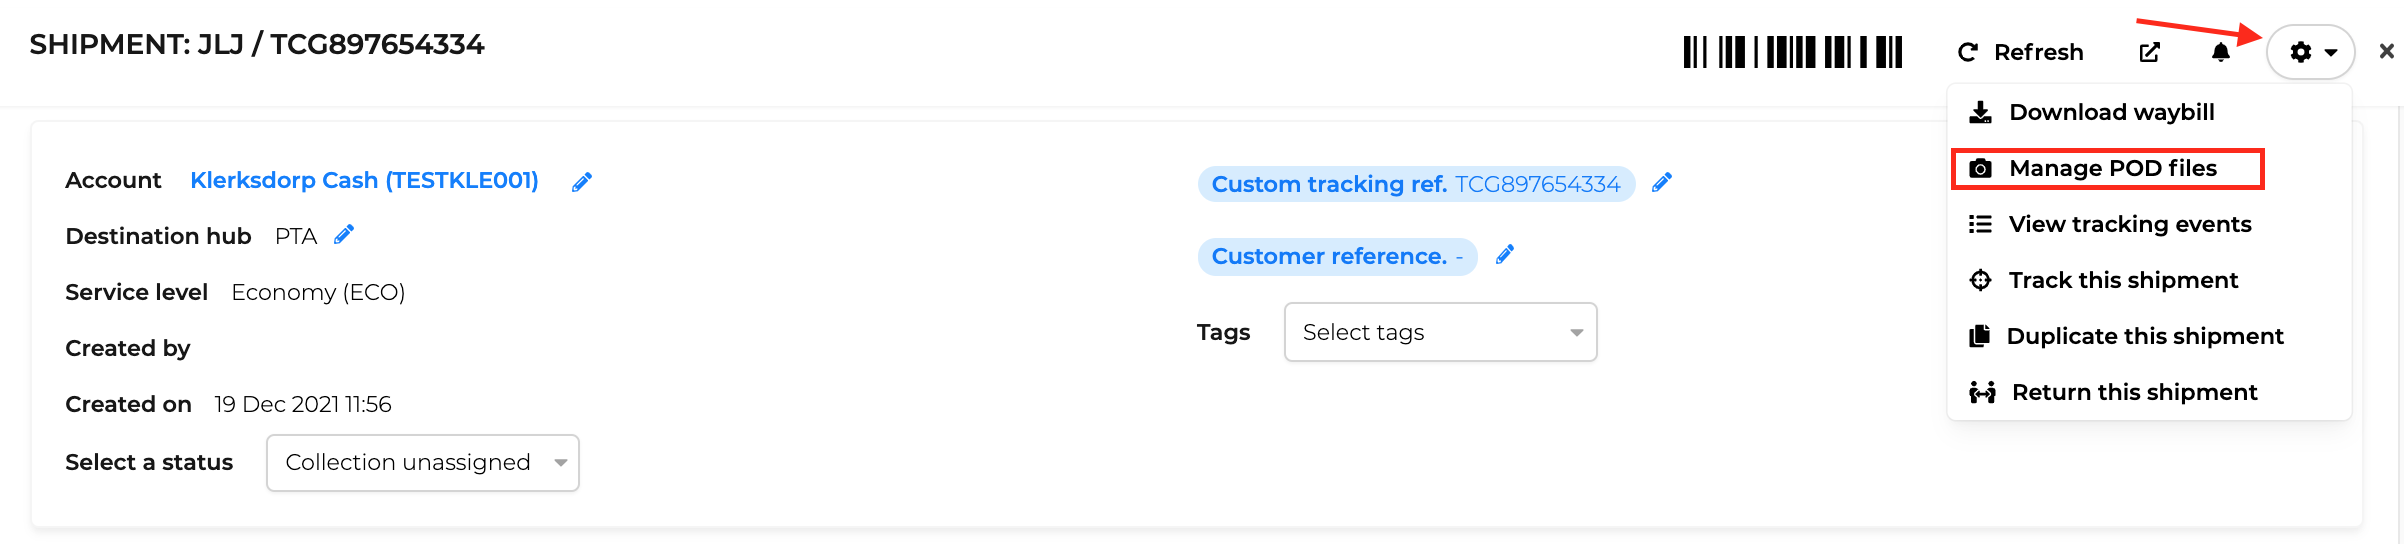
To upload POD images to individual shipments, go to the shipment page and select the relevant shipment.
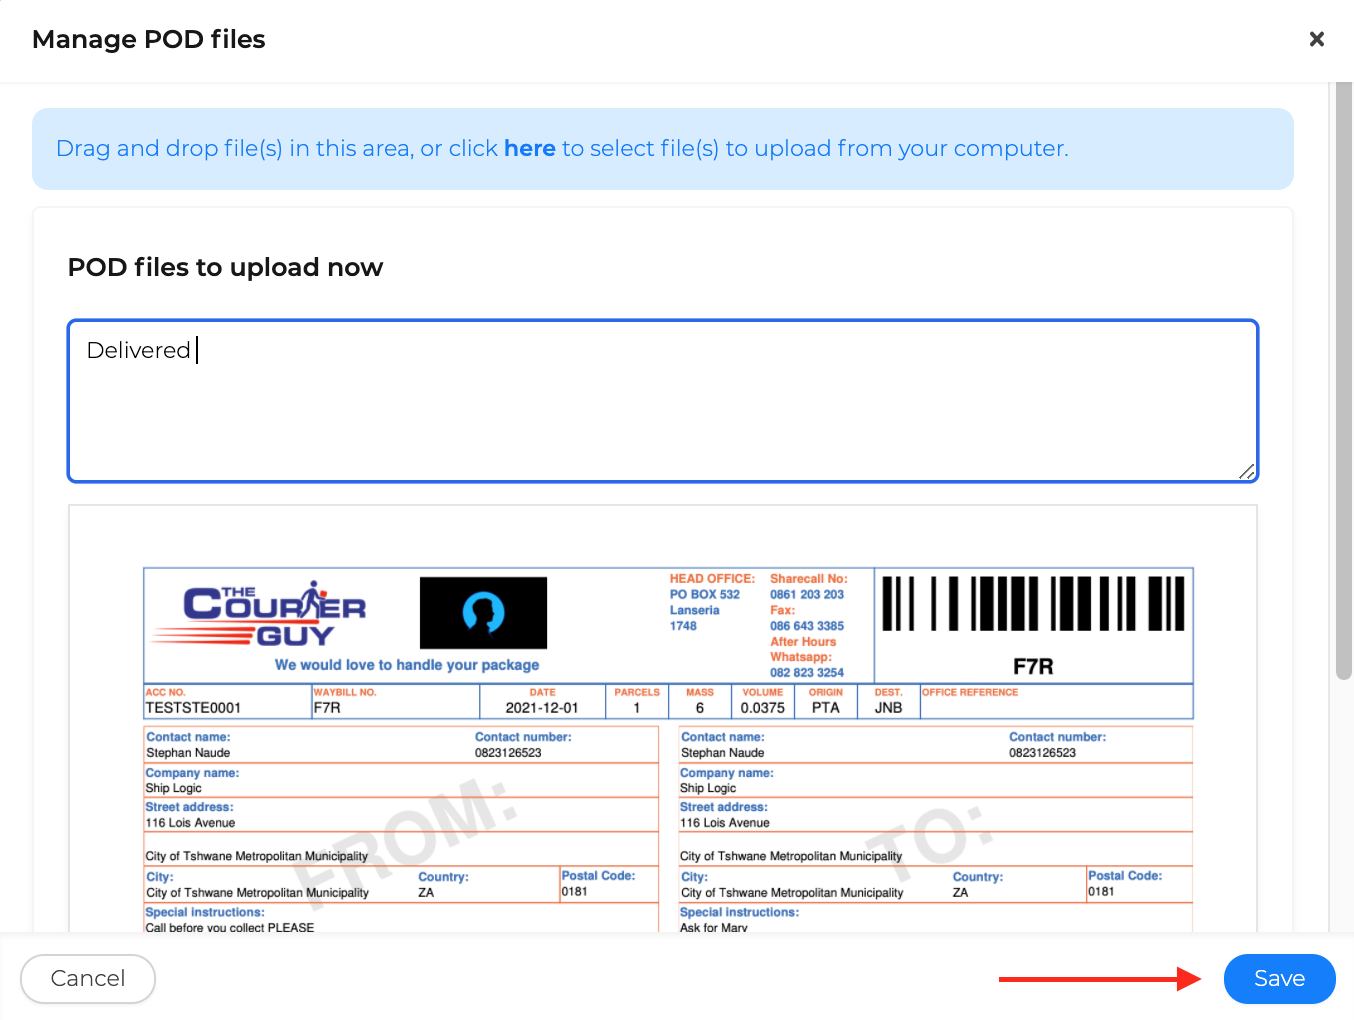
The POD will be available in the shipment tracking events to view and download.
![]() The customer will be notified of delivery once the POD has been uploaded.
The customer will be notified of delivery once the POD has been uploaded.
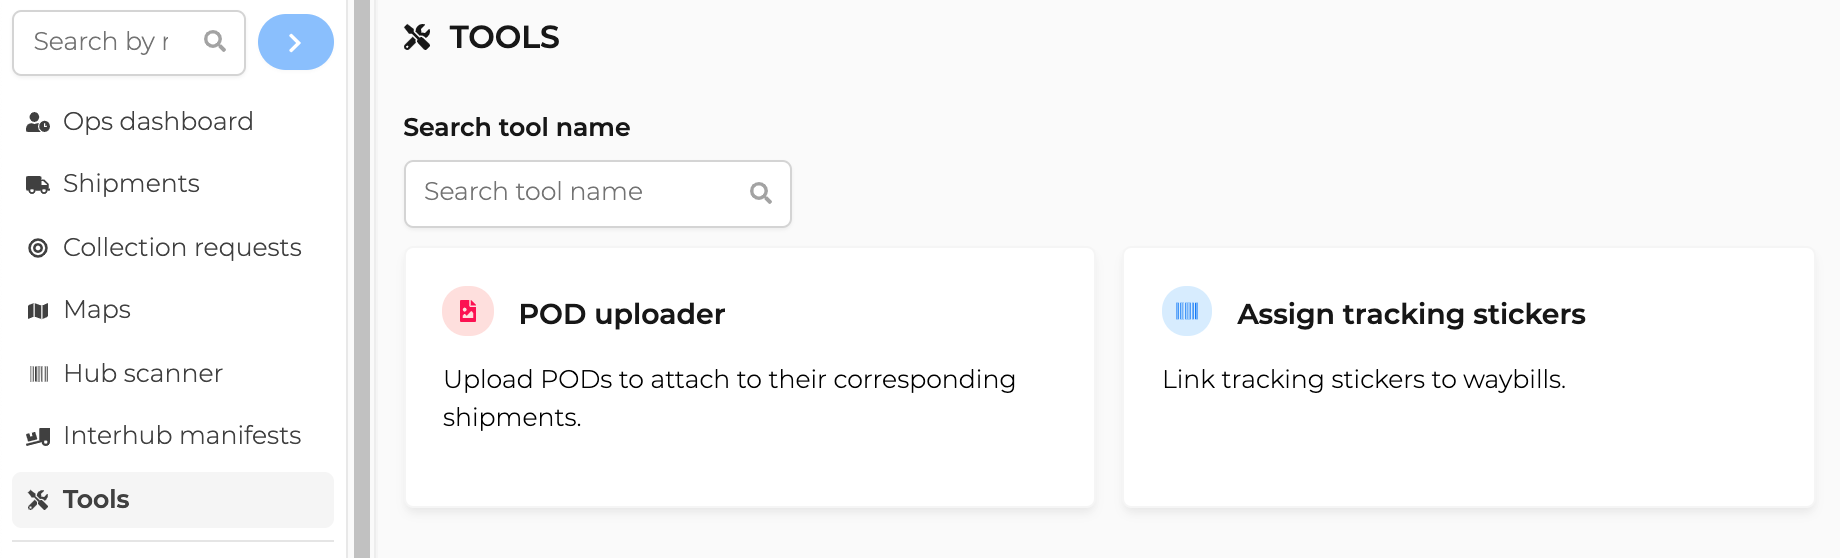
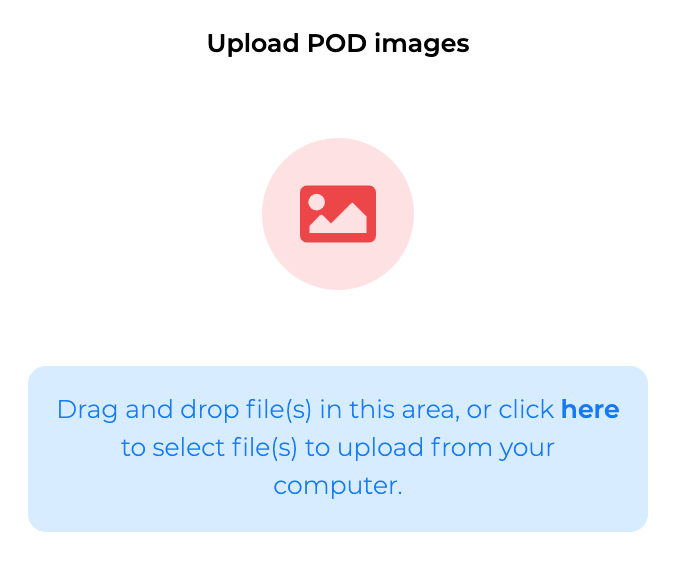
![]() To upload PODs in bulk, click here and find out how to use the POD uploader tool.
To upload PODs in bulk, click here and find out how to use the POD uploader tool.
![]() Door delivery
Door delivery
The driver scans the parcel as “out for delivery” using the hub scanner so the shipment appears on the driver’s tripsheet.
The driver then delivers the parcel as per normal.
![]() Receiver collects from kiosk
Receiver collects from kiosk
In this case the shipment status will be e.g. “At hub – JHB kiosk” after being inbounded from the inter-hub manifest.
The kiosk contacts the delivery contact and instructs them to collect the shipment from the kiosk.
Upon collection, the Kiosk operator sets the status of the shipment to “delivered” by either manually uploading the POD or by using the POD uploader tool to upload PODs in bulk.
![]() PUDO pick up
PUDO pick up
If the shipment was created using PUDO with the delivery location as the kiosk (the service level will be “PUDO”), then the kiosk acts as a virtual PUDO locker.
The Kiosk operator uses the PUDO web interface to enter the PUDO pin and mark the shipment as delivered.
Go to Hub scanner in the left-hand navigation menu and select an action from the drop down menu.
You will mostly be using the Inbound from manifest option.
Step 1: Select Inbound from manifest.
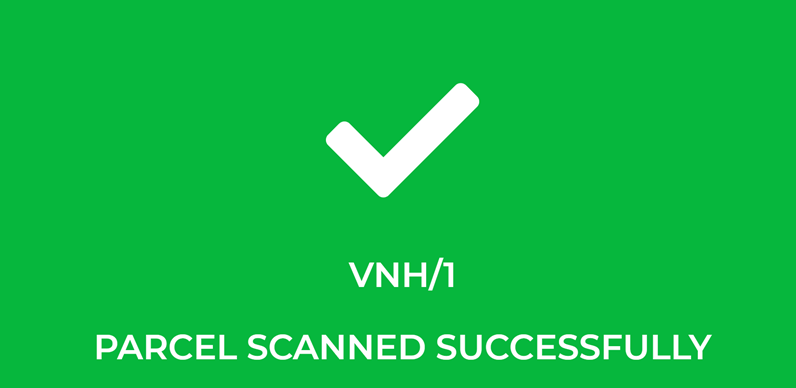
Step 2: Scan the waybill or tracking sticker to inbound the parcel from the relevant Interhub manifest.
![]() If plugged in, the scanner will become active and ready for use.
If plugged in, the scanner will become active and ready for use.


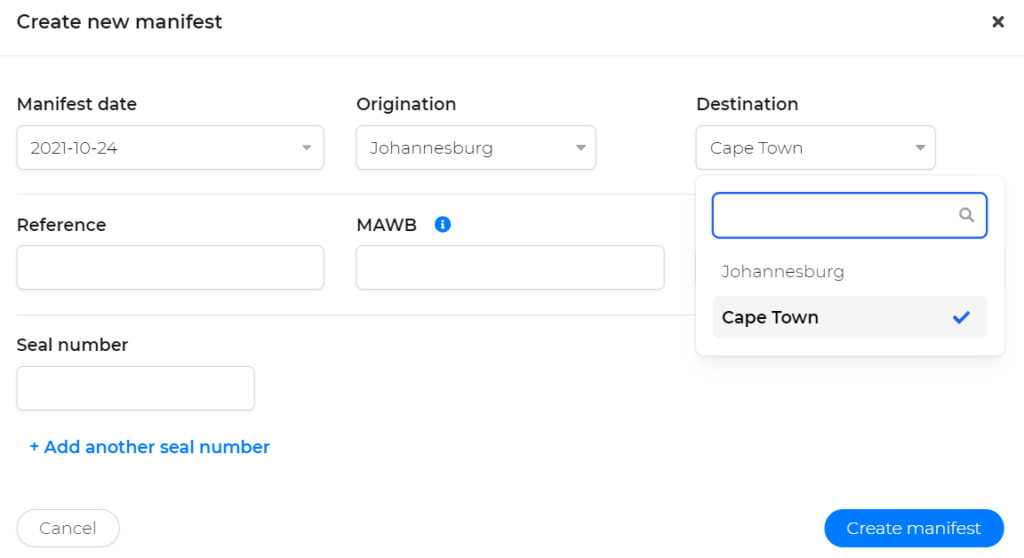
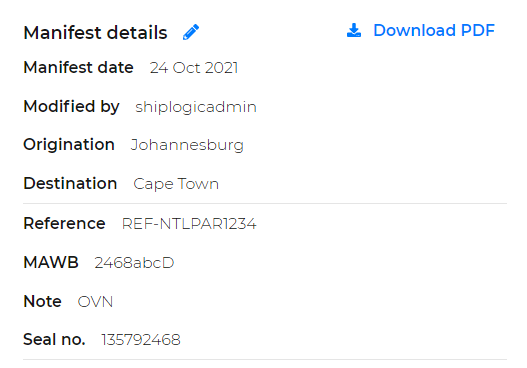
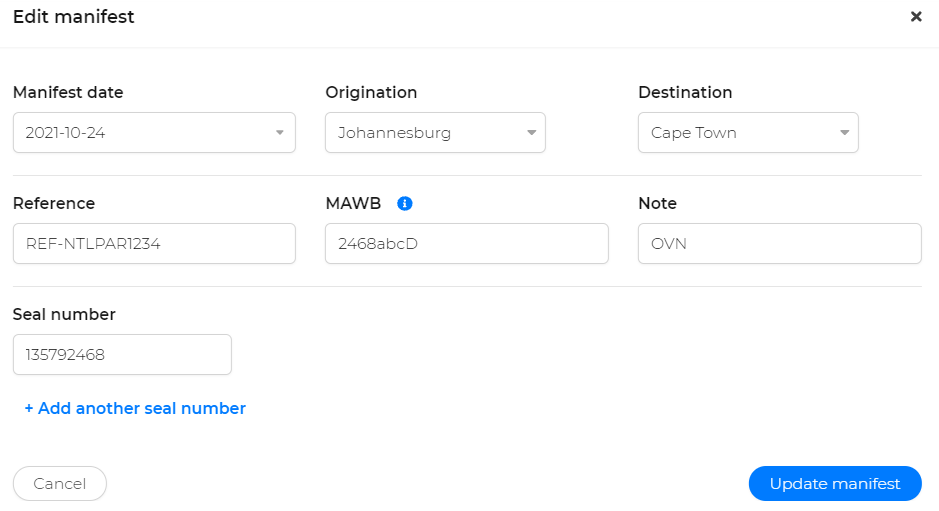
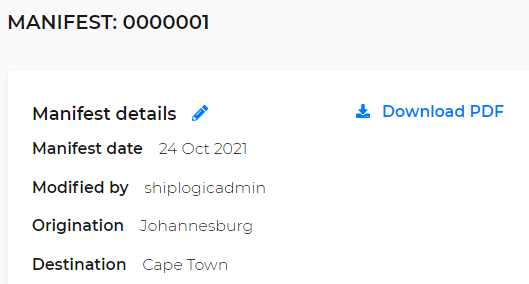
Open the manifest you wish to edit and click on the edit icon ![]() next to Manifest details.
next to Manifest details.

![]() Please note: You can manually enter the shipment/parcel reference if the scanner is not available or not working.
Please note: You can manually enter the shipment/parcel reference if the scanner is not available or not working.
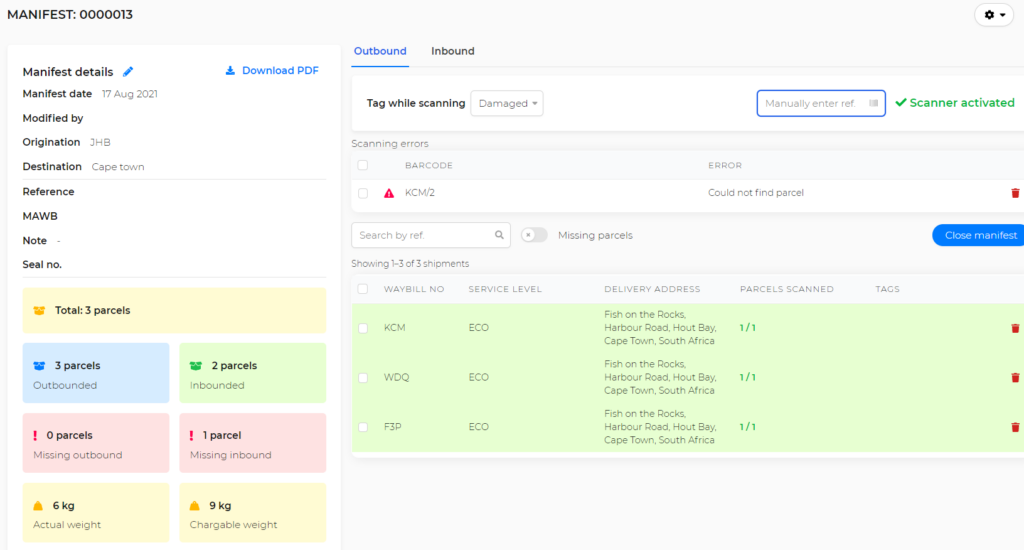
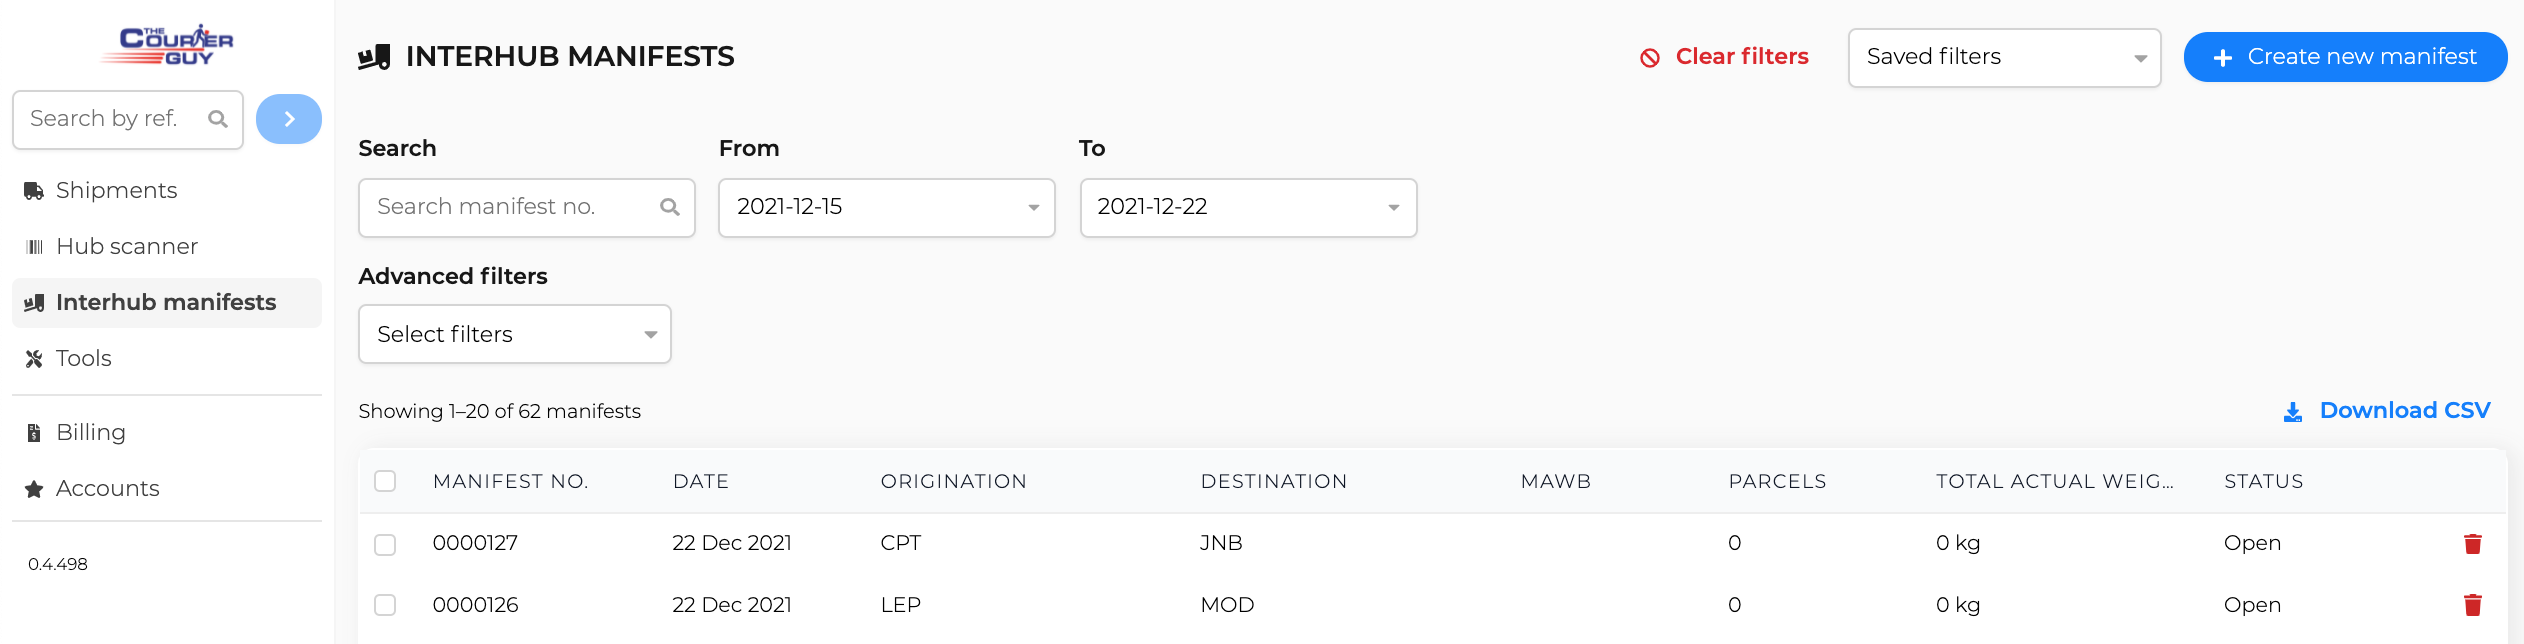
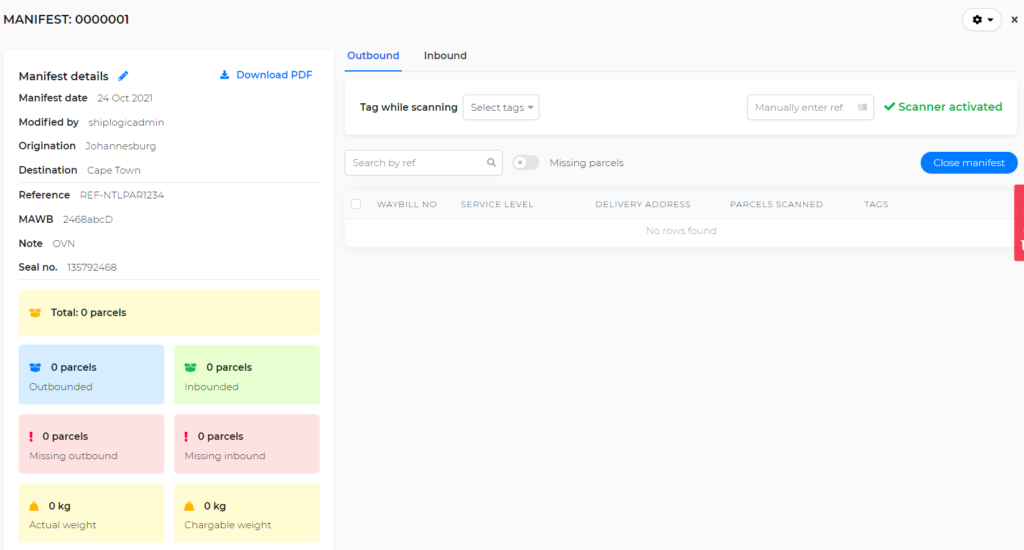
Open the relevant manifest and go to the right-hand side of the page.
Select the toggle “Missing parcels” and view all the parcels still outstanding in the list below.
![]()

Open the relevant manifest and go to the additional settings icon ![]() in the top right-hand corner of the screen.
in the top right-hand corner of the screen.

Select the manifest(s) you wish to remove and then click on the trash icon found on the right-hand side of the page ![]() .
.


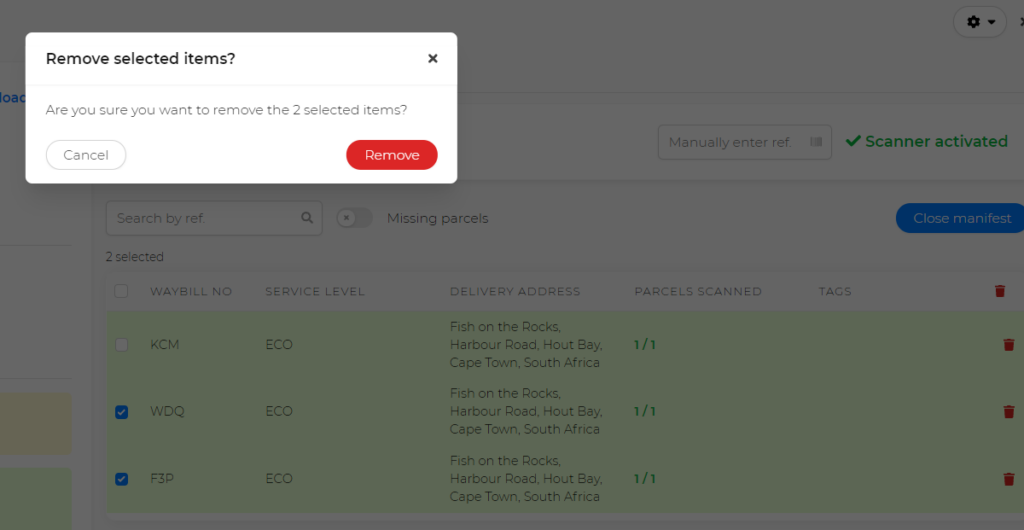
Click on the trash icon ![]() next to the shipment you wish to remove and confirm the removal.
next to the shipment you wish to remove and confirm the removal.


![]()
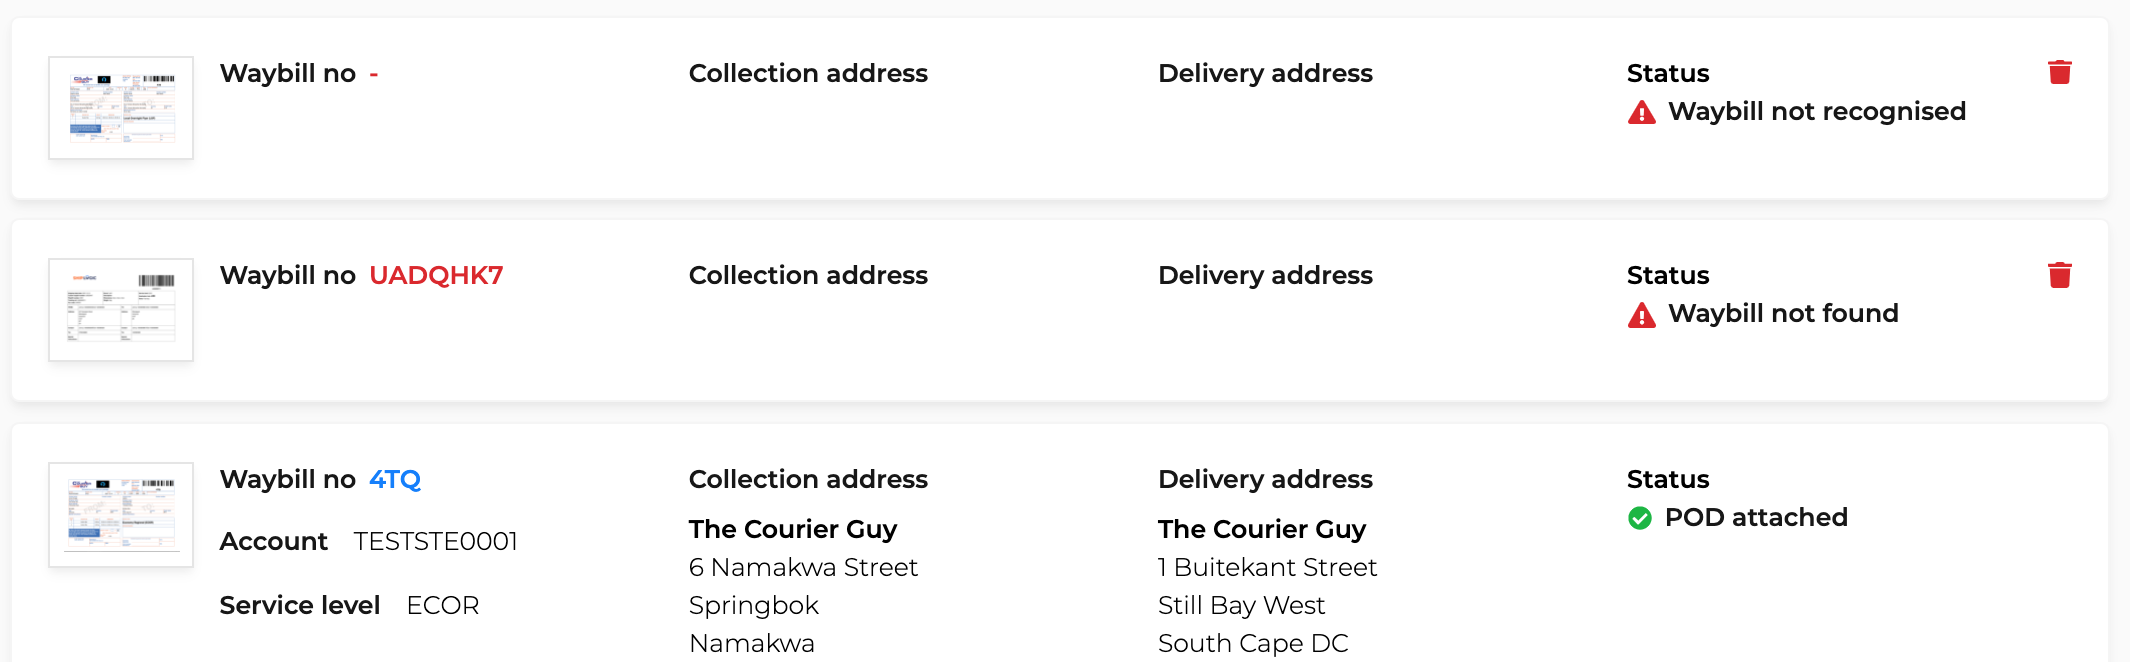
This step is only applicable to unsuccessful uploads.
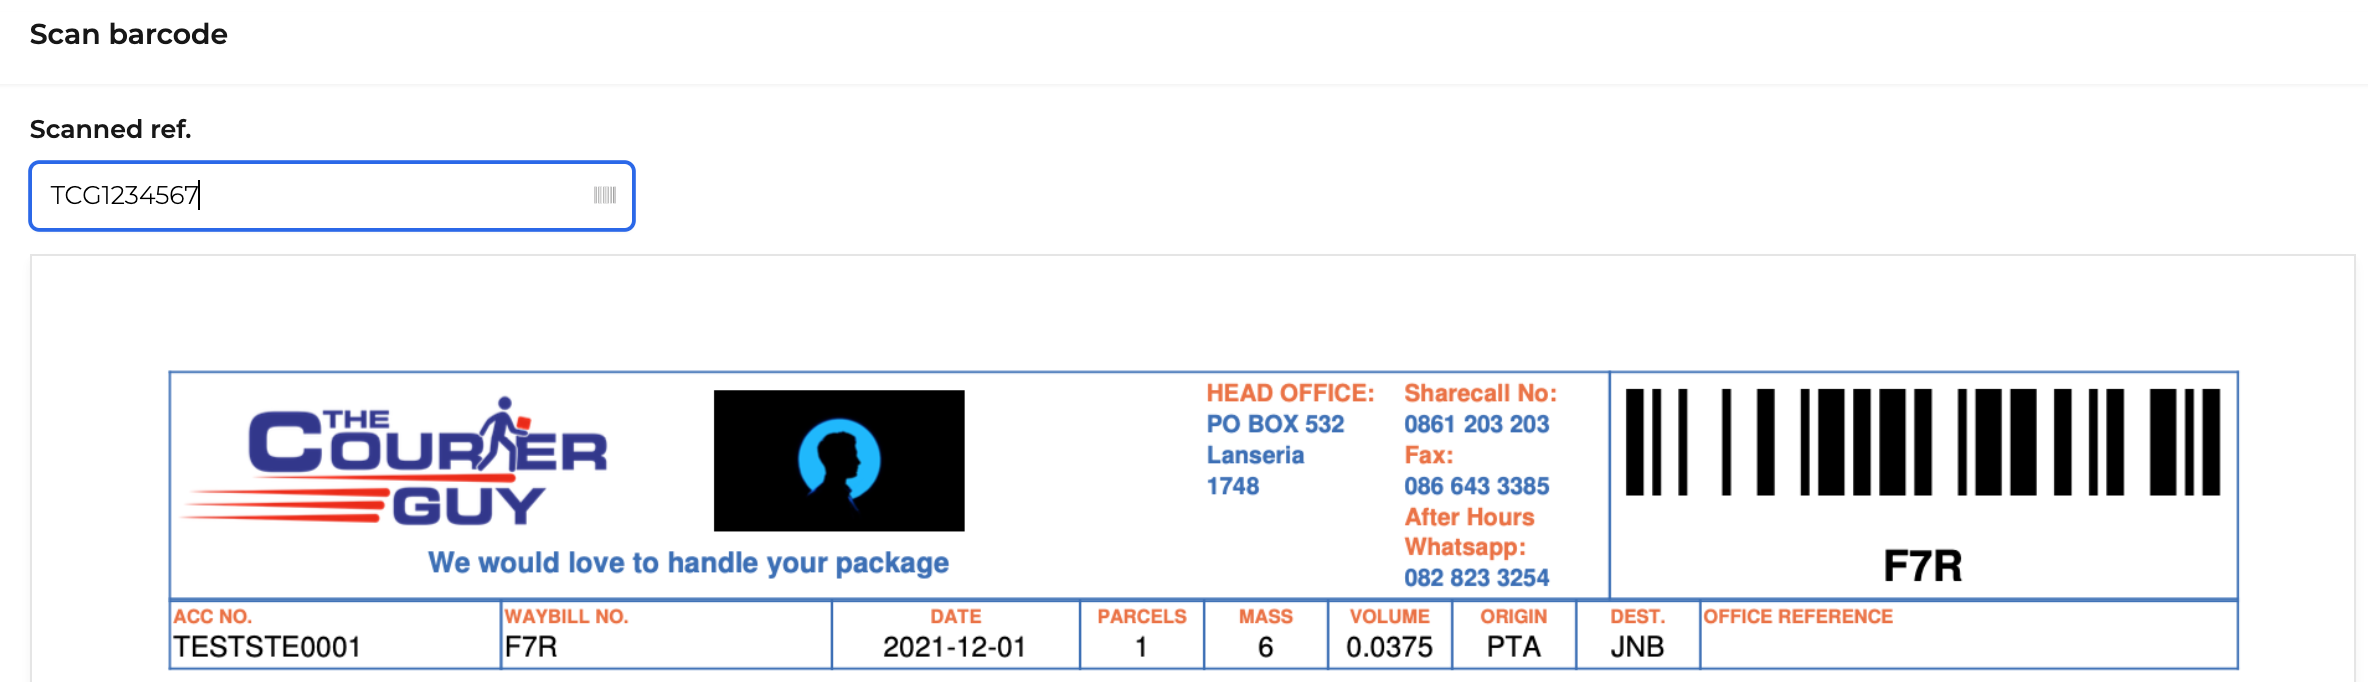
Manually scan or enter the correct waybill number to link the POD to the relevant shipment.
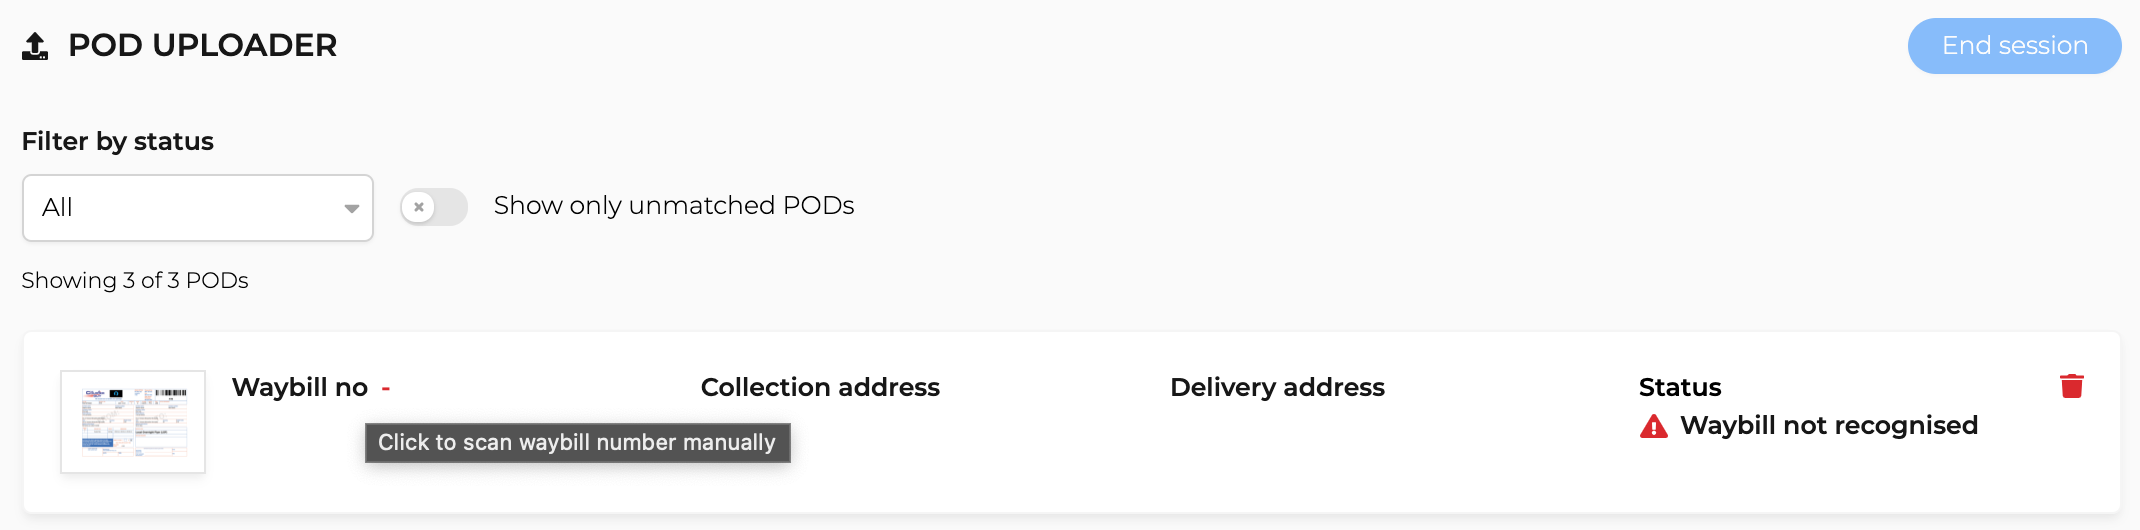
Click on the failed upload to open the manual entry page.
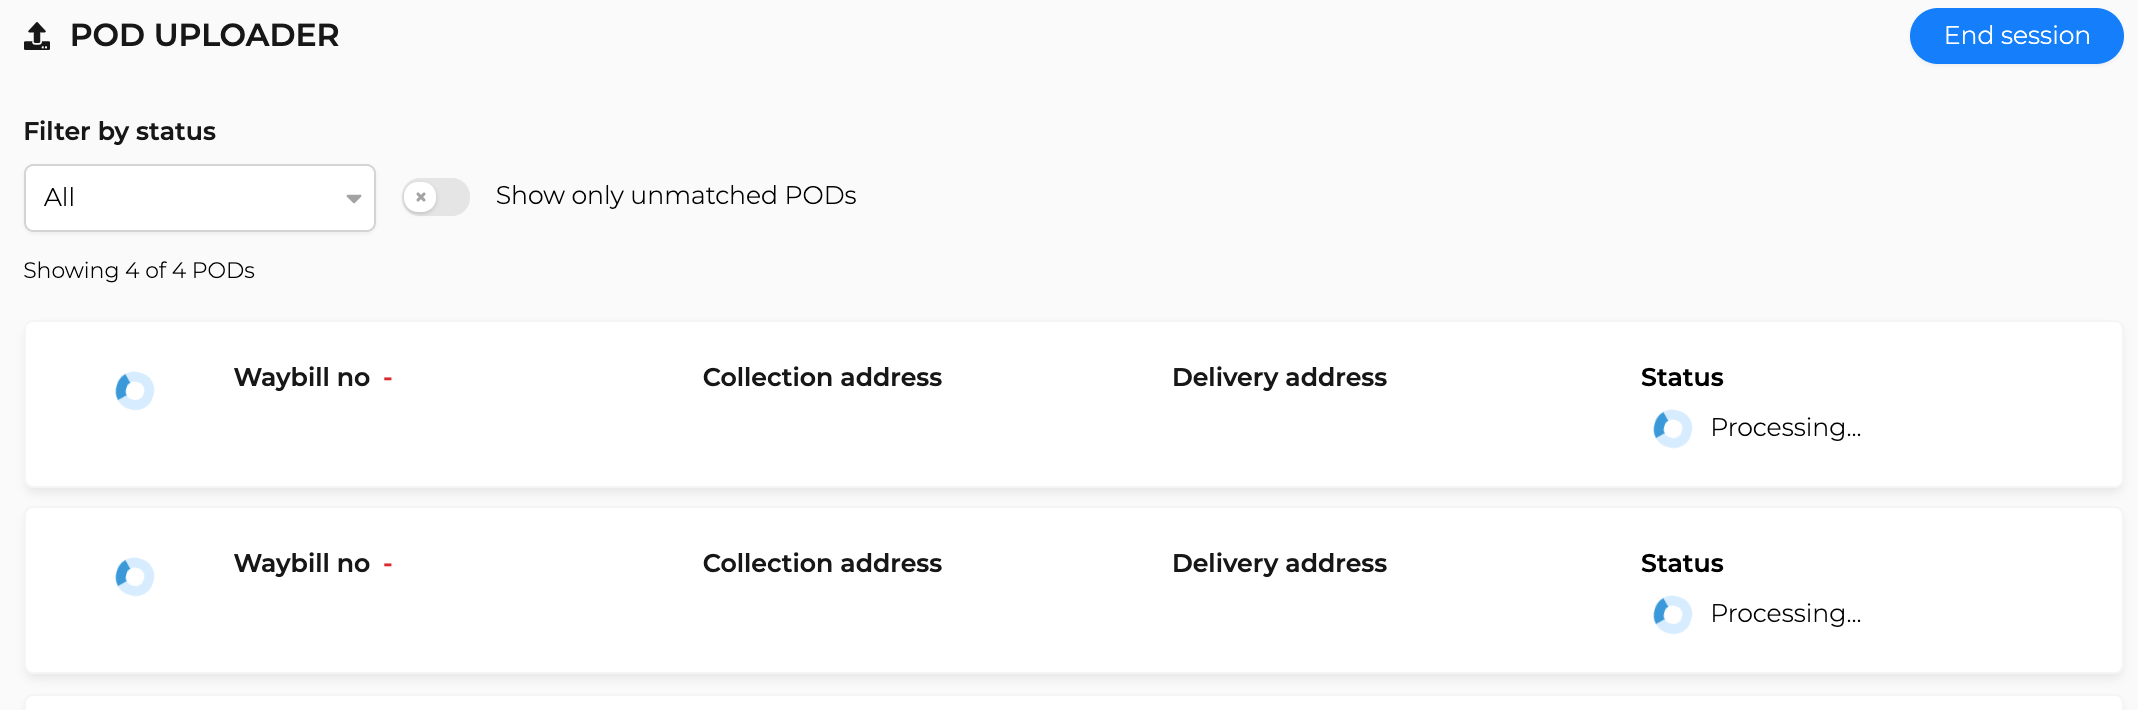
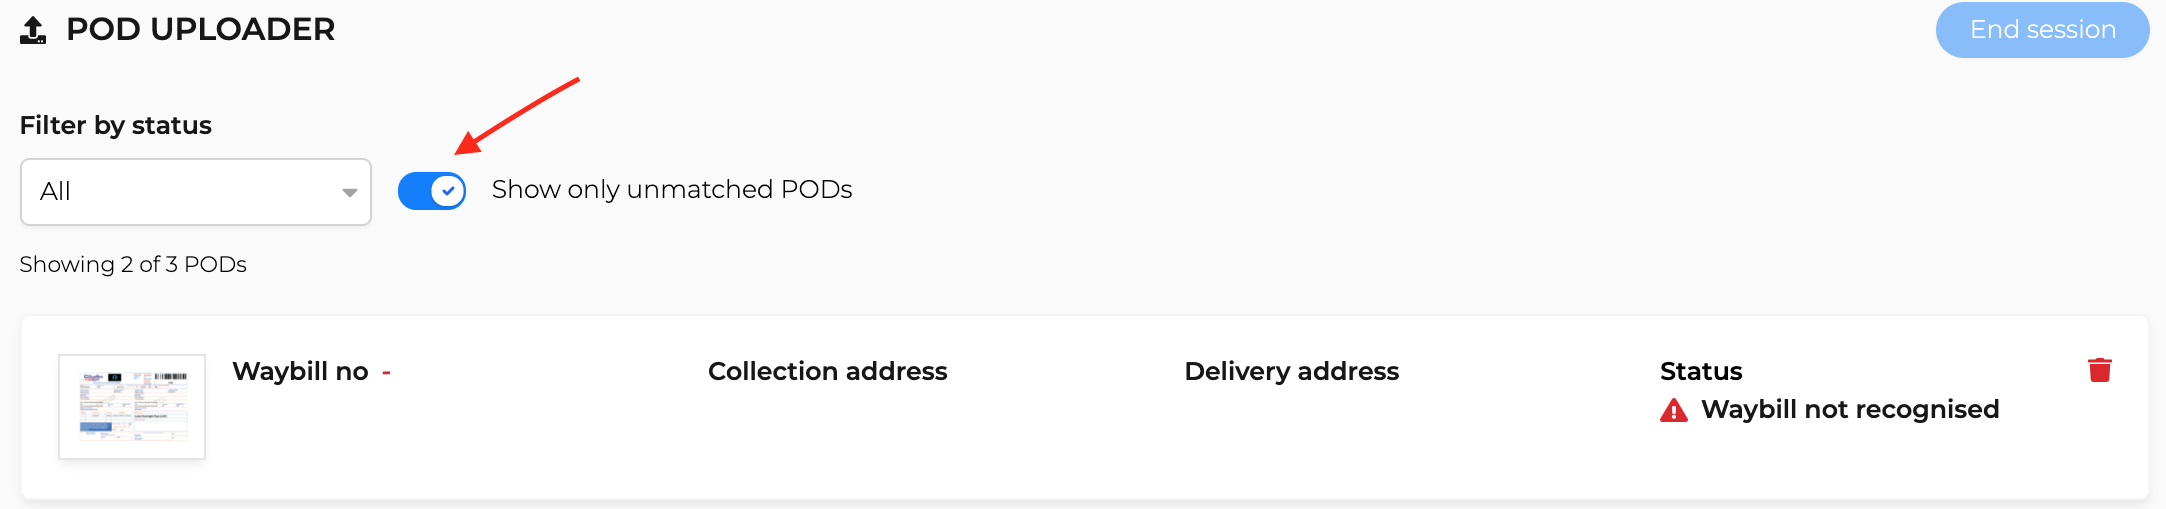
![]() Use the slider or filters to easily find all unmatched PODs.
Use the slider or filters to easily find all unmatched PODs.
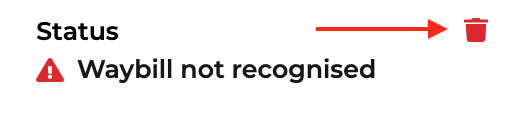
Click on the remove icon ![]() on the selected waybill to remove it from the upload session.
on the selected waybill to remove it from the upload session.


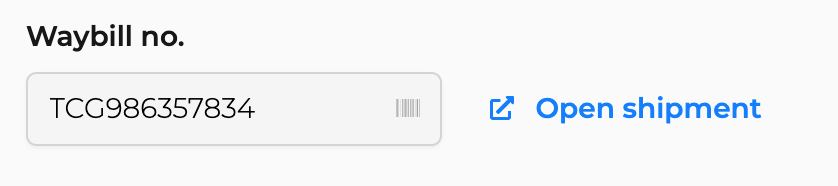
View your changes to the shipment by clicking on Open shipment
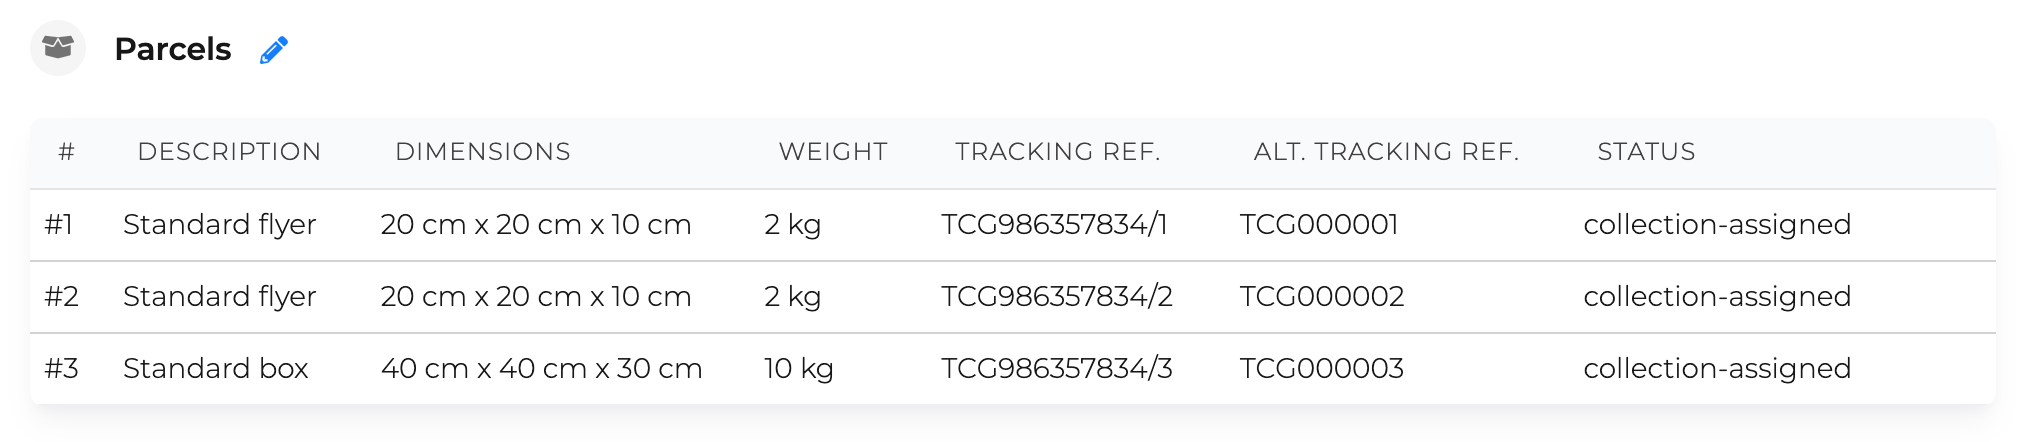
![]() All changes to the shipment and its billing are automatic and will reflect immediately.
All changes to the shipment and its billing are automatic and will reflect immediately.