


Then, choose the relevant service type to determine how fast the shipment should be delivered.
![]() Service level rates are determined by the dimensions of the parcel entered in the above step.
Service level rates are determined by the dimensions of the parcel entered in the above step.
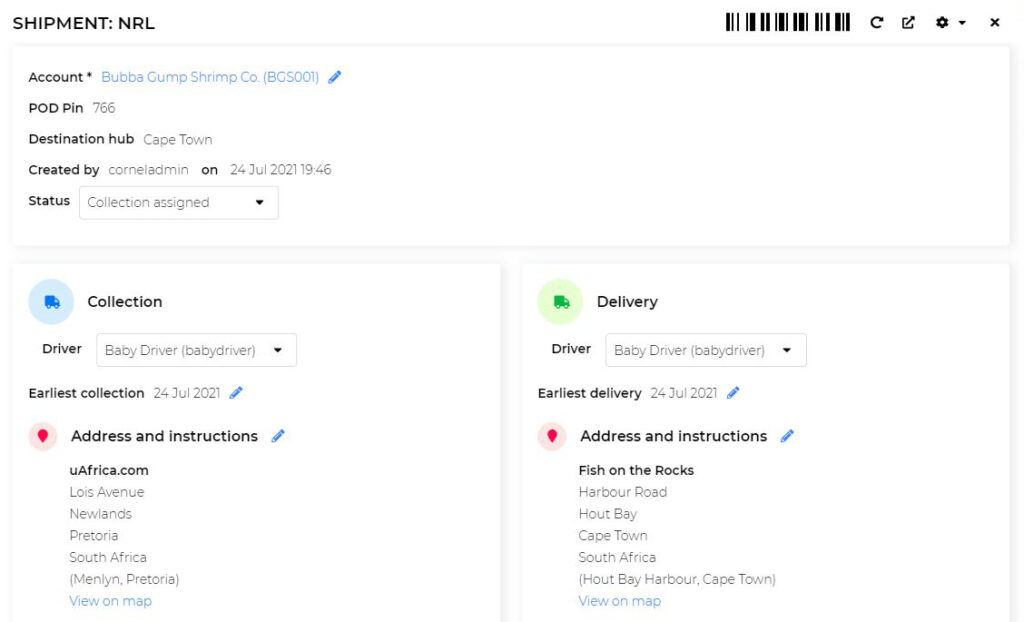
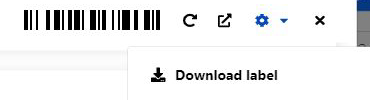
Select the relevant waybill and open to view the shipment details.
- Open the gear icon
 in the top right corner of the screen.
 - Click on Download waybill.
- A PDF file will download to your computer.
- Open the file to view the waybill information.
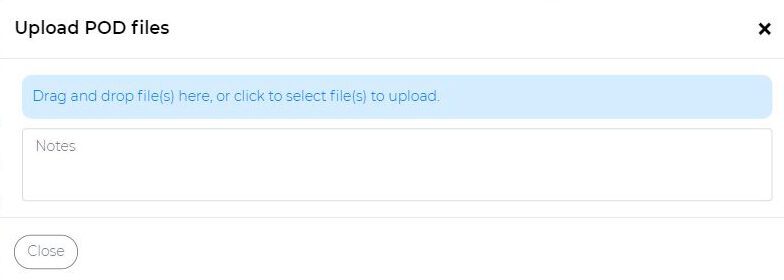
Select the relevant waybill and open it to view the shipment details.
- Open the gear icon in the top right corner of the screen.
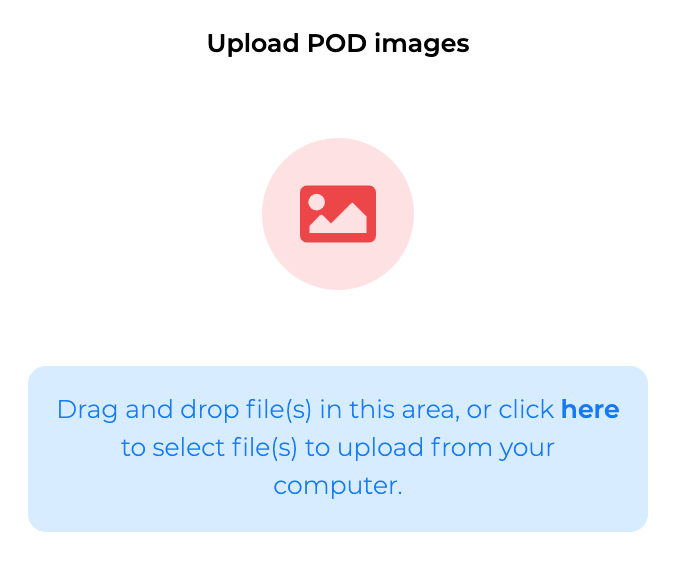
- Click on Manage POD files.
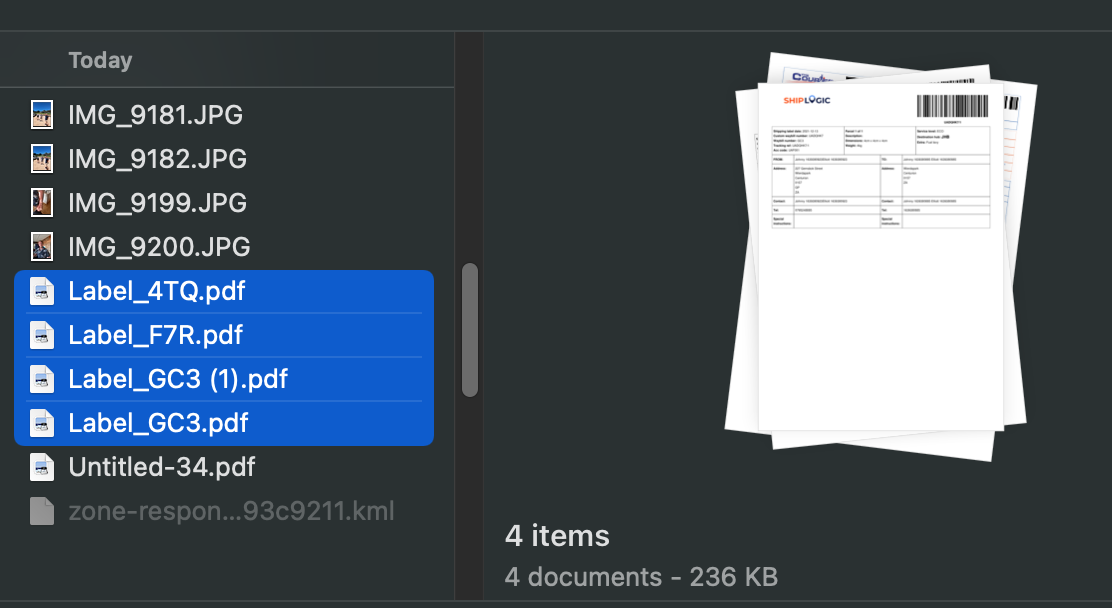
- Drag and drop any PDF or Image file(s) or click to open your documents.
- Wait for the file to load and then click on Save to complete the upload.
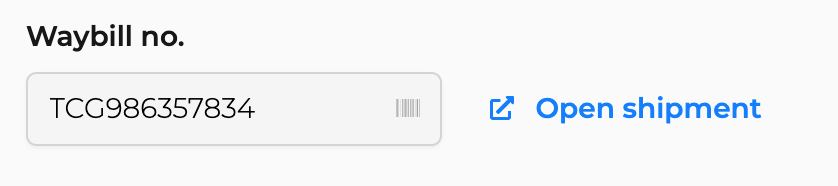
![]() POD files will be available in the shipment’s tracking events to view and access when needed.
POD files will be available in the shipment’s tracking events to view and access when needed.
Select the relevant waybill and open to view the shipment details.
- Open the gear icon in the top right corner of the screen.
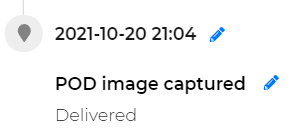
- Click on View tracking events.
Select the relevant waybill and open to view the shipment details.
- Open the gear icon in the top right corner of the screen.
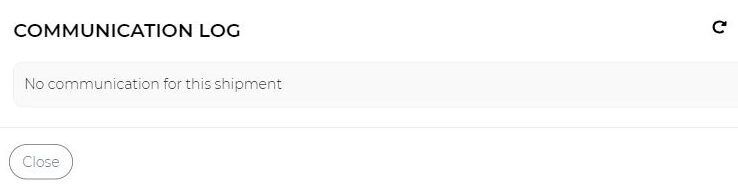
- Click on View communication log.
Select the relevant waybill and open to view the shipment details.
- Open the gear icon in the top right corner of the screen.
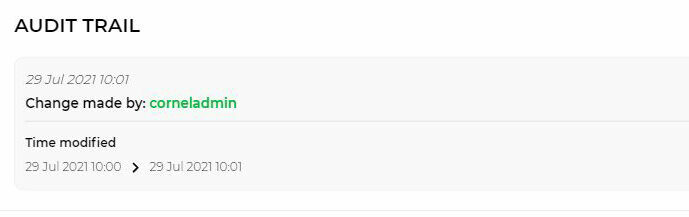
- Click on View audit trail.
Select the relevant waybill and open to view the shipment details.
- Open the gear icon in the top right corner of the screen.
- Click on Duplicate shipment.
- Create a new shipment with the same shipping details
Select the relevant waybill and open to view the shipment details.
- Open the gear icon in the top right corner of the screen.
- Click on Return this shipment.
- A new shipment is created where the collection and delivery details are swapped, ready to be returned to the sender.
- Note the new waybill number assigned to the returned shipment.
![]() Note the new waybill number assigned to the returned shipment.
Note the new waybill number assigned to the returned shipment.
Select the relevant waybill and open to view the shipment details.
- Open the gear icon in the top right corner of the screen.
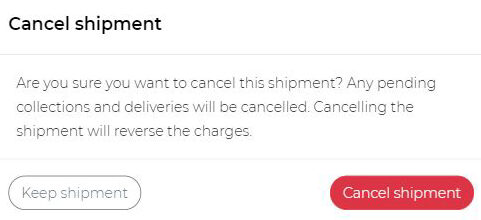
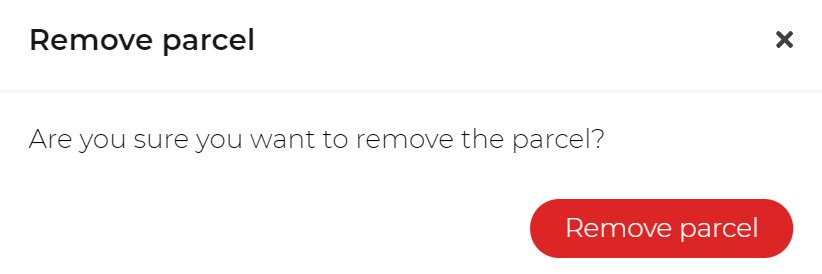
- Click on Cancel shipment.
- Read the pop-up carefully and either cancel or keep the shipment.
![]() Please note:
Please note:
- Cancelling a shipment before collection will not incur any costs.
- Charges will still apply if a shipment is cancelled after collection
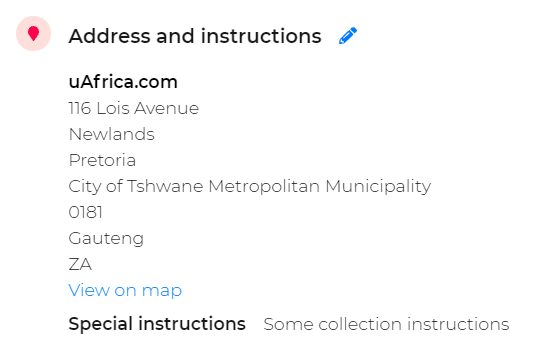
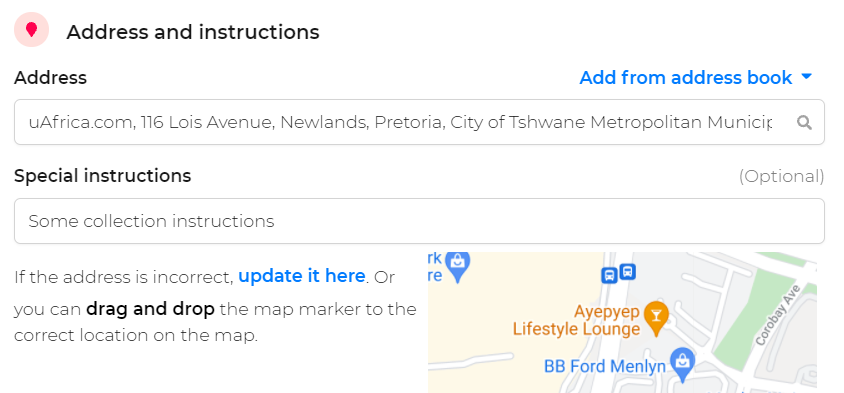
Select the relevant waybill and open it to view the shipment details.
Edit the collection/delivery address by clicking on the edit icon ![]() . Enter the new address and click on Save in the bottom right corner.
. Enter the new address and click on Save in the bottom right corner.
Select and open the relevant waybill to view the shipment details, then scroll to the Parcel Details section and click on the ![]() icon to edit the parcel details.
icon to edit the parcel details.
Make the necessary changes and click on Save in the bottom right corner to finalise the changes.
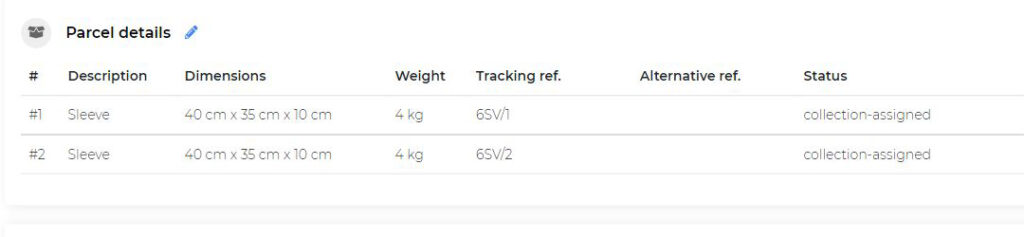
Make the necessary changes and click on Save in the bottom right corner to finalise the changes.
![]() Changes made to dimensions and weight will affect the rate of the entire shipment. Confirm the new rate to complete the change.
Changes made to dimensions and weight will affect the rate of the entire shipment. Confirm the new rate to complete the change.
Select the relevant waybill and open it to view the shipment details.
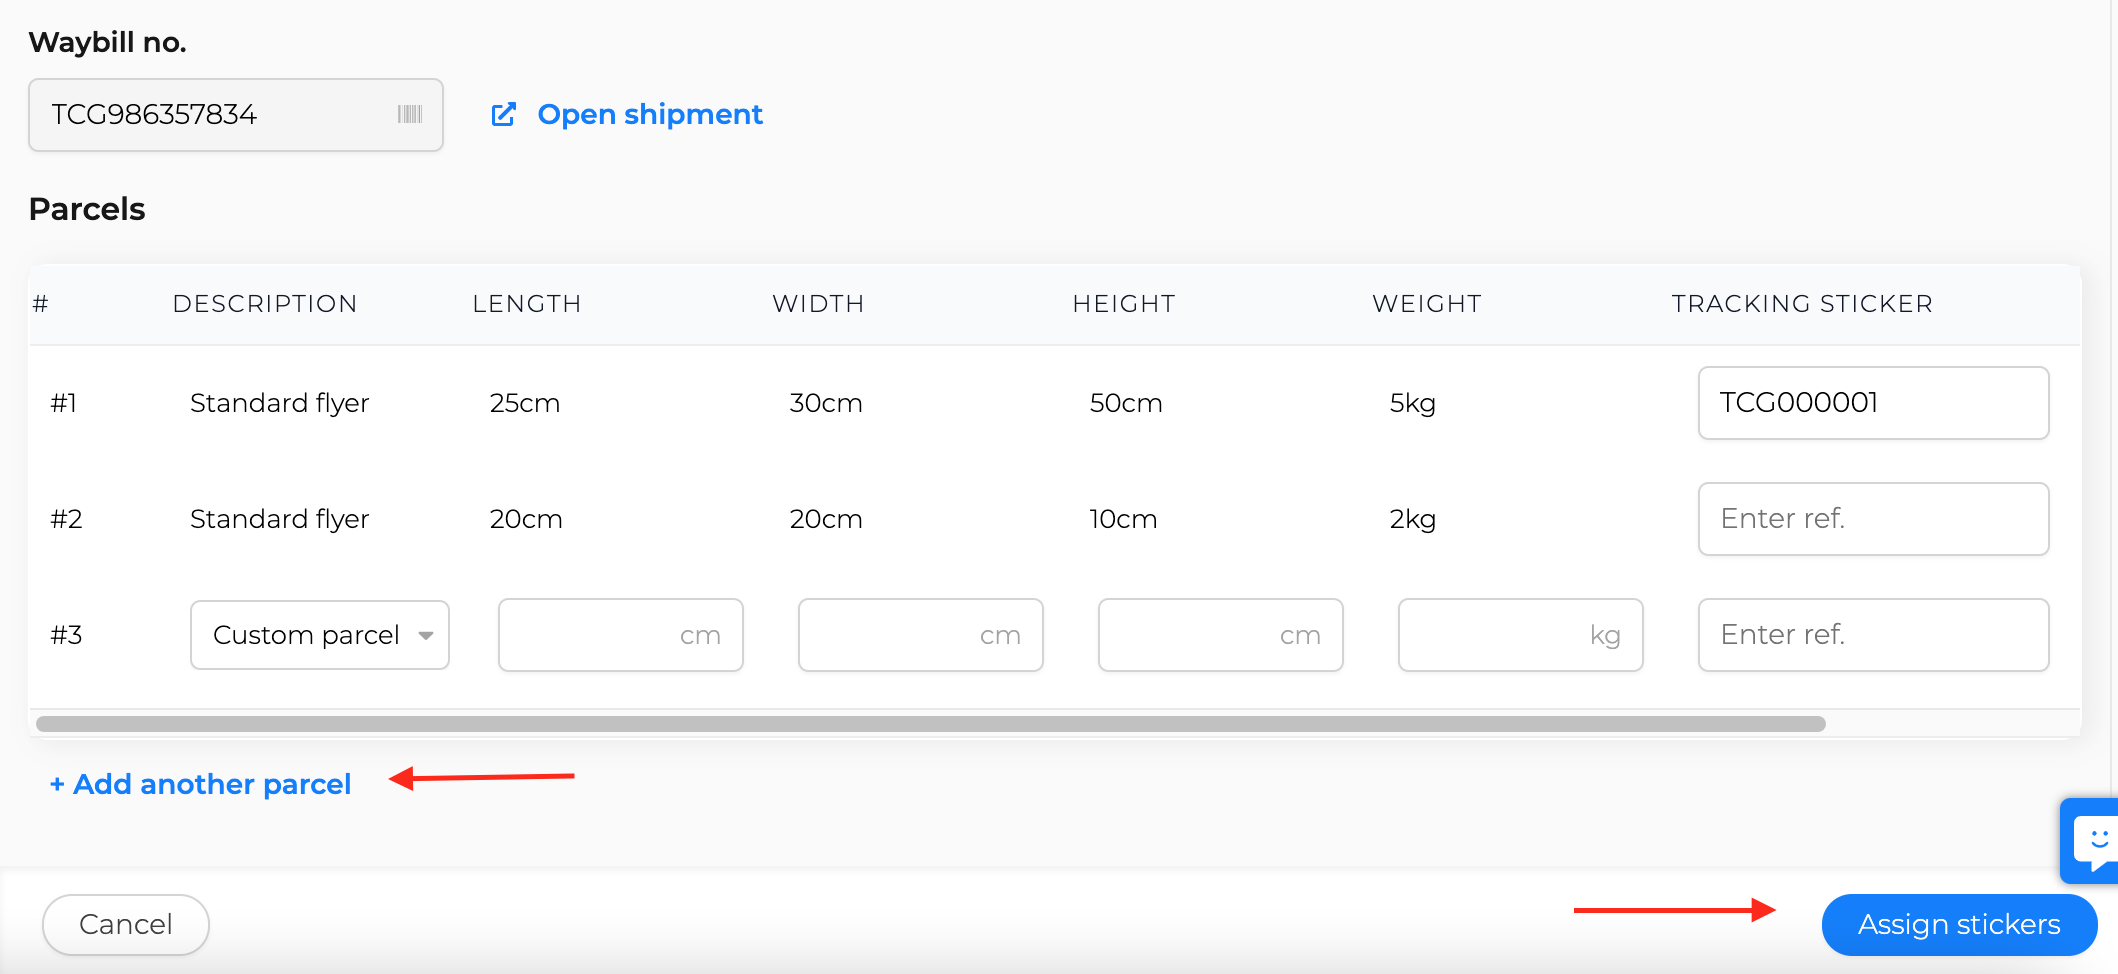
Scroll to the Parcel details section, click on the ![]() icon and then click on Add another parcel
icon and then click on Add another parcel

Select the relevant waybill and open it to view the shipment details.
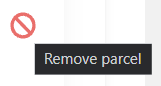
Scroll to the Parcels section, click on the icon ![]() to edit. Then click on the icon remove to delete the parcel from the shipment.
to edit. Then click on the icon remove to delete the parcel from the shipment.
Select the relevant waybill and open to view the shipment details.
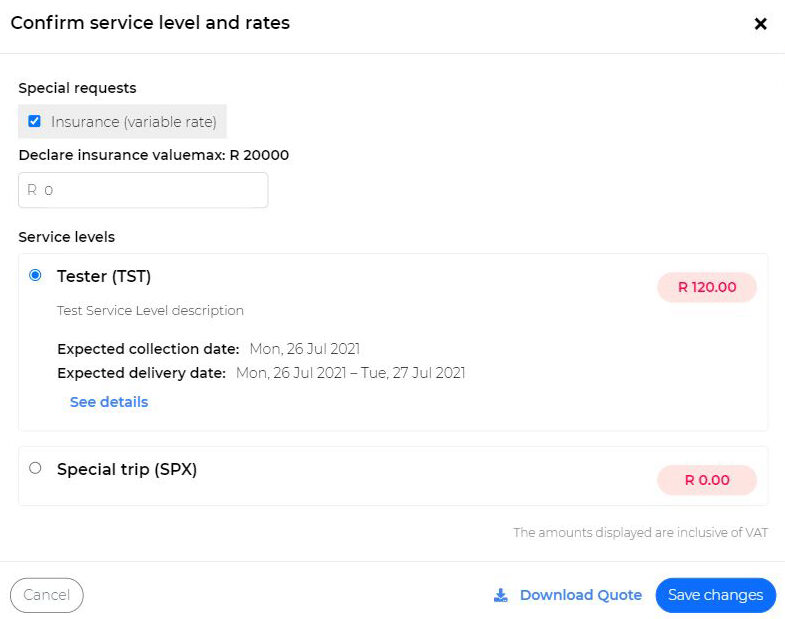
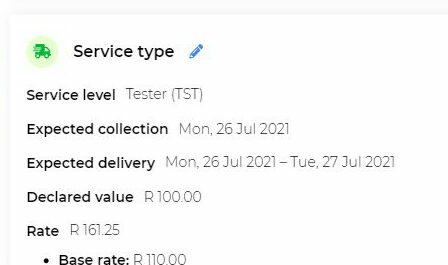
Scroll to the Service type section and click on the icon ![]() .
.
- View all relevant service levels for the shipment.
- Select and/or change the required service level.
- Save changes at the bottom.
![]() Note: Service levels can also be changed after editing parcel details.
Note: Service levels can also be changed after editing parcel details.


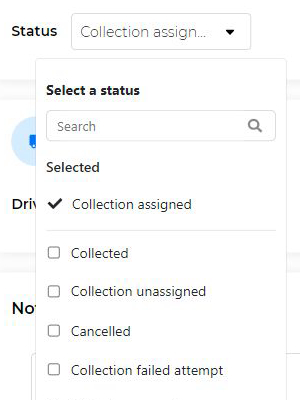
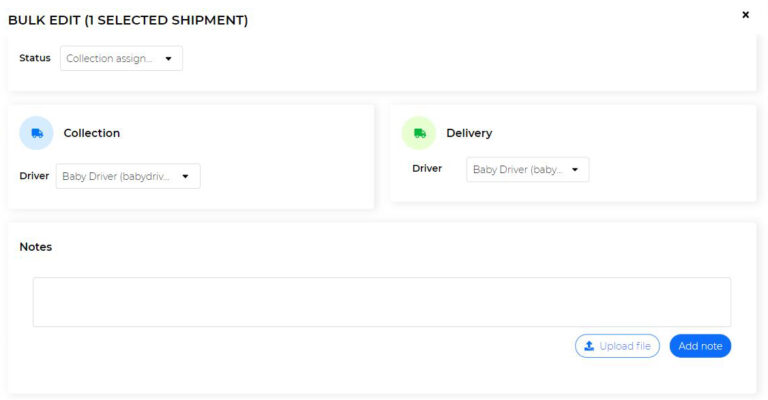
![]() Shipment notes are only visible to other admin users and not to the drivers assigned to the shipment.
Shipment notes are only visible to other admin users and not to the drivers assigned to the shipment.
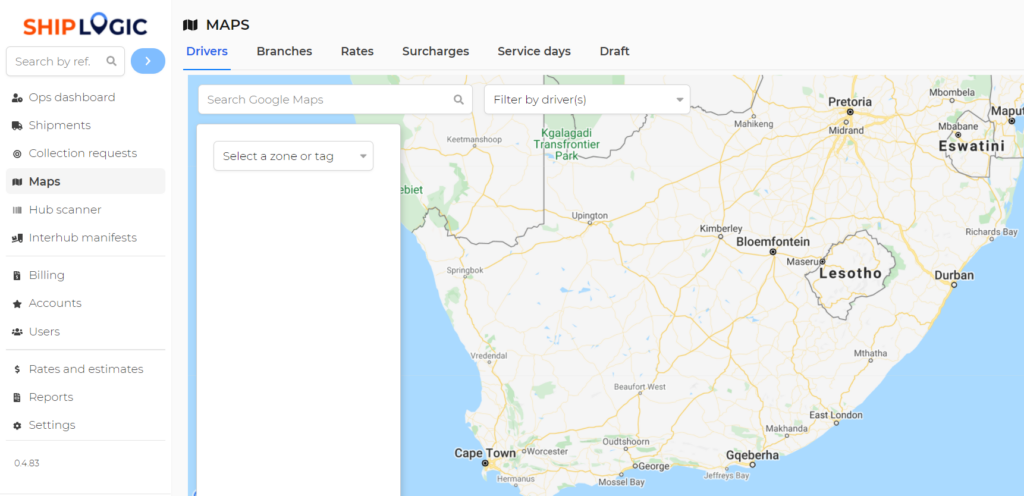
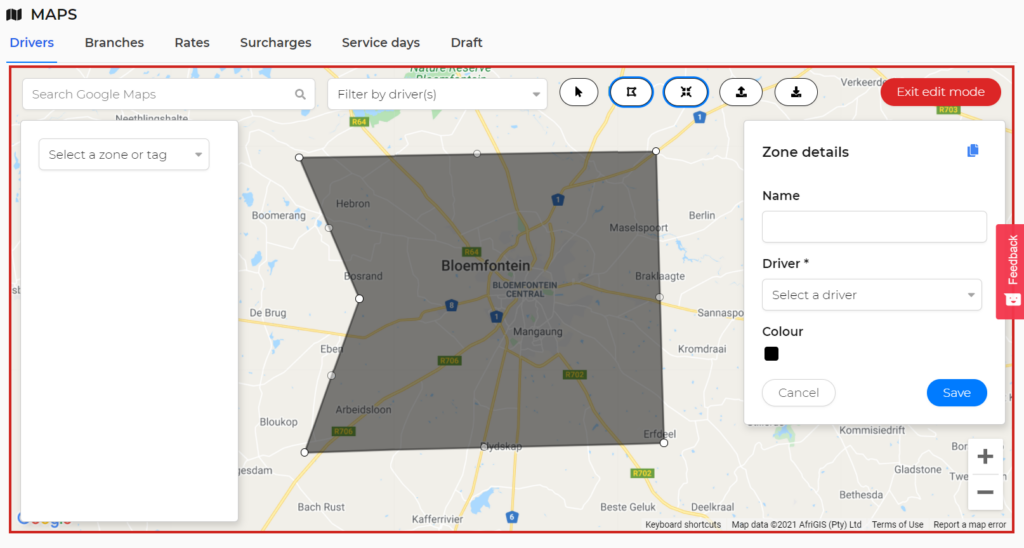
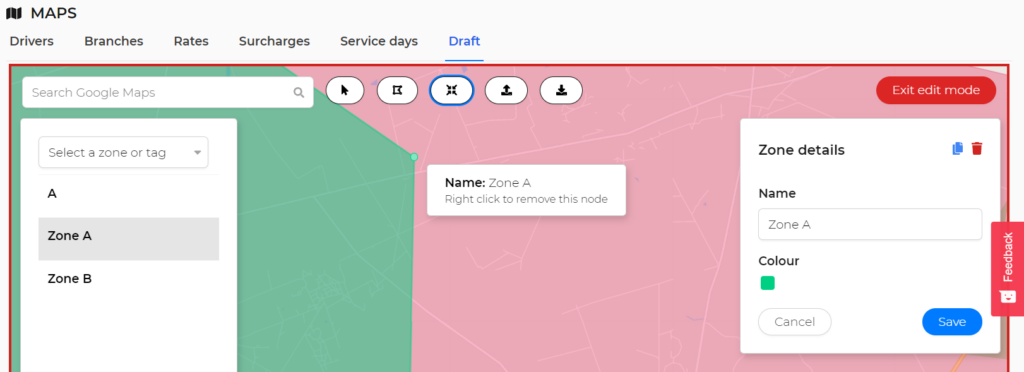
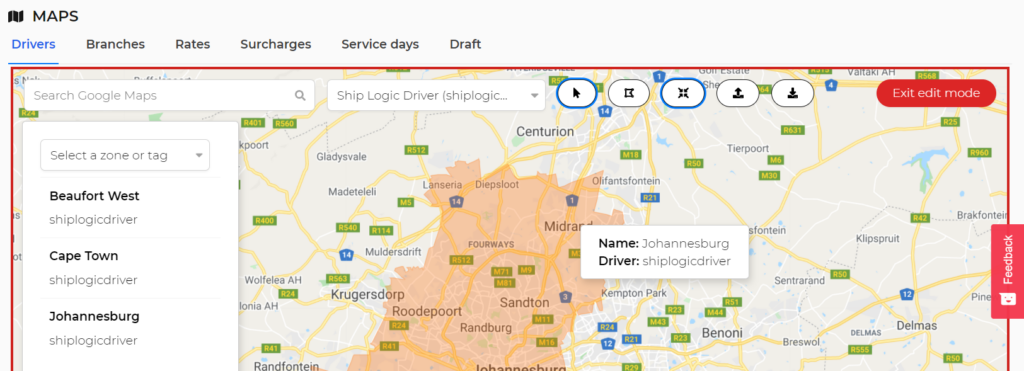
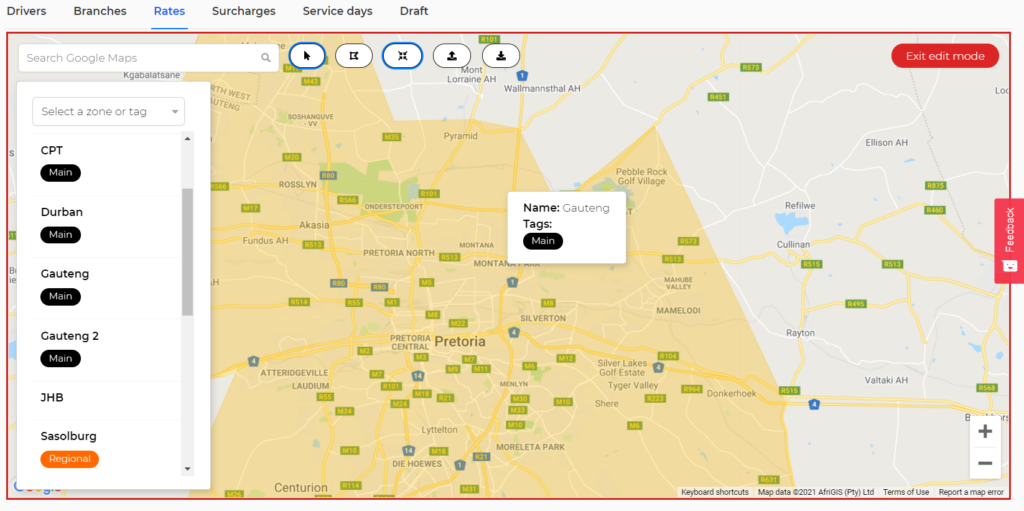
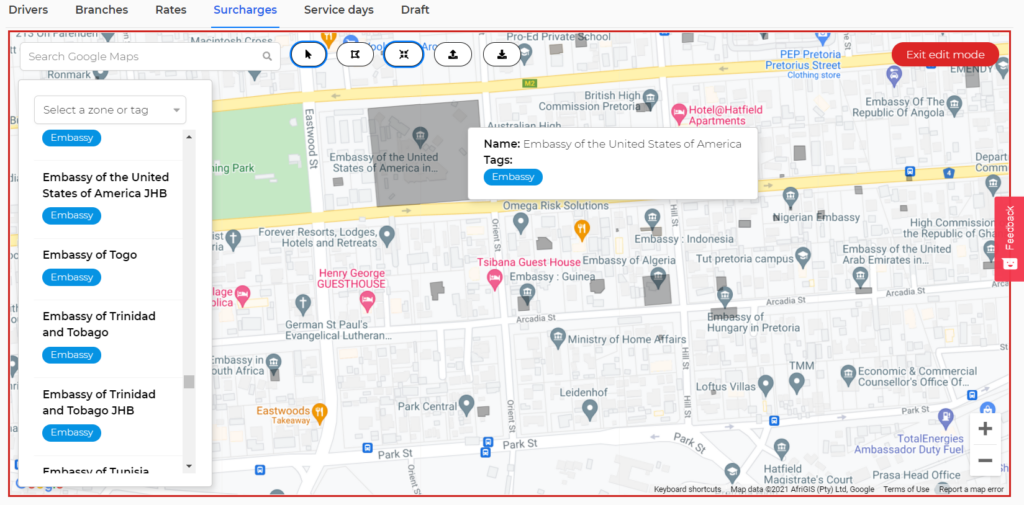
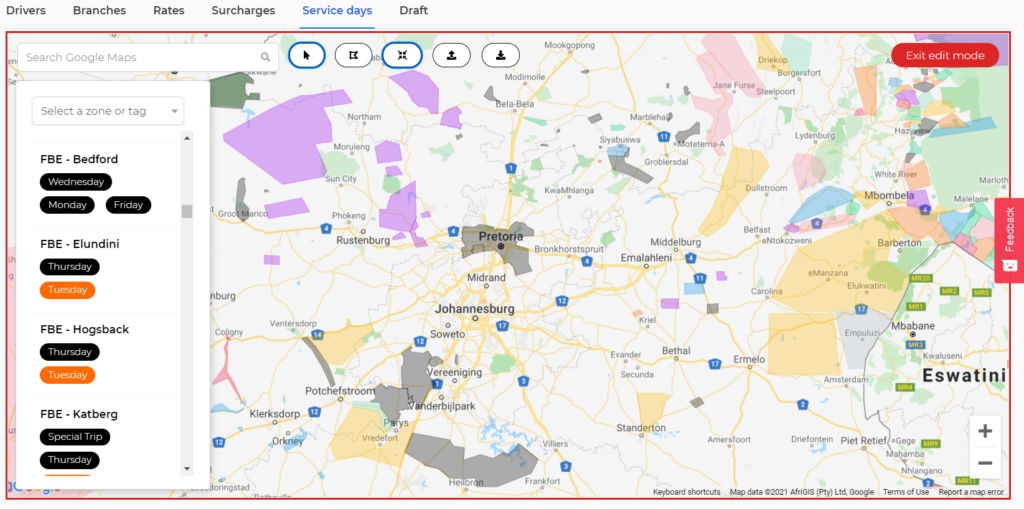
Go to the relevant map and click on Edit zones in the right-hand corner.
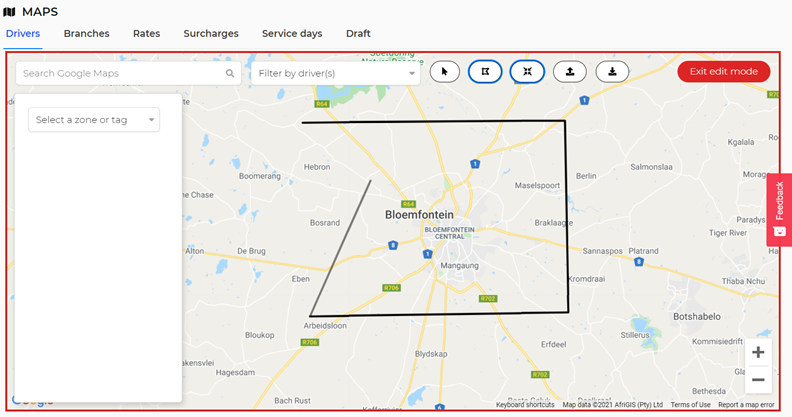
Once in edit mode, click on the draw tool icon ![]() next to the selector icon and then go to the spot on the map where you wish to draw the new zone.
next to the selector icon and then go to the spot on the map where you wish to draw the new zone.


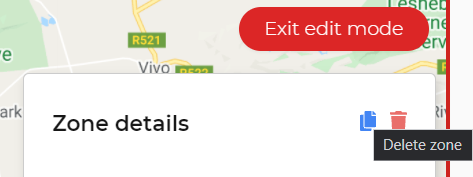
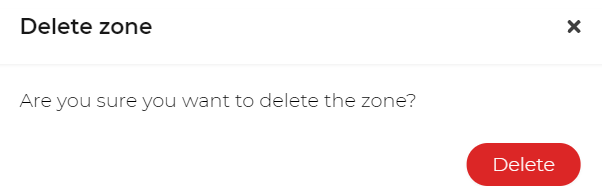
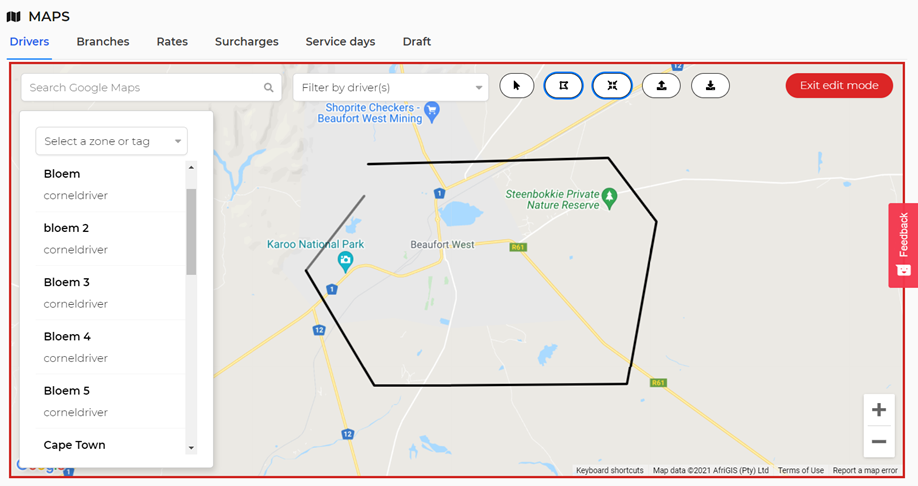
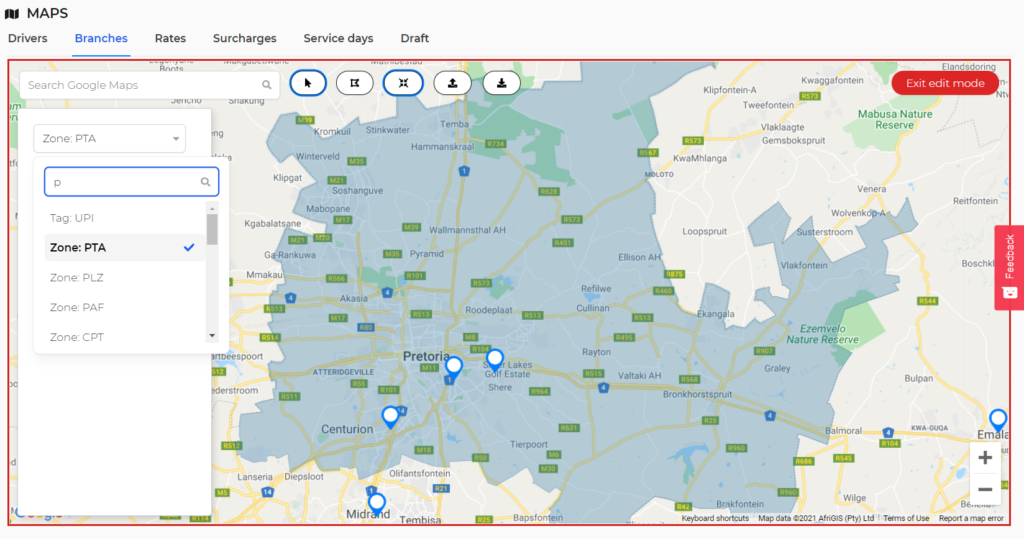
Open the relevant map and click on the Edit zones button in the top right-hand corner.
Select the zone you want to delete and click on the bin icon in the panel on the right ![]() .
.
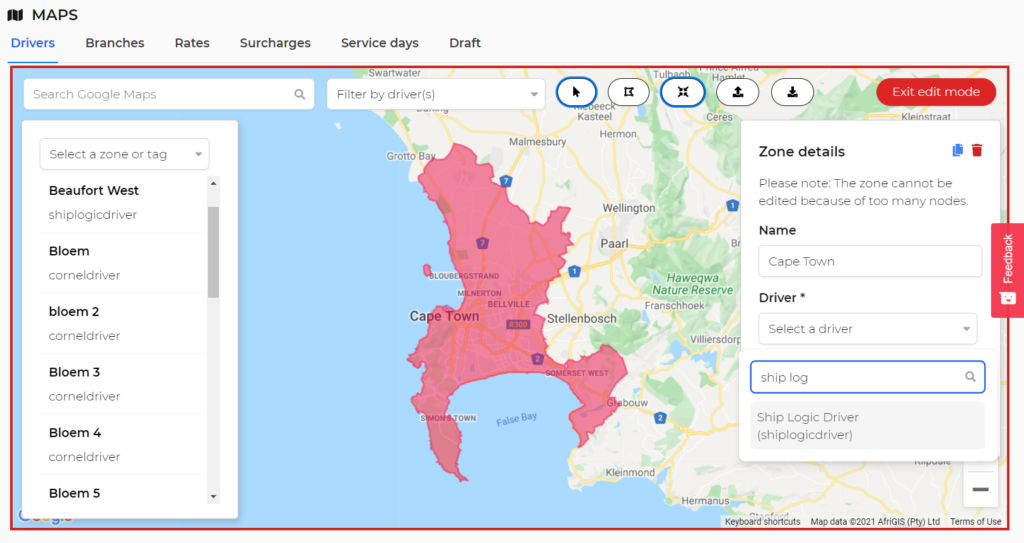
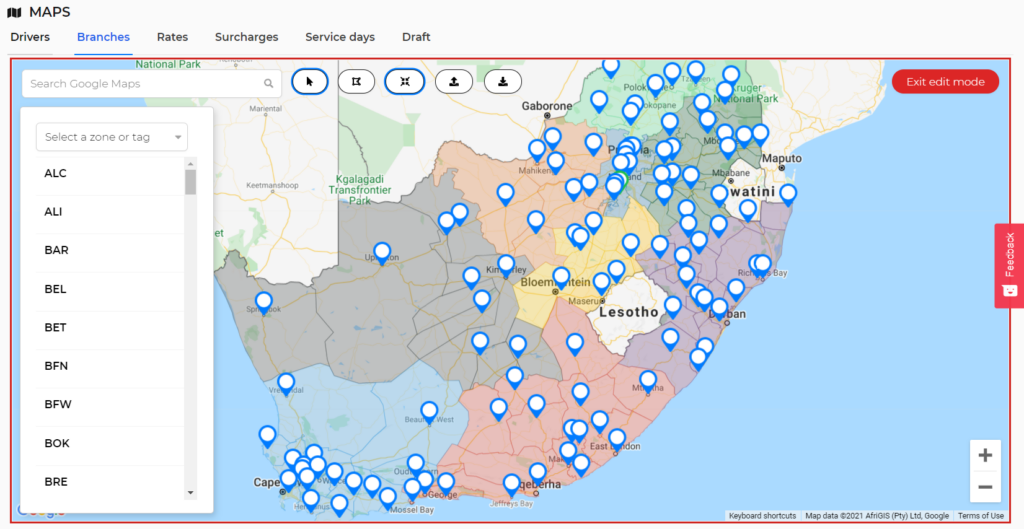
With Google Maps integrated into our powerful software, you can easily create your own zones and assign them to different drivers, eliminating the need to integrate with external maps software. This allows the system to seamlessly auto-assign new collections and deliveries to your drivers based on the zone in which the shipment address is located, freeing up valuable time for your operations managers to focus on problematic shipments. To make it even more exciting, these zones are completely editable in real-time, empowering you to refine your drivers’ zones or even to assign a different driver to a specific area if the primary driver is unavailable for that day. This ensures that your customers’ parcels are always collected and delivered no matter what the circumstances are.
In short, you’ll have a bird’s eye view of all your drivers, the locations of all shipments, and who is responsible for each shipment. If that’s not full control over your fleet, then we don’t know what is.
![]() Note: Drivers must be created as users before being assigned to zones.
Note: Drivers must be created as users before being assigned to zones.
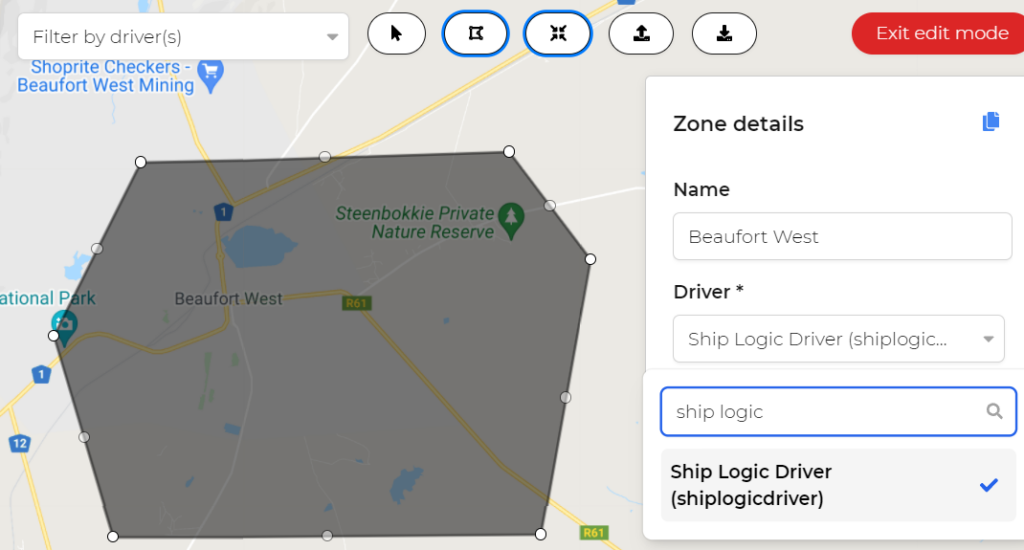
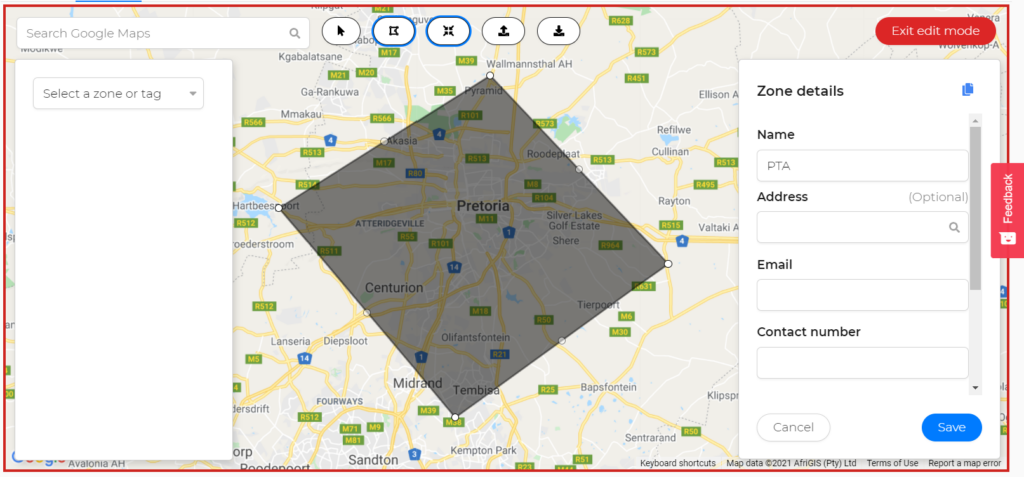
Once you’re in edit mode, click on the Draw tool icon at the top of the map ![]() . This tool allows you to draw a zone, assign a driver and add a colour to the zone.
. This tool allows you to draw a zone, assign a driver and add a colour to the zone.
Complete the zone details and assign a driver to the zone by selecting one from the drop-down.
![]() Drivers need to be added as users before they can be assigned to a new driver zone.
Drivers need to be added as users before they can be assigned to a new driver zone.
![]() These contact details will be needed when customers request special trips near this branch.
These contact details will be needed when customers request special trips near this branch.

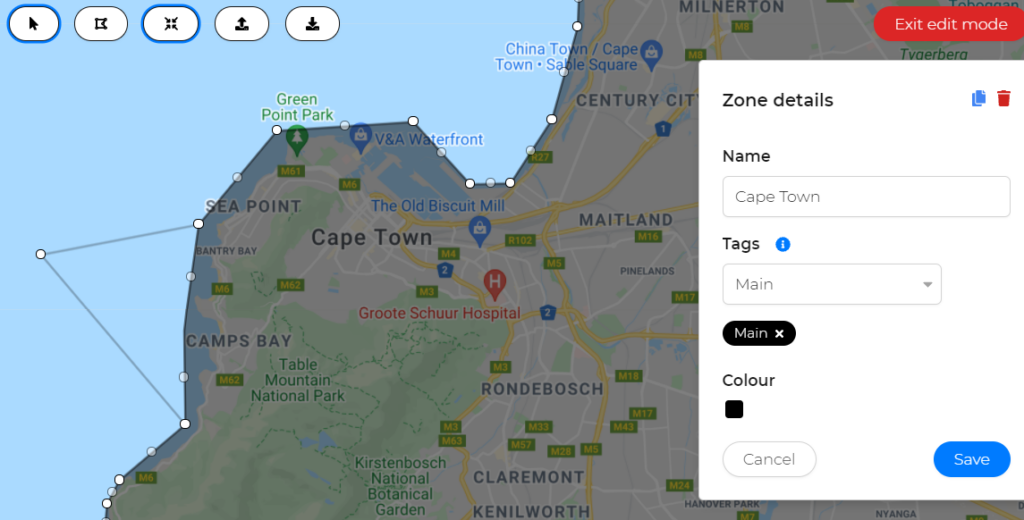
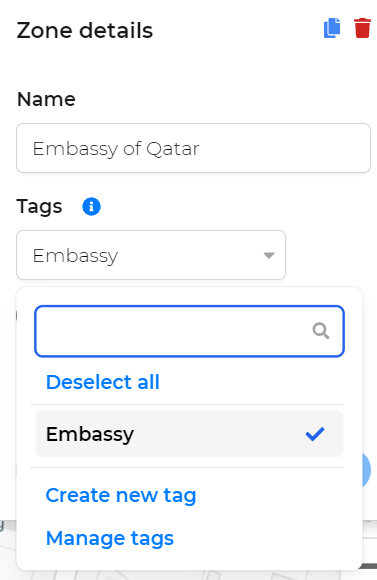
![]() Tags are used to identify zones when setting up rates and estimates. Create a tag and reuse the same tag across different zones to link zones to one rate or surcharge.
Tags are used to identify zones when setting up rates and estimates. Create a tag and reuse the same tag across different zones to link zones to one rate or surcharge.
![]() Click on Manage tags to go to the current maps’ tag page to edit and manage existing tags.
Click on Manage tags to go to the current maps’ tag page to edit and manage existing tags.

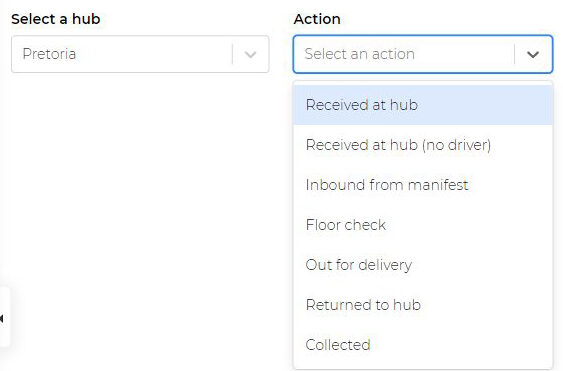
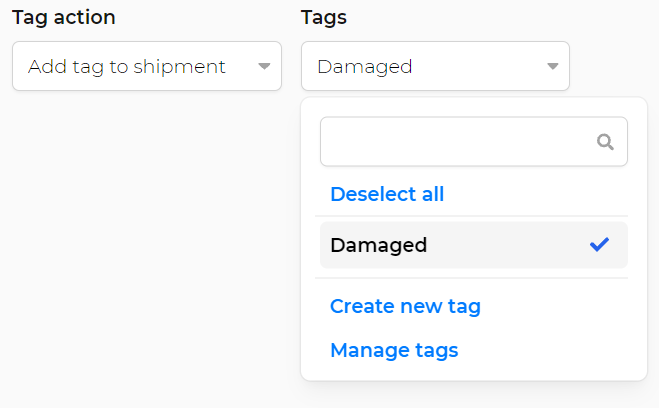
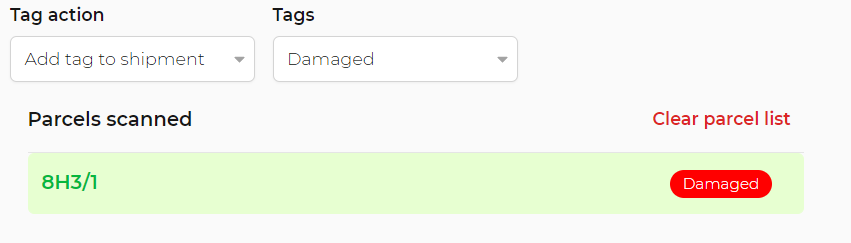
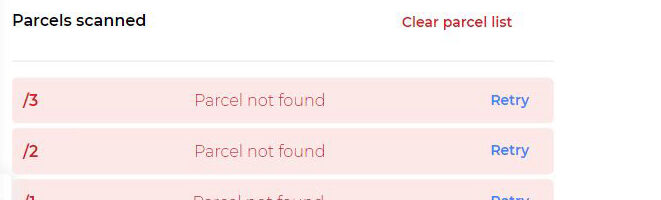
Go to Hub scanner in the left-hand navigation menu and select a hub from the drop-down. If the logged-in user is limited to the branch, then there will be no branch option as the hub scanner will automatically be linked to the chosen branch.
More drop-down menus will appear as you complete the information.
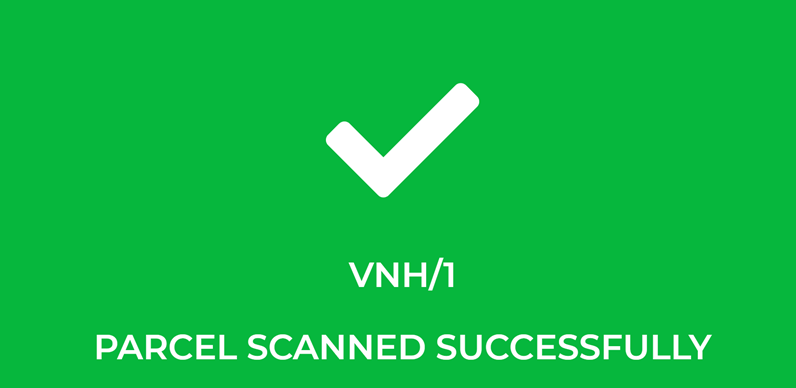
![]() If plugged in, the scanner will become active and ready for use.
If plugged in, the scanner will become active and ready for use.


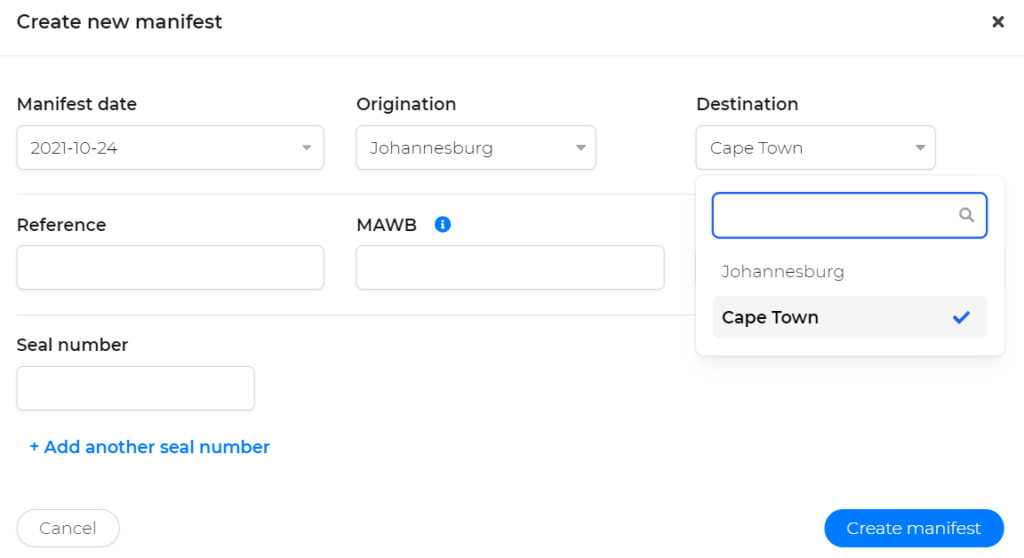
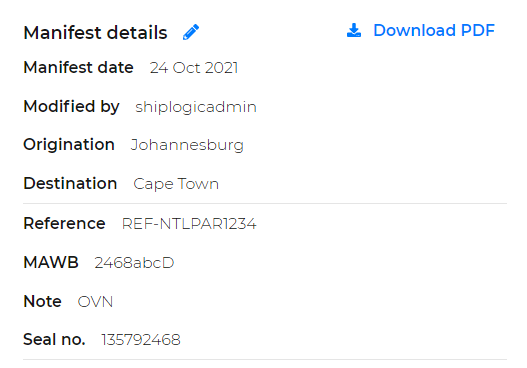
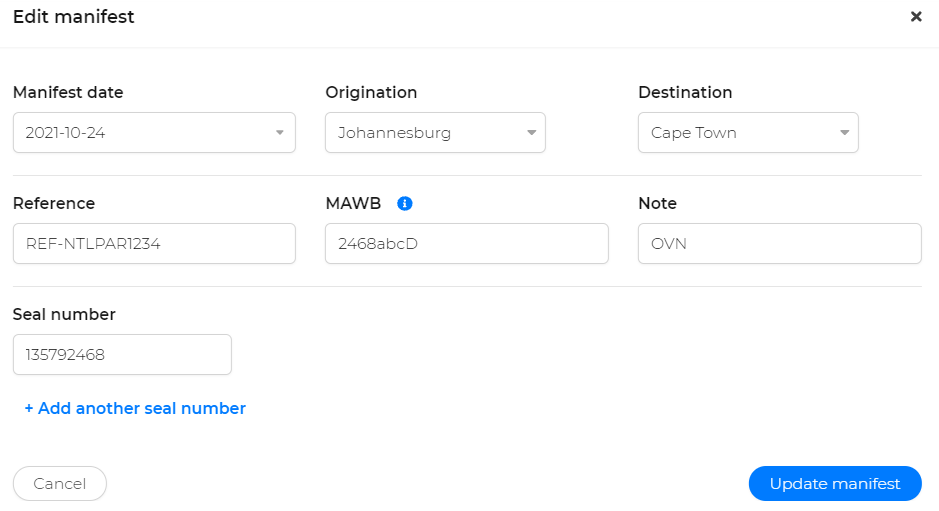
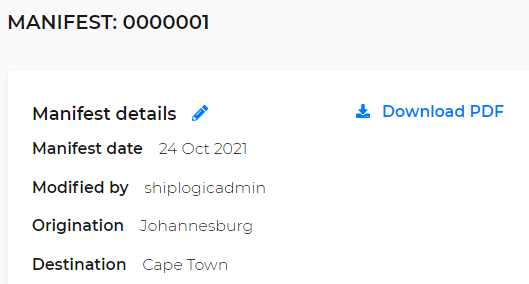
Open the manifest you wish to edit and click on the edit icon ![]() next to Manifest details.
next to Manifest details.

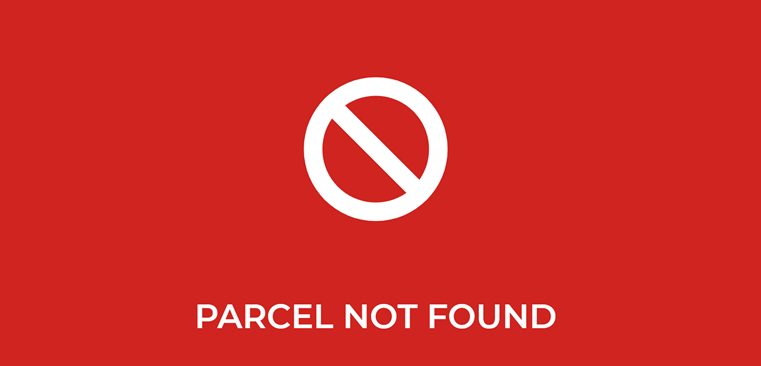
![]() Please note: You can manually enter the shipment/parcel reference if the scanner is not available or not working.
Please note: You can manually enter the shipment/parcel reference if the scanner is not available or not working.
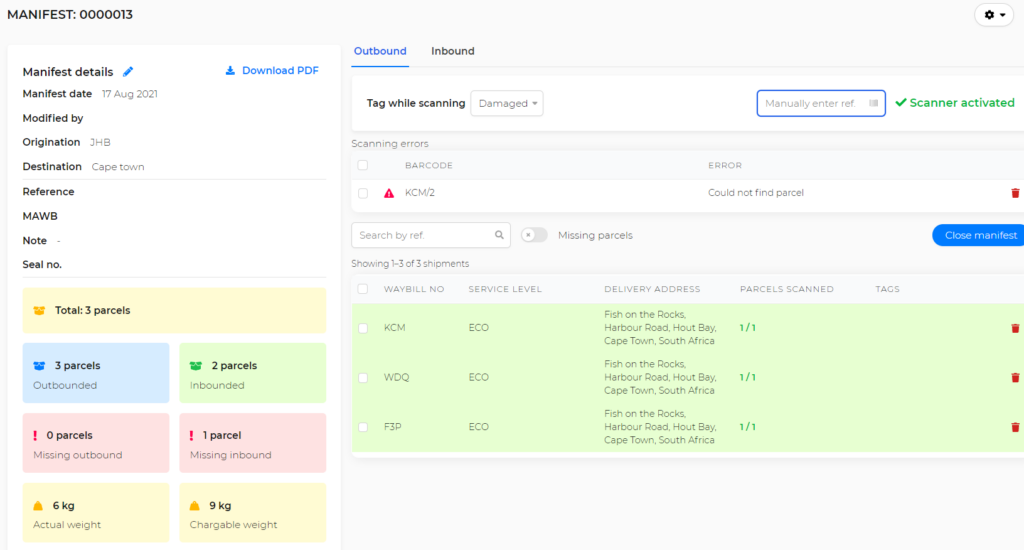
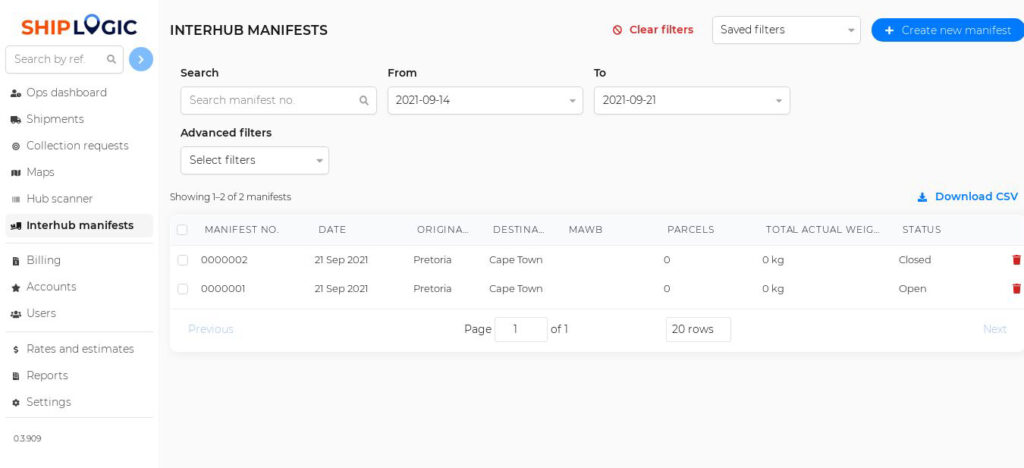
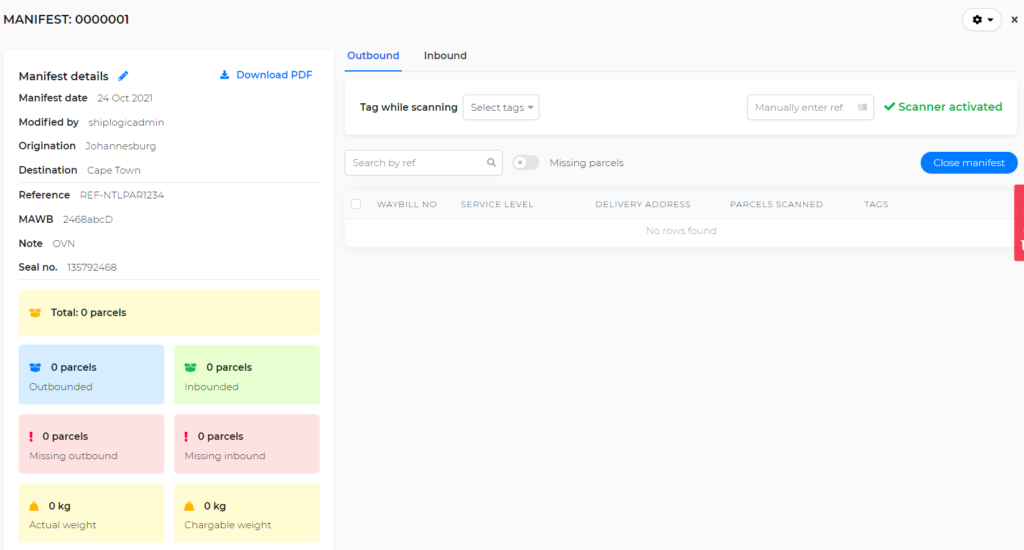
Open the relevant manifest and go to the right-hand side of the page.
Select the toggle “Missing parcels” and view all the parcels still outstanding in the list below.
![]()

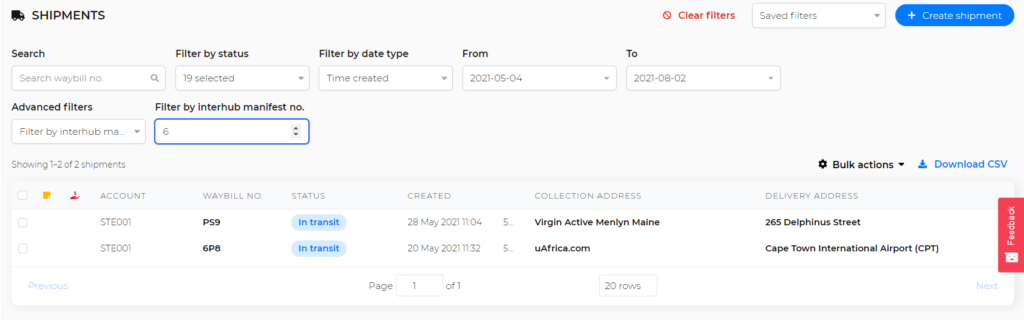
Open the relevant manifest and go to the additional settings icon ![]() in the top right-hand corner of the screen.
in the top right-hand corner of the screen.
Click on View on shipments page to go to the main page.

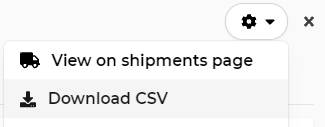
Open the relevant manifest and go to the additional settings icon ![]() in the top right-hand corner of the screen.
in the top right-hand corner of the screen.
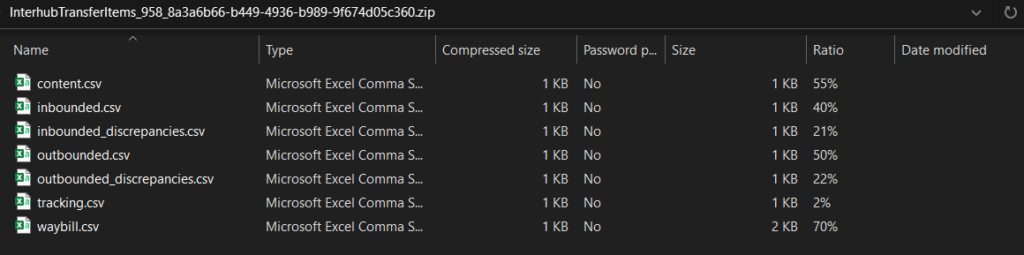
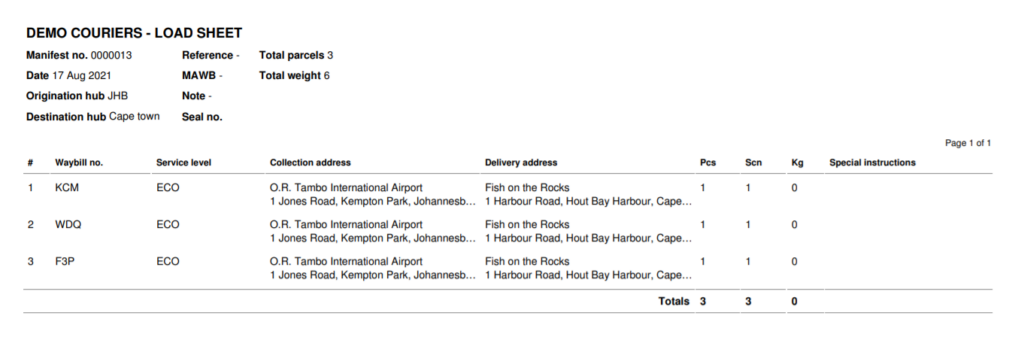
Choose the Download CSV option.
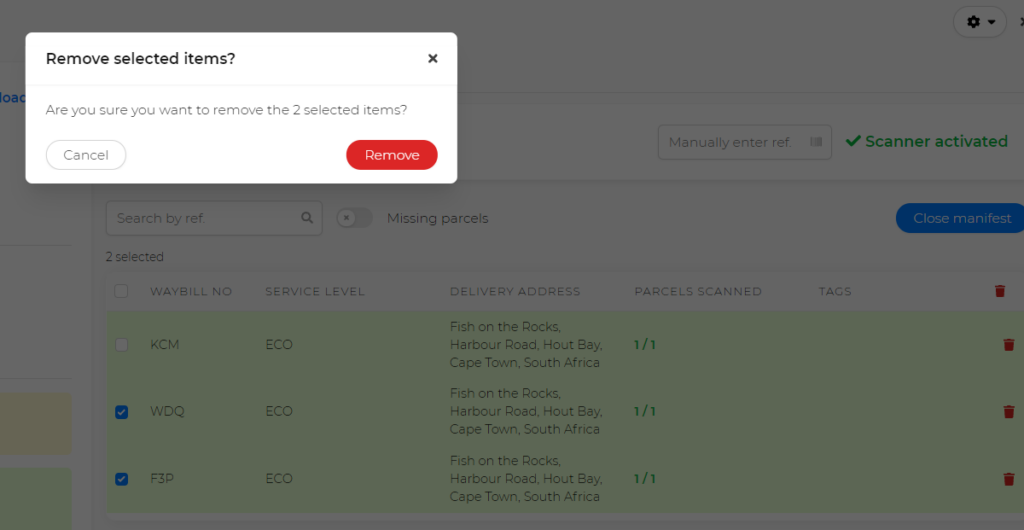
Select the manifest(s) you wish to remove and then click on the trash icon found on the right-hand side of the page ![]() .
.


Click on the trash icon ![]() next to the shipment you wish to remove and confirm the removal.
next to the shipment you wish to remove and confirm the removal.

![]()
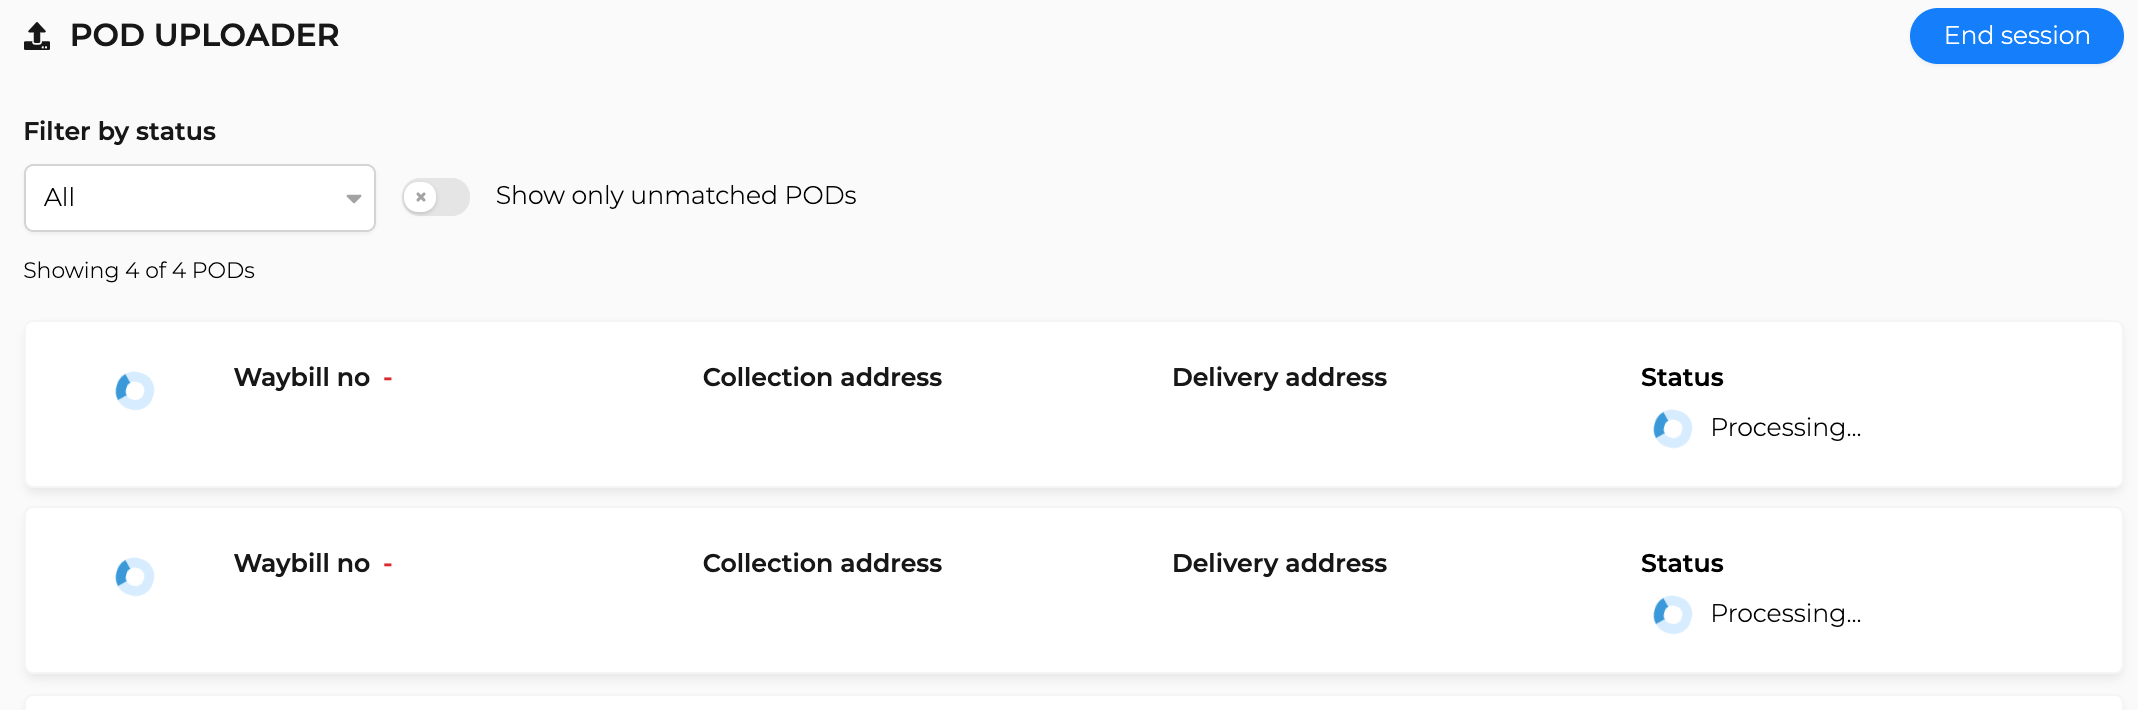
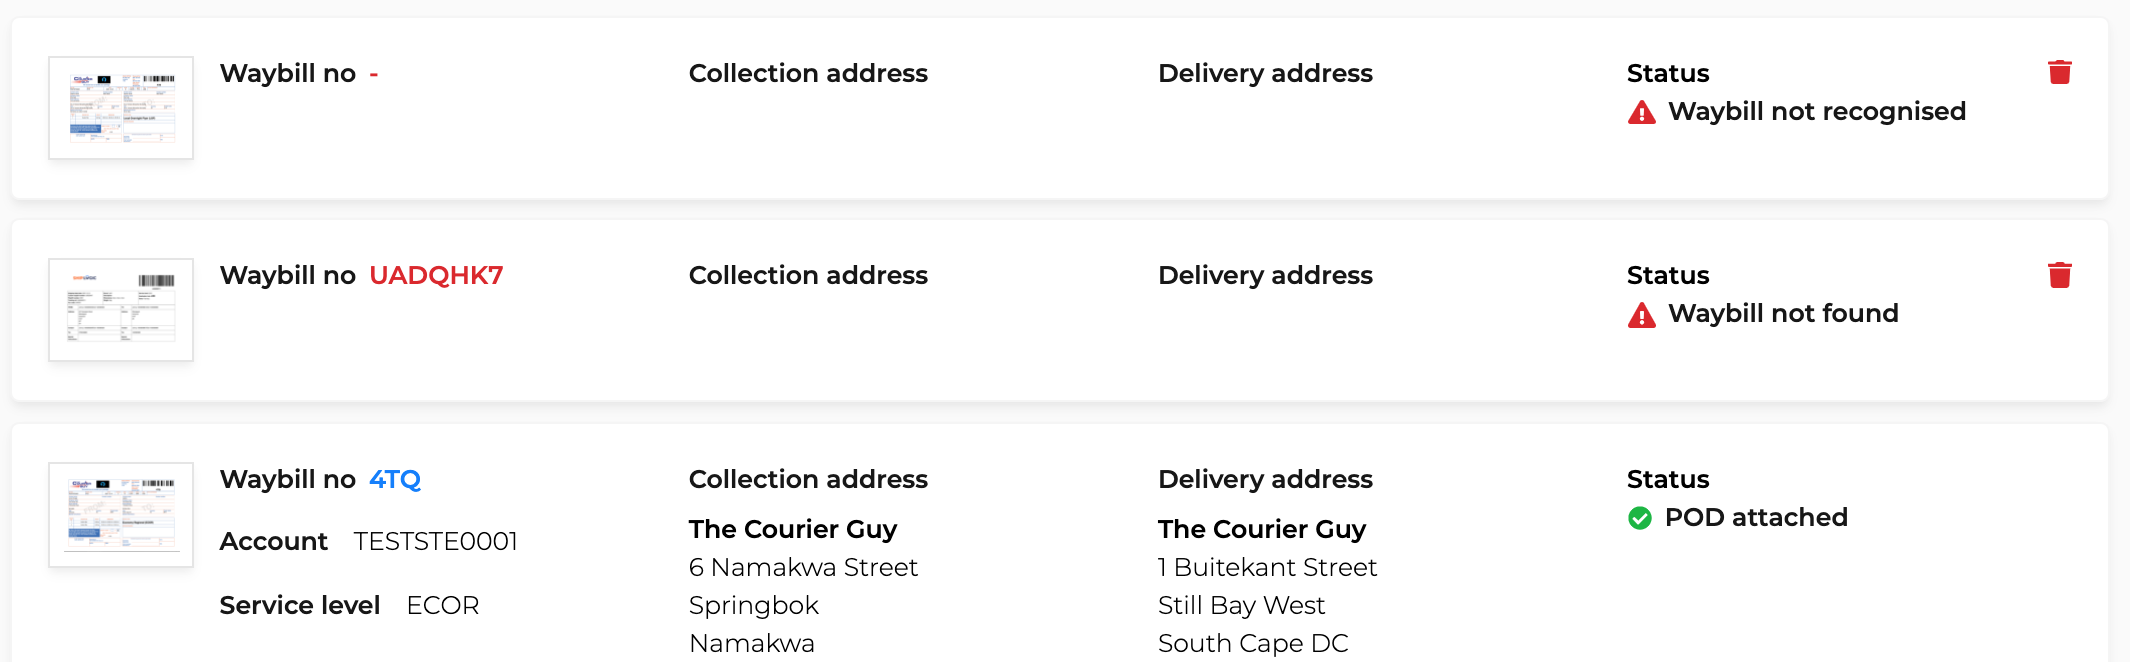
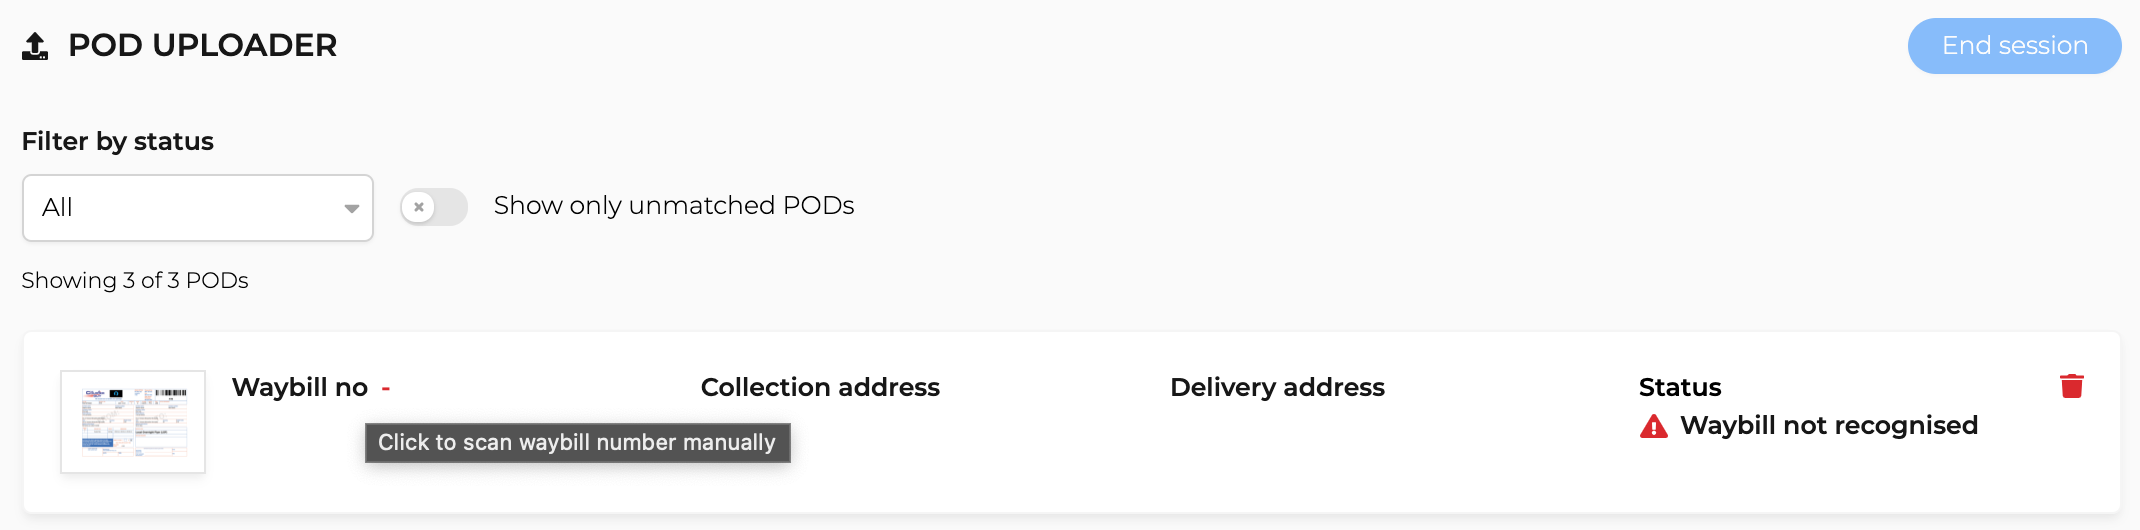
This step is only applicable to unsuccessful uploads.
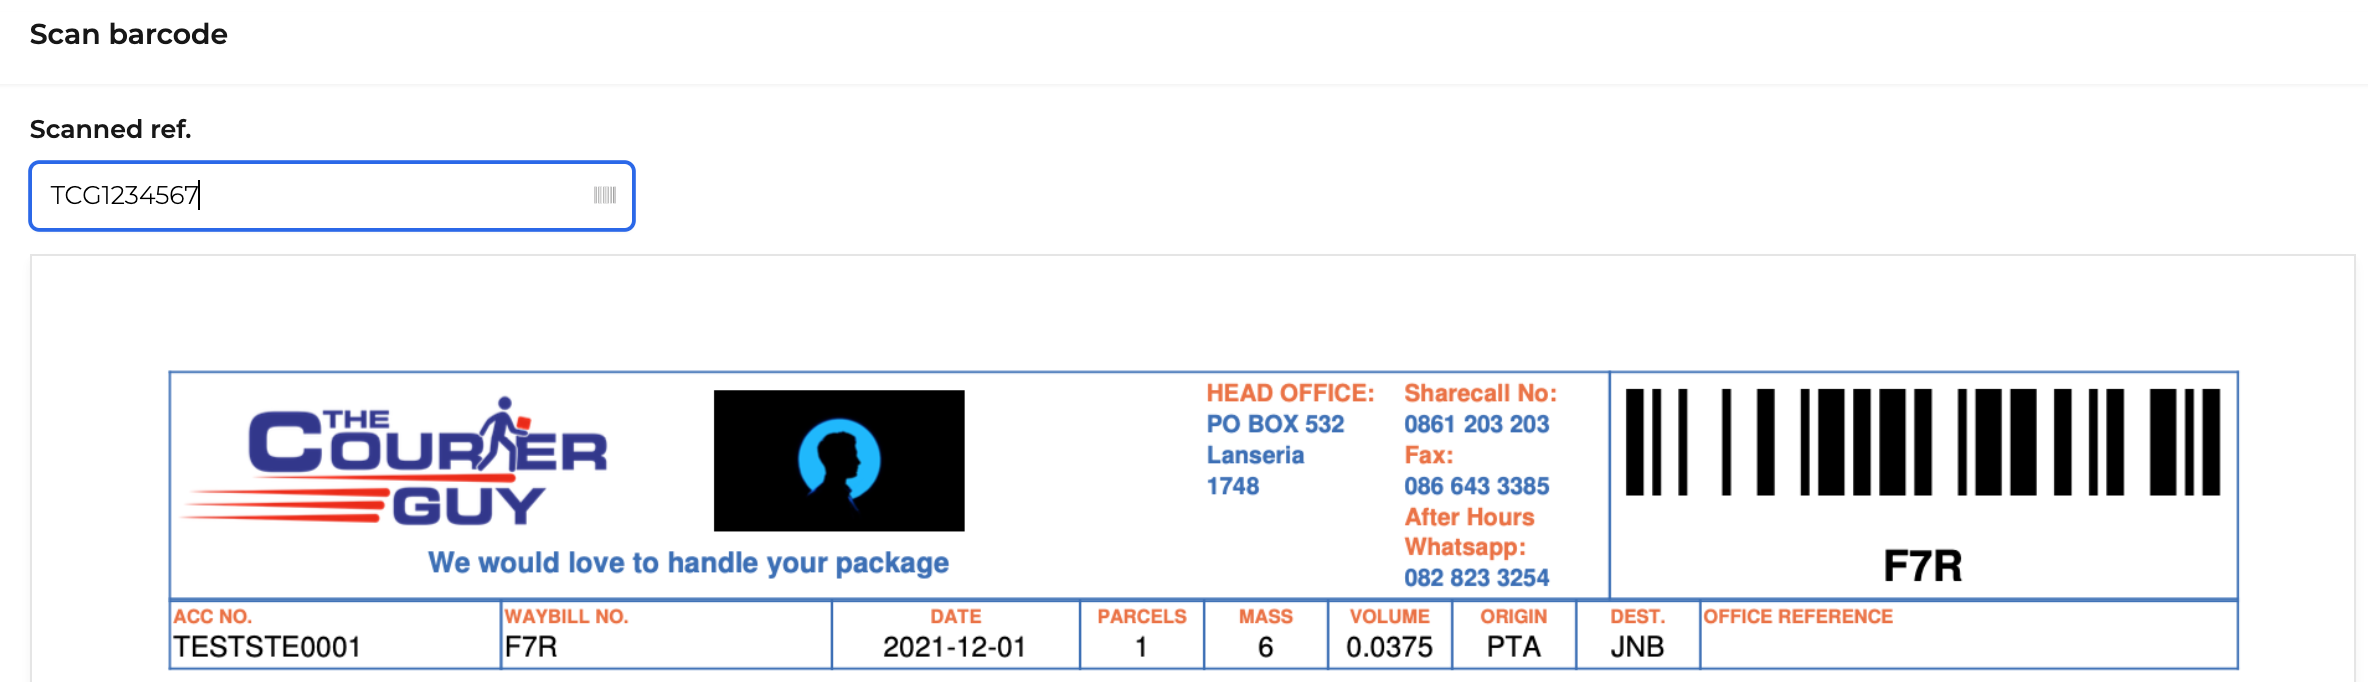
Manually scan or enter the correct waybill number to link the POD to the relevant shipment.
Click on the failed upload to open the manual entry page.
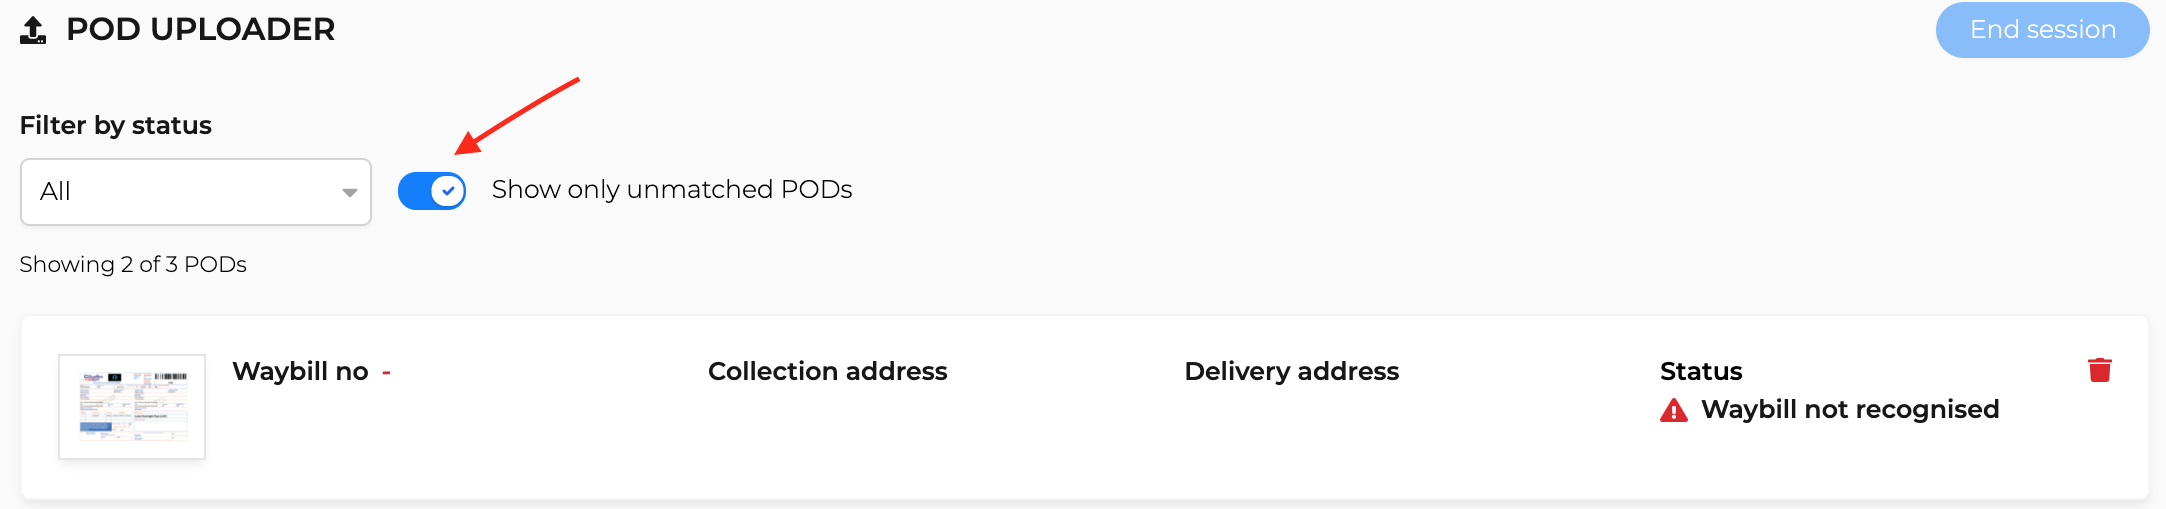
![]() Use the slider or filters to easily find all unmatched PODs.
Use the slider or filters to easily find all unmatched PODs.
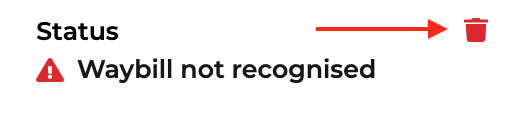
Click on the remove icon ![]() on the selected waybill to remove it from the upload session.
on the selected waybill to remove it from the upload session.

View your changes to the shipment by clicking on Open shipment
![]() All changes to the shipment and its billing are automatic and will reflect immediately.
All changes to the shipment and its billing are automatic and will reflect immediately.


Click Save when done.
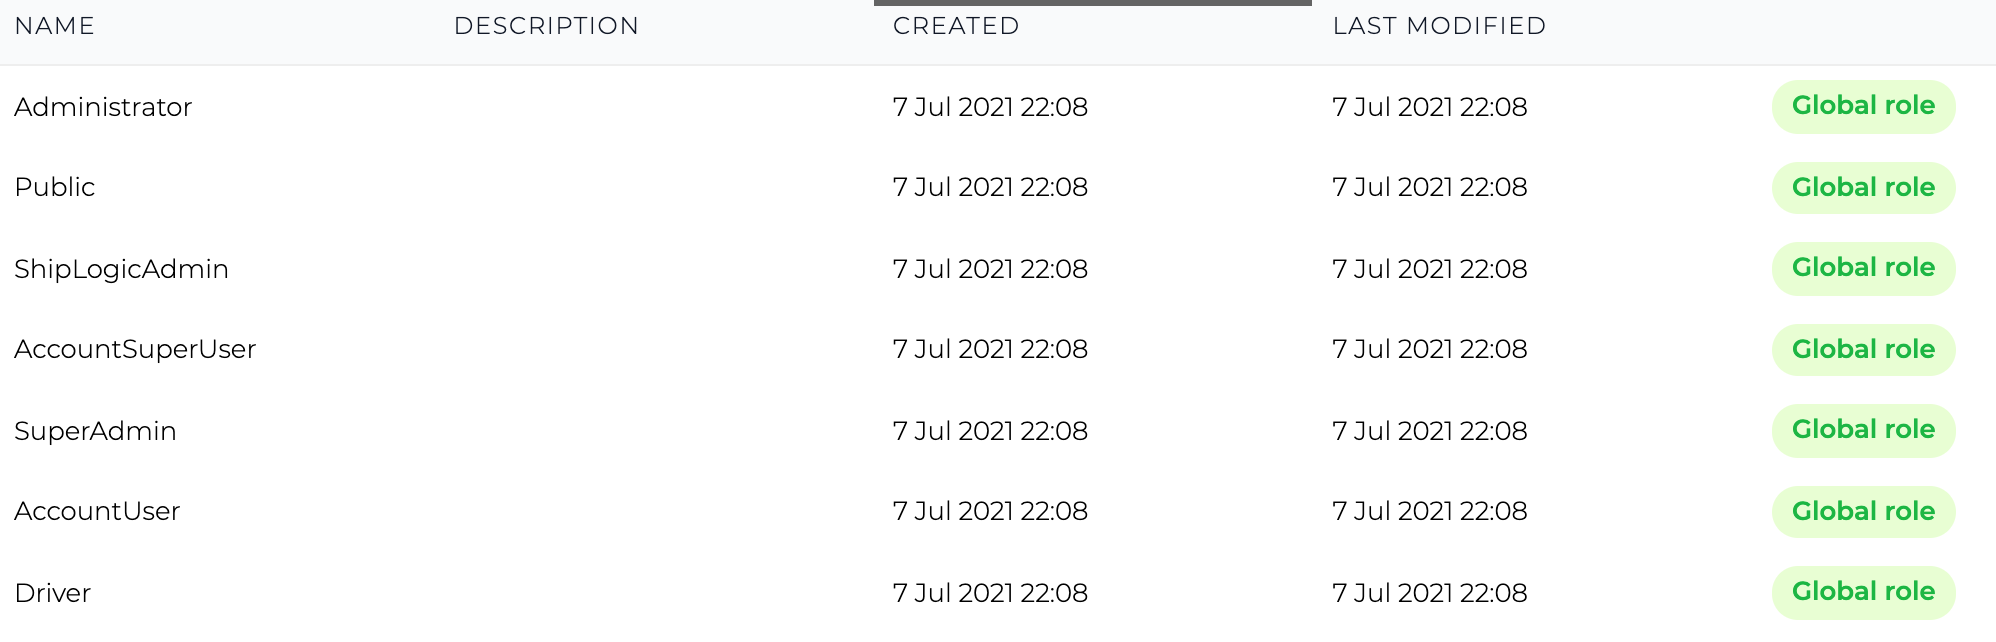
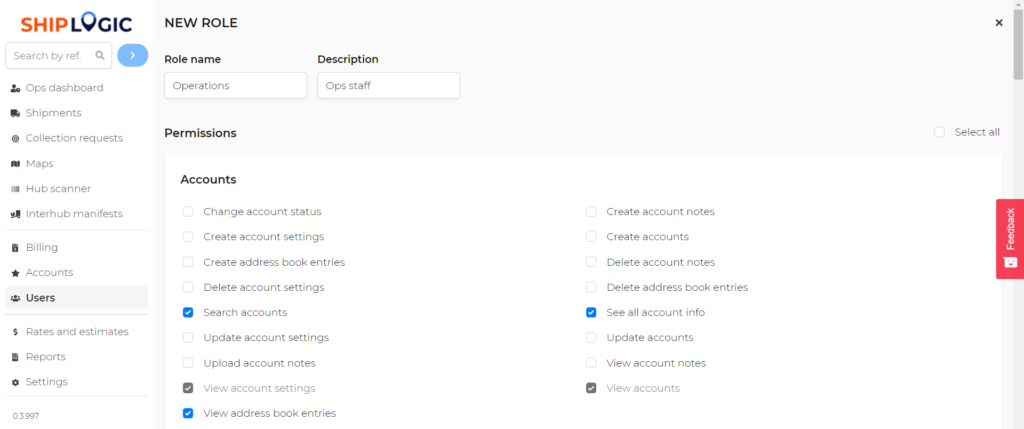
![]() All users with the role will be automatically updated with the new permissions and changes.
All users with the role will be automatically updated with the new permissions and changes.
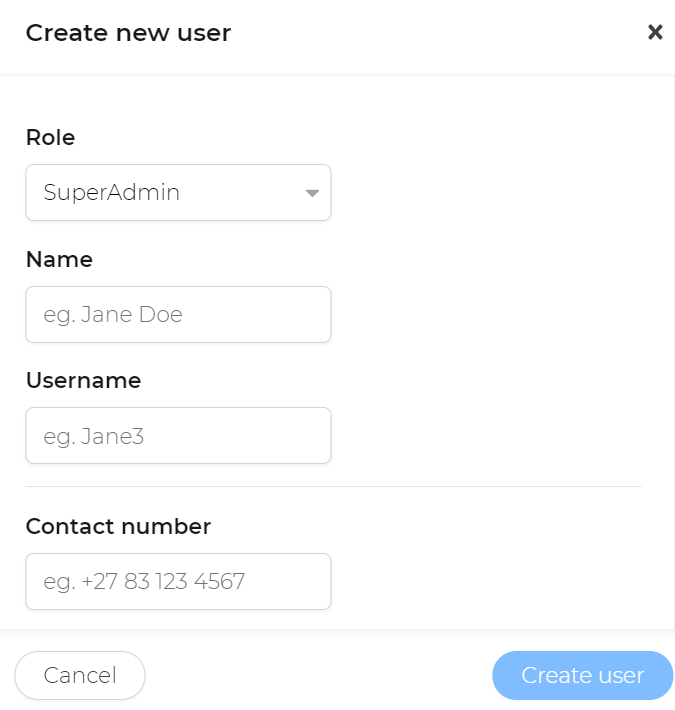
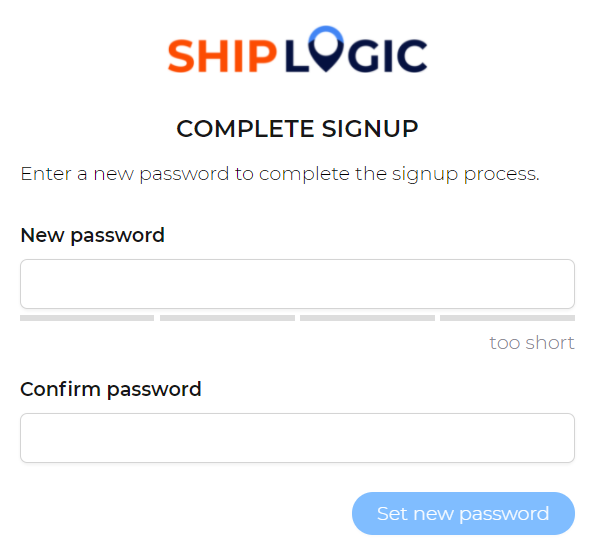
 Newly created users receive an email and/or SMS with their username and a temporary password that they can use to log in to the system the first time.
During this process, they’ll be able to set their own new (private) password.
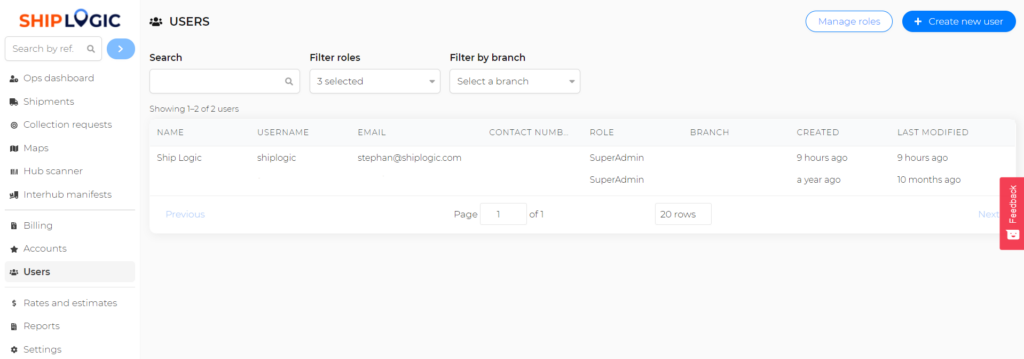
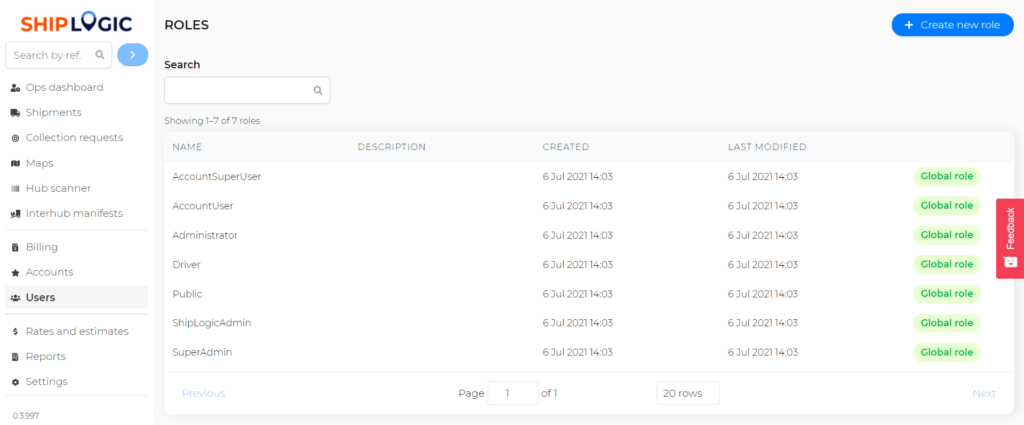
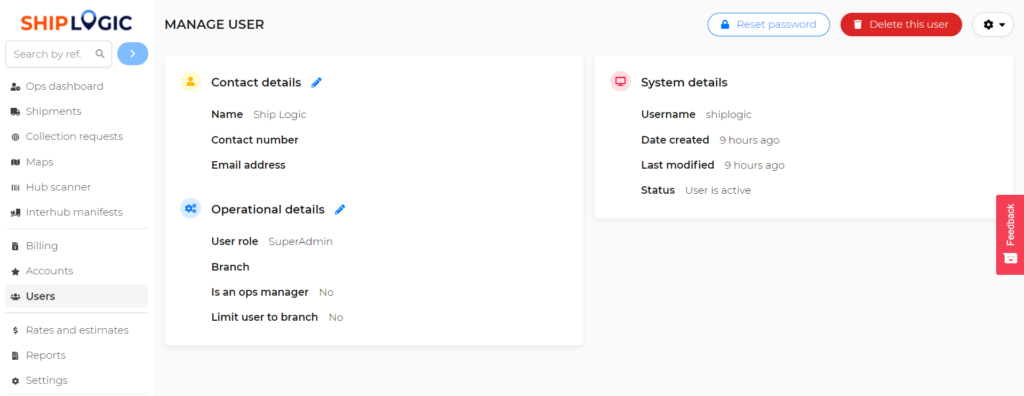
Go to Users and search for the relevant user or select the user from the list below.
Click on the user to open their details and then click on the pencil icon ![]() next to the details you wish to edit.
next to the details you wish to edit.
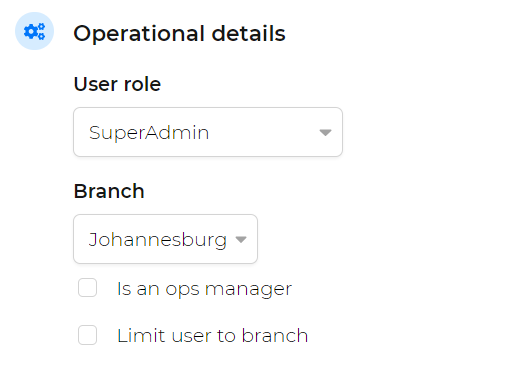
Choose between Contact details or Operational details.
Go to Users and search for the relevant user or select the user from the list below.
Click on the pencil icon ![]() next to Operational details and click on Change user role.
next to Operational details and click on Change user role.
![]() Note: A deleted user’s username cannot be reused in any new user that is created
Note: A deleted user’s username cannot be reused in any new user that is created